Clean-Air-Technologies's logo

Can You Put A Filter On Return Air Vent? Pros And Cons Explained

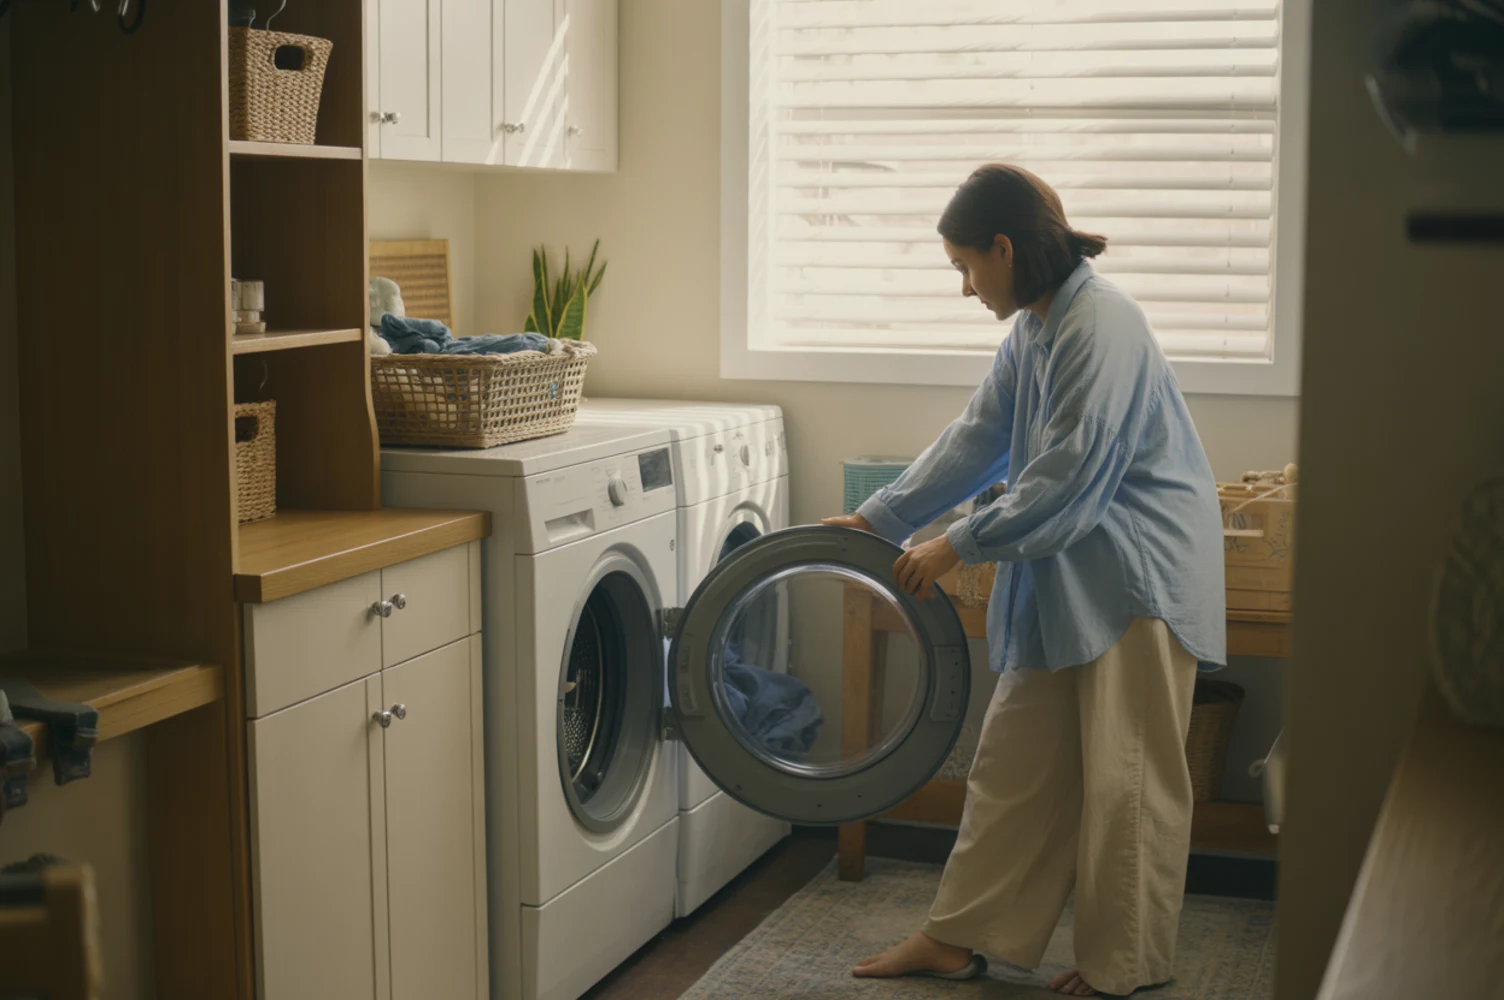
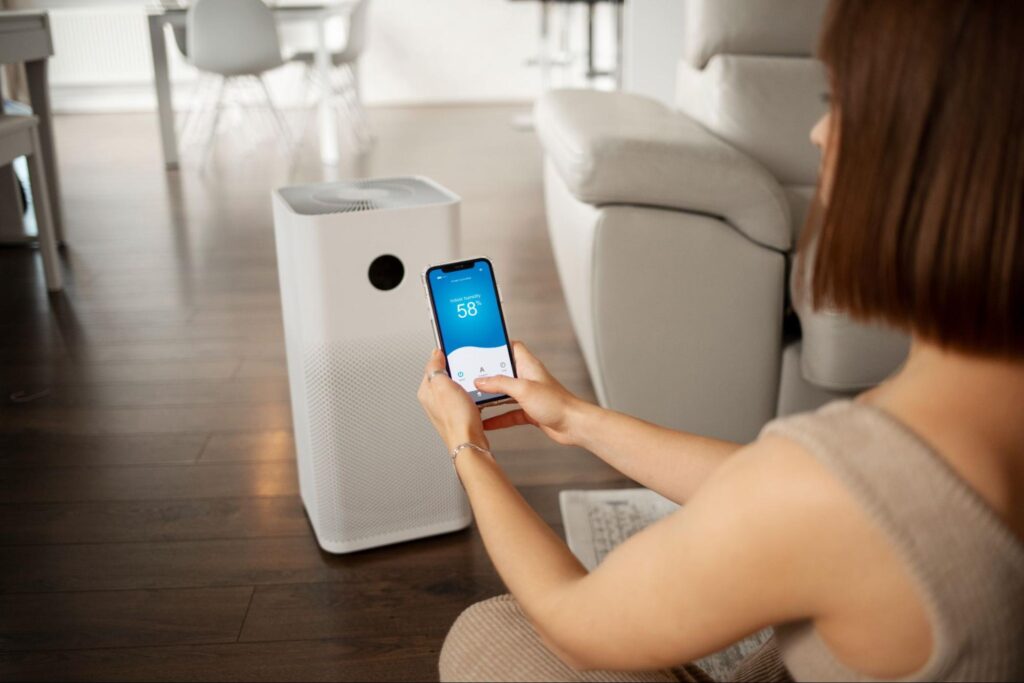
Can I put a filter on return air vent? 

This is one question a lot of New Jersey homeowners ask me. More so when they’re dealing with dust, pet hair, allergies, and other air quality issues. 

Now, if you’re looking for an answer to this online, you’ve probably come across mixed opinions.

After all, while some HVAC experts say return vent filters are good, others say they’ll damage your HVAC system.

So what’s the truth?

For starters, you can put a filter on a return air vent. But it’s not always a good idea.  

It all depends on how your HVAC system is designed, how many return vents you have, and what type of filter you use.

In this guide, I will break it all down. You’ll know: 

  • When return vent filters make sense
  • When they cause problems
  • Pros and cons of placing filters on return vents
  • What I suggest homeowners in NJ

And a lot more. 

So, let’s get started. 

Key takeaways: 

  • You can put a filter on a return vent, but it’s not always a good idea.
  • One properly sized central filter is usually enough for most homes.
  • Return vent filters help with dust, pet hair, and hard-to-reach main filters.
  • Too many filters or high-MERV filters can reduce airflow and damage your HVAC.
  • Always prioritize airflow over heavy filtration for system health.
  • Regular filter changes are critical as a dirty filter can harm your HVAC system.
  • Older homes or undersized ducts need professionally installed filters.

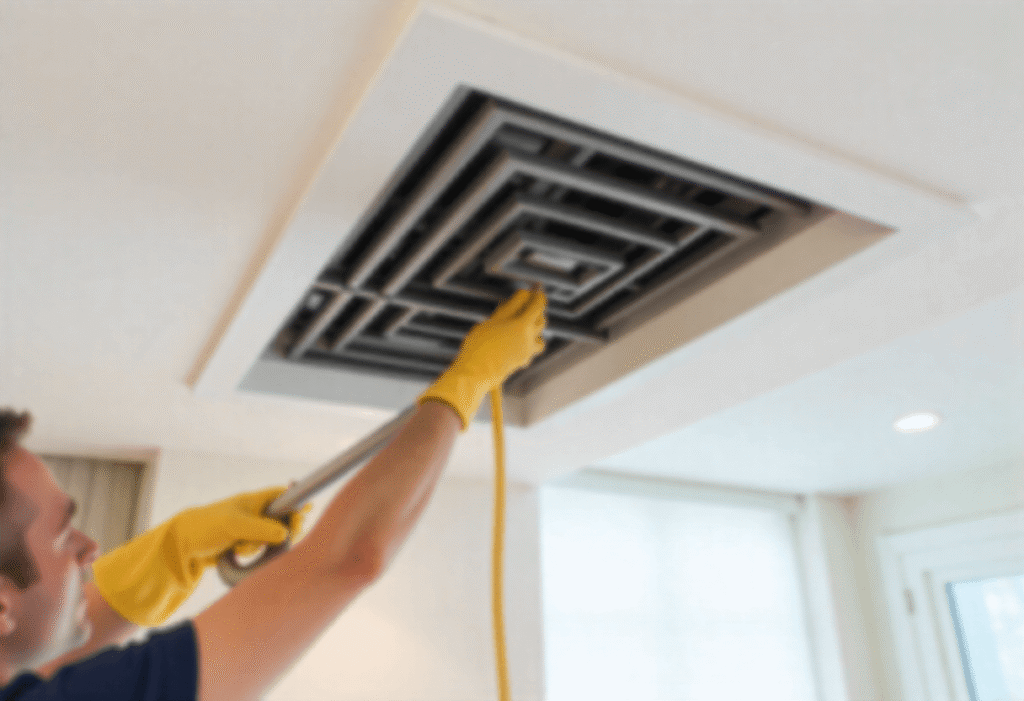
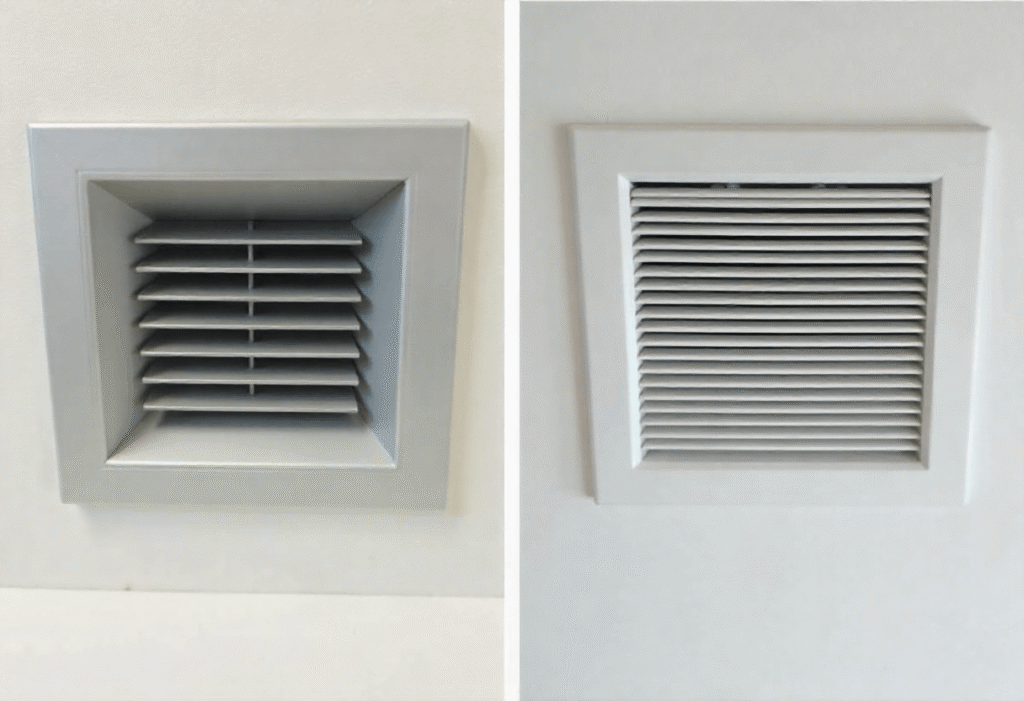
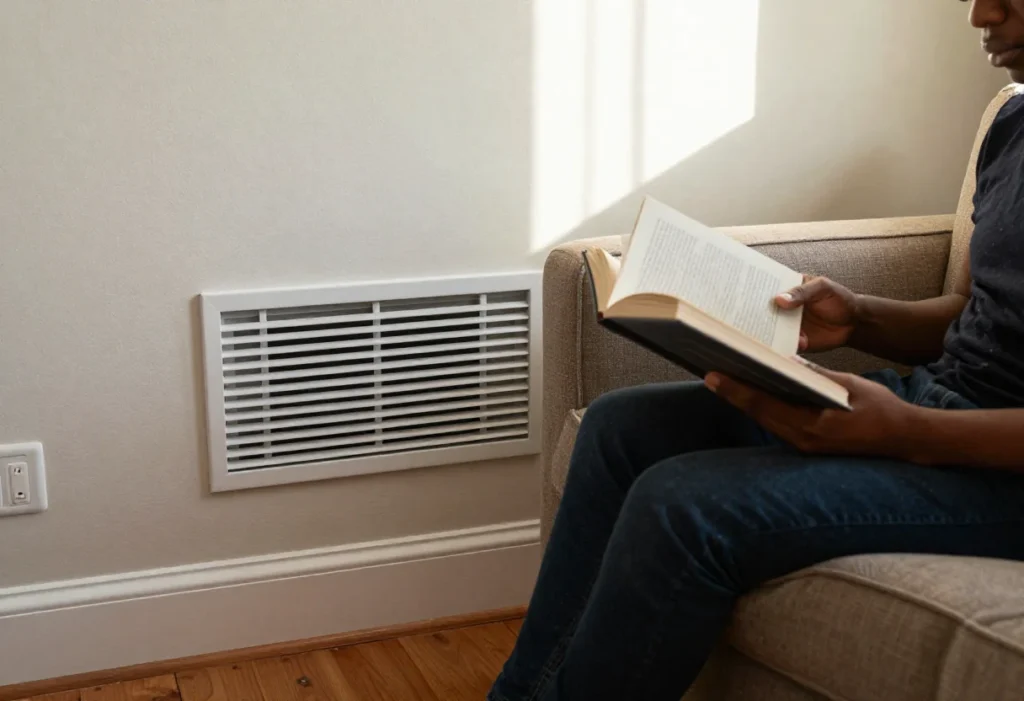
For starters, what is a return air vent ?

Floor return air vent installed near wall baseboard without a filter

Your HVAC system doesn’t just blow air into your home, it also pulls air back in. And that’s the job of the return air vent. 

While supply vents push warm or cool air into your rooms, return vents quietly do the opposite. They pull that air back to the system so it can be filtered, reheated, or cooled again.

In fact, return vents are more important than you might realize. That’s because they keep air moving smoothly through the system, help maintain consistent temperatures from room to room, and protect sensitive HVAC components from dust and debris buildup.

Now, most HVAC systems are designed with one main air filter, usually at the furnace or inside a return duct. 

In this blog, we are talking about whether or not you can put an extra filter outside the return vent. 

Clean-Air-Technologies's Logo
Angies Super Service
Accredited Business
Aeroseal

Schedule Your Free Estimate Today

Contact us to improve your indoor air
quality with our expert cleaning services in NJ.

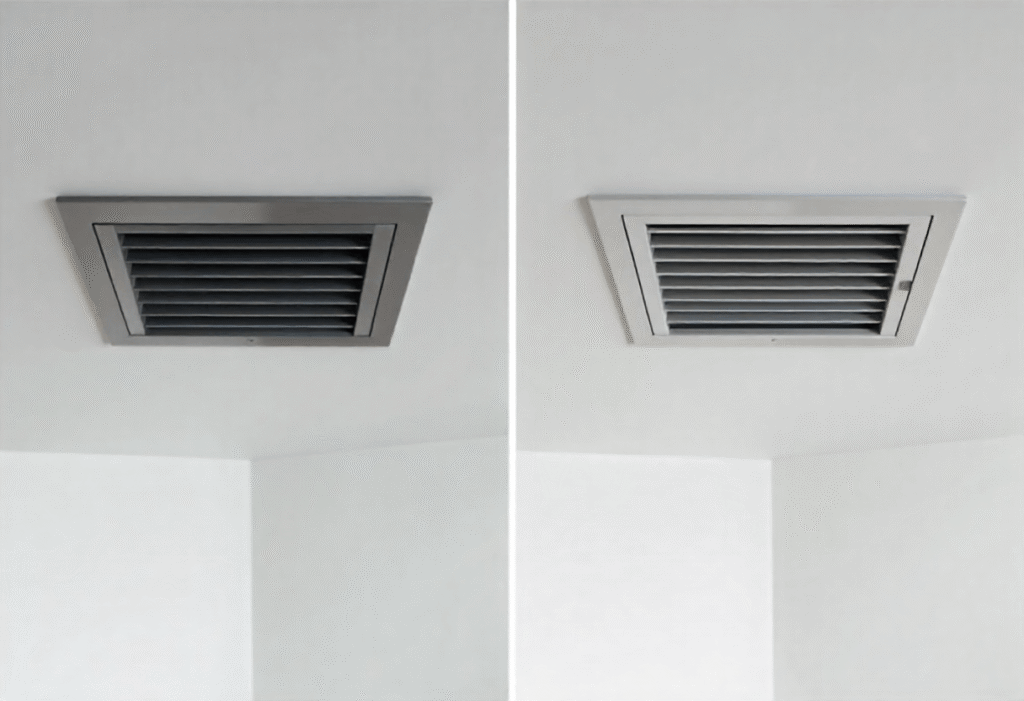
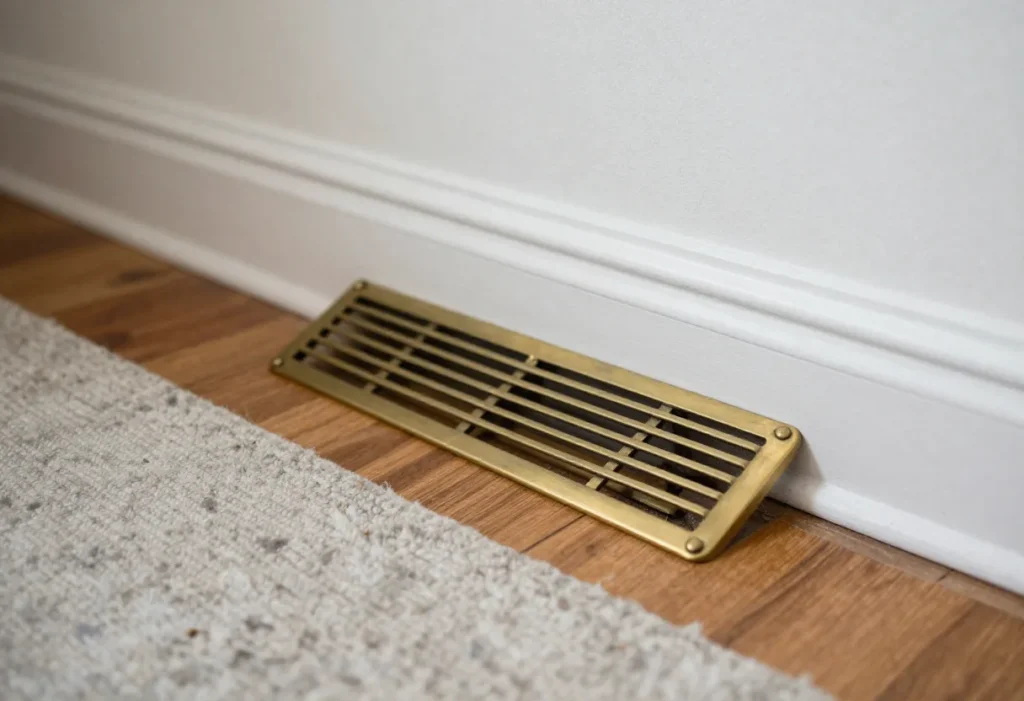
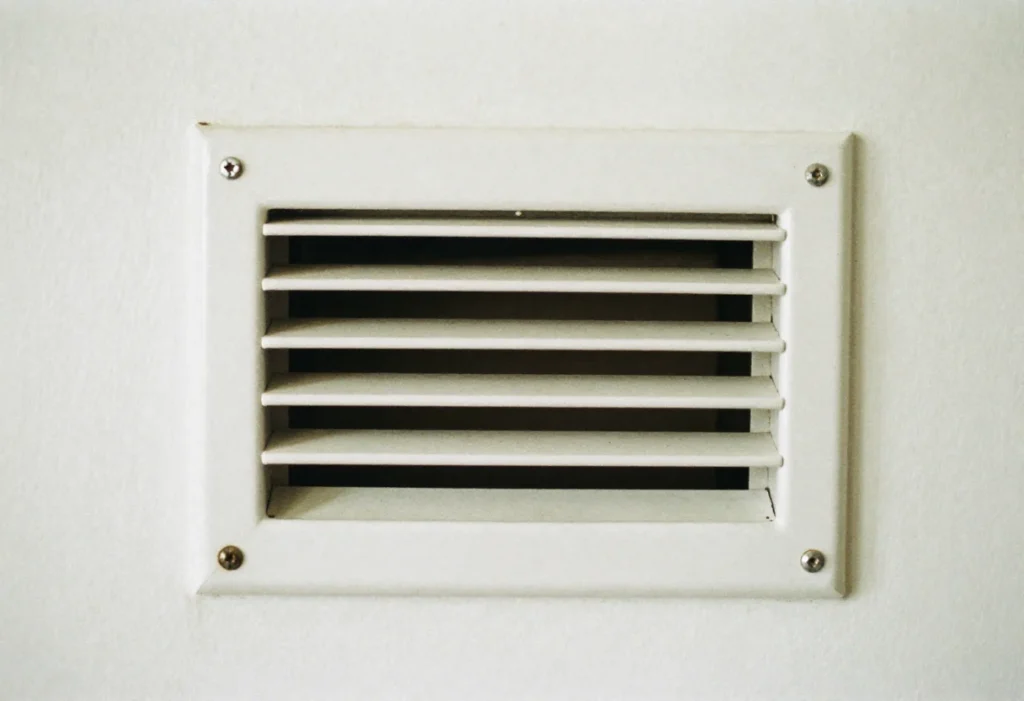
Can you put a filter on return air vent?

Yes, you can put a filter on a return air vent. 

In fact, some return vent covers are made to hold filters, so it’s easy to assume. 

But here’s the tricky part.

You see, just because something fits doesn’t mean it’s right for your HVAC system. 

This is especially true for return vents that are designed to pull back air freely into the unit. So, if you add a filter in the wrong spot, or a filter that’s too thick, you can slow down that airflow without even realizing it.  

This restriction might not cause problems right away. But over time it can lead to issues like poor heating or cooling, higher energy bills, or extra strain on your system.

Simply put, installing a return vent filter is possible. However, whether you should do it depends on how your system is designed, how many returns you have, and what type of filter you’re using.

What are the pros of putting a filter on return air vent? 

Wall-mounted return air vent in a living room near seating area

When you use filters on return vents the right way, they can definitely offer some benefits. 

Sure, they’re not a one-size-fits-all solution. But in the right setup, they can make a noticeable difference. 

These filters work by catching larger particles before air travels deep into your HVAC system.\

So, if you’ve been dealing with dust, pet hair, or hard-to-reach filter locations, return vent filters can be a practical upgrade. 

Overall, here are the benefits of using an air return vent with filter: 

1. Helps capture dust and pet hair early

One of the biggest advantages of return vent filters is that they catch dust, lint, and pet hair right where the air enters the system. 

This means less debris traveling through your ductwork and settling on HVAC components. 

If your home has shedding pets, older carpeting, or noticeable dust buildup, this can be especially helpful. 

While these filters won’t eliminate dust completely, they can reduce how much dust ends up inside the HVAC system. All you’ve got to do is schedule an air filter replacement every month or so. 

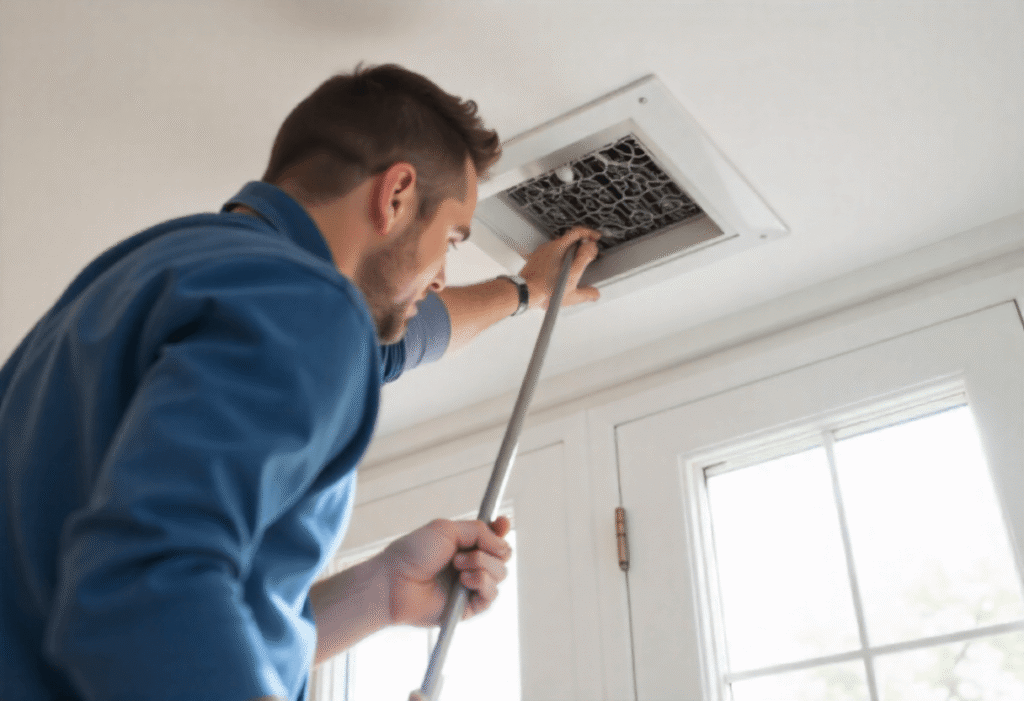
2. It is easy to install 

In many New Jersey homes, the main HVAC filter isn’t easy to reach. It might be tucked into a basement ceiling, a crawl space, or an attic air handler. 

Now, when filters are hard to access, they often don’t get changed as often as they should.

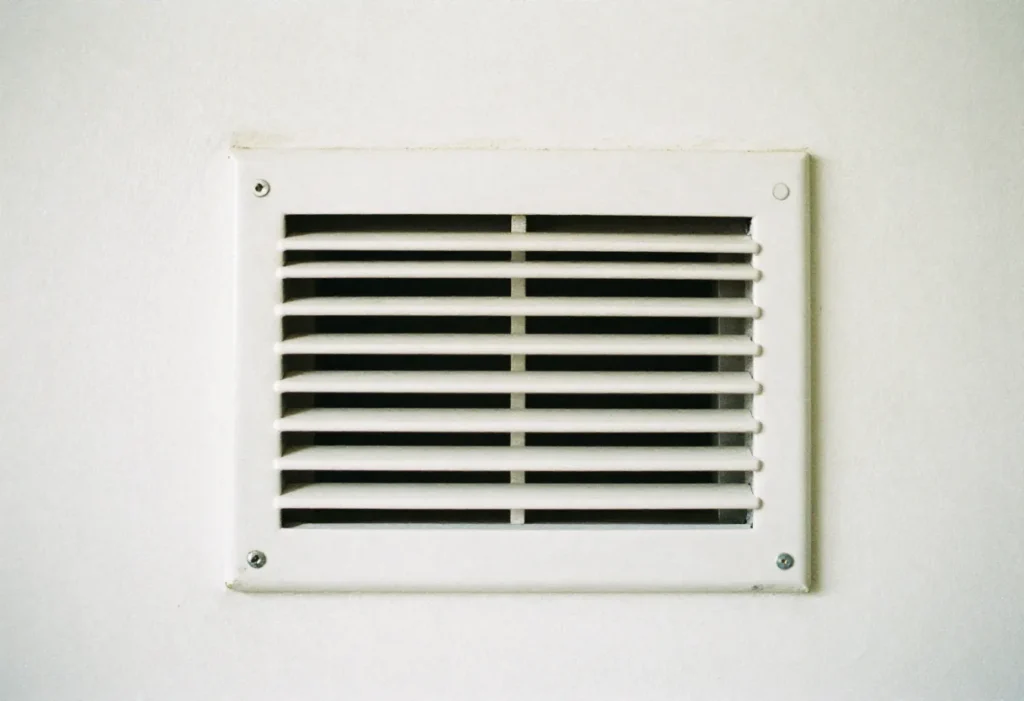
Return air vents, on the other hand, are usually in walls or floors and easy to replace. This convenience alone can be a big advantage, because old/dirty air filters do more harm than good.

3. It is useful when there’s no central filter 

Some older HVAC systems simply weren’t built with a dedicated central filter slot. And in these systems, homeowners might not have a clear place to install a standard filter. 

For these setups, return vent filters come in handy as a practical solution.

While it might not be as good as a central filter, it’s better than letting unfiltered air move freely through your HVAC system. 

4. Helps filter air evenly in homes with large return vents  

Homes with multiple large return vents may tolerate low-resistance filters, but only if airflow has been tested and approved by a professional. When properly designed and balanced, this setup can help filter air more evenly throughout the home without restricting airflow.

However, you’ve to ensure that the airflow is properly balanced across all areas of your home.

In short, here are all the pros of putting a filter on return air vent: 

ProsTakeaway
Capture Dust & Pet HairStops dust, lint, and pet hair before it enters ducts; reduces buildup if changed regularly.
Easier AccessReturn vents are often easier to reach than attic or basement filters, making timely changes more likely.
No Central FilterWorks as a practical solution in older systems without a main filter.
Multi-Return HomesCan help if multiple large returns exist and low-resistance filters are used; needs professional guidance.

Bonus: Not sure when to schedule an air filter replacement?

You can read my blog on how often to change air filters and get expert-backed timelines on when to replace air filters based on your HVAC system and filter type.  

What are the cons of putting a filter on return air vent? 

Close-up of a wall return air vent grille without a filter installed

While return vent filters can help in some situations, they also come with real risks. More so if your HVAC system wasn’t designed for them. 

The biggest issue is airflow. 

Your HVAC system needs a steady, unrestricted flow of air to work properly. And when filters are added in the wrong places, the system can struggle to get airflow. 

These problems often build slowly, which makes them easy to overlook until expensive repairs show up.

Overall, here are the disadvantages of using an air return vent with filter: 

1. Reduced airflow

I am often asked by homeowners: Do vent filters block air flow? 

And the answer is yes, they can. 

You see, every filter creates some resistance to air flow, even clean ones. And when you add more than one return vent filter, your HVAC system has to work harder just to pull air in. 

This reduced airflow can cause serious issues over time. Air conditioners might freeze up, furnaces can overheat, and you can end up with higher energy bills.

In many New Jersey homes, restricted airflow is made worse by dust and debris inside the ductwork, which is why professional air duct cleaning in New Jersey is often recommended before adding extra filters or increasing filtration resistance.

Plus, poor airflow also puts extra strain on parts like the blower motor, which can shorten the life of the equipment.

2. You might do double filtering 

This is one of the most common problems I see with filters on return vents.

Many homeowners add a filter to the return vent without realizing there’s already a filter at the furnace or air handler. 

This means the system is filtering the same air twice. And while it sounds like extra protection, it usually does more harm than good. 

How?

Double filtering increases resistance and restricts airflow unless the HVAC system has been tested and approved for it. 

3. Harder maintenance 

When you have multiple return filters, maintenance quickly becomes more complicated. That’s because instead of changing one filter, you now have several to keep track of. 

It is easy to forget replacing one of the filters, especially if it’s in a low-traffic area. And this can lead to clogged return vent filters and block airflow without you noticing. 

4. Wrong filter type can cause damage

When it comes to placing a filter on return air vent, filter type matters more than you might realize. 

How?

Well, if you install high-MERV filters, especially those rated MERV 11 to 13, it can severely restrict airflow when placed at return vents. 

In fact, this is a common problem I notice in older New Jersey homes with smaller or modified ductwork. 

And this happens because even though these filters are great at trapping tiny particles, they often aren’t compatible with return vent locations.

In short, here are all the cons of putting a filter on return air vent: 

Cons Takeaway
Reduced AirflowExtra resistance can cause frozen AC, overheating furnace, higher bills, and equipment wear.
Double FilteringAdding a filter when one exists at furnace can reduce airflow and strain system.
MaintenanceMore filters = more to remember; dirty filters block airflow and hurt performance.
Wrong Filter TypeHigh-MERV filters may block air in smaller/older ducts and stress the system.

When to use filters on return vents and when not to? 

White wall-mounted return air vent grille inside a home

Return air vent filters aren’t automatically good or bad. They really depend on how your HVAC system is set up and how well it can handle extra resistance. 

For instance, in some homes return vent filters do solve air quality-related problems. But in others, they can quietly create new problems. 

So, your goal should always be to get clean air without hurting airflow. 

All in all, here’s when I suggest using return vent filters, and when not to.

You can use an air filter in return vent if:

A. Your system has no central filter

Some older HVAC systems weren’t built with a main filter at the furnace or air handler. In these systems, return vent filters are a practical way to keep dust and debris from circulating through the system.

B. You use low-resistance filters (MERV 4-8)

Low-MERV air filters rated from MERV 4-8 are designed to catch larger particles without blocking airflow. 

And when you use them at return vents, these lighter filters help protect the system while still allowing air to move freely, which is critical for proper HVAC performance.

C. You have multiple large return vents

Homes with several large return vents can sometimes handle filters better because airflow is spread out. 

Here, the return vents are properly sized, and low-resistance filters work well without putting too much strain on the system.

D. You commit to regular filter changes

Return vent filters only help if they’re kept clean. So, if you are consistent about checking and changing filters every 30-60 days, your HVAC is far less likely to run into airflow problems or system strain.

E. Airflow has been tested or approved by a professional

When an HVAC professional confirms that your system can handle return vent filters, the risk drops significantly. That’s because proper airflow testing ensures the system won’t be starved for air or overworked.

In short, here’s when you can use a filter on return air vent: 

When to UseTakeaway
No Central FilterOlder systems without main filters benefit from return vent filters.
Low-Resistance Filters (MERV 4-8)These catch dust without restricting airflow.
Multiple Large Return VentsCan spread airflow if system is balanced and filters are low-resistance.
Regular ChangesFilters only help if cleaned/changed every 30–60 days.
Airflow ApprovedProfessional confirmation ensures system can handle added filters.

You should not use an air filter in return vent if:

A. Your system already has a properly sized central filter

If your HVAC system already uses a well-sized central filter, adding return vent filters usually creates unnecessary restriction. 

One good filter in the right place is almost always better than several filters working against airflow.

B. You’re using high-MERV filters

High-MERV filters trap smaller particles but also block more air. And when you install them at return vents, they often restrict airflow too much, especially in residential systems that weren’t designed to handle that level of resistance.

C. Your home has older or undersized ductwork

A lot of old homes have duct systems that are smaller or less efficient. Adding return vent filters in these setups can quickly lead to airflow problems, uneven temperatures, and extra strain on HVAC components.

D. You notice weak airflow or temperature issues

If some rooms don’t heat or cool well, or airflow already feels weak, return vent filters can make things worse. These symptoms often mean the system needs more airflow and not more restriction.

E. Filters are being forgotten or neglected

A dirty return vent filter can quietly choke airflow. So, if filters aren’t checked and changed consistently, they can cause more damage than protection.

In short, here’s when you shouldn’t use a filter on return air vent: 

When Not to UseTakeaway
Central Filter ExistsExtra filters usually create unnecessary resistance.
High-MERV FiltersCan block airflow too much for residential systems.
Older / Small DuctworkRisk of weak airflow and uneven temperatures.
Weak Airflow or Temp IssuesFilters can worsen existing airflow problems.
Filters NeglectedDirty filters can choke system more than they help.

Here’s how I suggest you use air filters on return vents

If you ask me, most homeowners don’t need filters on every return vent. From my experience, the safest and most effective setup is just one good central filter, the one at your furnace or air handler. 

Make sure it’s properly sized for your system and that you change it regularly. 

That’s all it really takes to keep your HVAC running smoothly and the air in your home clean.

And what about return vent filters? 

Well, I only recommend them in special cases, like if your system doesn’t have a central filter or a professional has approved it. 

Otherwise, stick with the main filter as it is simpler, safer, and works better.

You might also want to read: Why Is Your AC Blowing Out Smoke And How To Fix It?

Clean-Air-Technologies's Logo
Angies Super Service
Accredited Business
Aeroseal

Schedule Your Free Estimate Today

Contact us to improve your indoor air
quality with our expert cleaning services in NJ.

Final words 

So, can you put a filter on return air vent?

Yes, but only in the right situation.

For most homes, one properly placed filter is safer and more effective than multiple filters scattered throughout the system. 

Return vent filters can help in certain cases, but they can also create airflow problems if you use them incorrectly.

Got more questions or want to schedule air filter replacement?

You can get in touch with us!

At Clean Air Technologies, we offer both one-time and recurring air filter replacement plans. We bring the highest-quality MERV-rated air filters to keep your indoor air clean. 

Frequently asked questions 

Is it bad to put a filter on every return air vent?

It can be, yes. 

When you put filters on every return vent, you increase resistance in the system. This means your HVAC unit has to work harder to pull air in. 

Over time, this can lead to weak airflow, frozen AC coils, overheating furnaces, and higher energy bills. 

Should I use a return vent filter if my system already has one?

In most cases, no. 

If your HVAC system already has a central filter at the furnace or air handler, adding return vent filters creates double filtering.

That extra restriction can reduce airflow and strain the system. I recommend sticking with one main filter that’s properly sized and changed regularly instead of adding multiple filters throughout the home.

What MERV rating is best for return air vent filters?

If you do use return vent filters, lower is better. 

A MERV rating between 4 and 8 is usually the safest range. 

Higher MERV filters can block too much airflow, especially in older New Jersey homes with smaller return ducts. 

Do return air vent filters help with dust and pet hair?

Yes, they can help catch dust, pet hair, and lint before it enters the ductwork. This is especially useful in homes with shedding pets or visible dust buildup. 

However, the benefit only matters if the filters are changed regularly. A dirty return vent filter can actually cause more problems than it solves by restricting airflow.

How often should return air vent filters be changed?

Return vent filters should typically be changed every 30 to 60 days, sometimes sooner in homes with pets, allergies, or heavy dust. 

Are return air vent filters good for older homes?

It depends. 

Many older New Jersey homes have undersized or modified ductwork, which makes airflow more sensitive. 

Meaning adding return vent filters in these homes can sometimes cause airflow issues. 

It is always a good idea to have your airflow checked by a professional. 

What’s better: A return vent filter or a central HVAC filter?

For most homes, a single central HVAC filter is the better choice. It’s easier to maintain, designed into the system, and less likely to restrict airflow. 

Return vent filters are best used only in special situations, like systems without a central filter.

Ventless Dryer Pros And Cons: Are They Right for New Jersey Homes?

You might have noticed the buzz around ventless dryers lately, those sleek models that don’t need any external vent. They promise easy installation, less energy use, and a lot of convenience. 

But are they actually a good fit for your home?

Well, it depends. 

You see, ventless dryers are excellent if you live in a condo or have trouble installing a traditional vent. 

Nevertheless, they also come with a few trade-offs, like longer drying times and some added humidity.

In this blog, I will walk you through all ventless dryer pros and cons, plus things you should keep in mind if you live in New Jersey. 

So, let’s get started. 

Key takeaways

  • Ventless dryers are good for apartments, condos, or homes where installing a vent is tricky.
  • They work well for small loads of laundry, delicate clothes, and people who care about energy efficiency.
  • Drying time, however, is longer than regular dryers.
  • You should watch out for extra humidity in the room, especially during humid New Jersey summers.
  • You might need a dehumidifier or extra ventilation to keep the air dry.

For starters, how do ventless dryers work? 

Ventless washer and dryer installed in a compact indoor laundry room with a homeowner loading clothes

To begin with, ventless dryers come in two main types, namely, condenser and heat-pump dryers. And both dryer types work without needing an outside vent, making them great for apartments or places where installing a vent is tough.

Here are the two ventless dryer types and how they work: 

  1. Condenser dryers: These dryers heat the air, pass it through your clothes, and then cool it down. The moisture from your clothes turns into water, which is either collected in a tray or drained away. 
  2. Heat-pump dryers: These dryers use a heat pump to recycle warm air, which helps save energy. They dry clothes more gently and efficiently, but cost more upfront.

Notwithstanding their type, both ventless dryers collect moisture inside instead of pushing it outside. 

Clean-Air-Technologies's Logo
Angies Super Service
Accredited Business
Aeroseal

Schedule Your Free Estimate Today

Contact us to improve your indoor air
quality with our expert cleaning services in NJ.

Ventless dryer pros and cons: What do you need to know? 

Ventless dryers are getting popular by the day, especially among people who live in apartments and condos and need flexibility in their laundry setups.

However, even though they solve a lot of problems, like not needing to install a vent, they also come with their own set of challenges. 

For instance, if you’re installing the dryer in a closet, it can lead to excessive humidity. Plus, it can also cause overheating and you might end up with a burning smell coming out of the dryer

I have detailed all the pros and cons of ventless dryers, so let’s go over them all. 

Ventless dryer pros 

Homeowner sorting laundry next to a stacked ventless washer and dryer in an indoor laundry room

1. No external vent needed

Ventless dryers are perfect for homes that don’t have a good way to run a vent. 

For instance, if you live in a condo, apartment, or older home, installing a vent can be a huge hassle. 

With a ventless model, you don’t have to worry about that at all. This means you can place the dryer pretty much anywhere, as long as there’s power. 

2. Installation flexibility

One of the best things about ventless dryers is the flexibility they offer. That’s because, unlike traditional dryers that need to be placed near a vent or an exterior wall, ventless dryers can go in almost any room. 

You can install them in a closet, bathroom, or even a kitchen cabinet, as long as you have the necessary electrical connections. 

This makes them a great option for homes with tight spaces or no easy access to an exterior wall.

3. Energy efficiency (especially with heat-pump models)

Dryers use a lot of energy, and even with regular use chances are you’ll have increased energy bills. 

But that’s not the case with heat-pump dryers. These models are more energy-efficient than traditional electric dryers because they recycle the warm air inside the dryer instead of letting it go to waste. 

Although they cost more upfront, you’ll save on your electric bill over time. Unlike traditional vented dryers that require routine dryer vent cleaning in New Jersey to prevent lint buildup and fire risks, ventless dryers eliminate the need for exterior vent maintenance entirely.

4. Gentler on clothes

Ventless dryers dry clothes at lower temperatures, which helps protect delicate fabrics like wool, silk, or anything that’s prone to shrinking or fading. 

So, if you’re tired of your clothes wearing out too quickly, a ventless dryer might be a good solution. The gentler drying process helps keep your clothes looking newer for longer.

5. Safe to use if even if there’s no place for venting

Ventless dryers are safer in places where venting might be a problem since they don’t need an exterior vent.

Plus, in a traditional dryer, the vent can get clogged with lint, which can cause a fire hazard.

Ventless dryers don’t have that issue either, and you won’t need to worry about your duct becoming blocked or damaged over time. 

Ventless dryer cons 

Stacked ventless washer and dryer installed inside an indoor laundry space without exterior venting

1. Slower drying time

One of the most common complaints about ventless dryers is that they take longer to dry clothes compared to vented models. So much so that a typical ventless dryer takes 90 minutes to 2 hours to dry clothes for a normal load. 

And this is especially true for older condenser models.

You see, since ventless dryers don’t expel hot air outside, the moisture in the clothes has to be absorbed and condensed inside the unit. This process is way slower, and you’ll need to plan for longer cycles when doing laundry.

2. Increases indoor humidity 

Another downside to ventless dryers is that they add moisture to the room where they’re placed. 

Why? 

The moisture from your clothes is collected inside the unit instead of being vented outside. And it increases the humidity in your laundry room.

This is a big problem particularly in New Jersey where summers are very humid. So much so that you might need to run a dehumidifier or make sure the area is well-ventilated to avoid the damp feeling in the room.

3. Upfront cost is higher 

While heat-pump ventless dryers are incredibly energy-efficient, they do tend to come with a higher price tag. And if you’re on a budget, this could be a dealbreaker. 

However, the good news is that heat-pump models can save you money in the long run by reducing your energy bills. 

4. Smaller drum capacity

Many ventless dryers have smaller drums compared to traditional dryers. This means you need to do smaller loads, which can be a hassle if you have a big family or need to dry lots of clothes at once. 

Also, some ventless dryers have specific loading rules (like not overloading them) to ensure they dry your clothes properly. This might take some getting used to, especially if you’re used to throwing everything in one big load.

5. Maintenance

Although you don’t need to schedule regular dryer vent cleaning service, ventless dryers still need more attention when it comes to maintenance. 

You’ll need to regularly empty the water reservoir (if your model has one) or make sure it’s properly plumbed to a drain. 

Also, you’ll have to clean the condenser and filters more often than with a regular dryer. 

TL;DR, here are all ventless dryer pros and cons: 

ProsCons
Perfect for spaces where installing a vent is tough.Ventless dryers can take longer to dry clothes.
Can be installed in small spaces like closets or cabinets.Moisture can build up, especially in humid NJ summers.
Heat-pump dryers recycle heat to save energy.Higher upfront cost (for heat-pump models).
Lower temperatures help keep fabrics in better condition.Some models have smaller drums, requiring smaller loads.
No vents to clog or pose fire risks.Regular cleaning and draining are required to keep the dryer in good condition.

Bonus: Here are all the differences between ventless and vented dryers

FactorVentless (Condensor / Heat-Pump)Vented Dryer
InstallationEasy, no exterior duct neededNeeds exterior vent/duct
Drying speedSlowerFaster
Energy useHeat-pump: very efficient; condenser: midVaries; electric vented often uses more energy
Indoor humidityCan increase humidityExhausts moisture outside
Upfront costHeat-pump models cost moreUsually cheaper upfront
Where it fits bestClosets, condos, retrofitsHouses with exterior walls for venting

What New Jersey residents need to know about ventless dryer installations? 

Ventless dryer operating in an indoor laundry room with closed cabinetry and shelving

Ventless dryers are a great option in many situations, but there are a few important things to consider when it comes to homes in New Jersey. 

The local climate, building types, and unique space challenges can all impact how well a ventless dryer will perform. 

Because ventless dryers can affect indoor humidity and airflow, many New Jersey homeowners consult experienced indoor air specialists like Clean Air Technologies before deciding which dryer setup is right for their home.

Here’s everything you need to know: 

1. Ventless dryers don’t fare well in humid summers 

New Jersey summers can get pretty humid, and that’s something you’ll need to think about when using a ventless dryer. 

You see, these dryers work by collecting moisture from your clothes. And if the area around the dryer isn’t well-ventilated, the extra humidity can quickly build up inside your home.

 In a small laundry closet, this can lead to mildew, damp walls, and even a musty smell. 

To avoid this, you might need to add extra ventilation or use a dehumidifier to keep things dry.

2. You need to factor space and layout 

Many NJ homes, especially rowhouses, apartments, and condos, don’t have easy access to the exterior walls for venting. This makes ventless dryers a great choice when you can’t install a traditional vent. 

However, if your building has limited space or layout challenges, you’ll need to carefully consider where the dryer will go. 

Ventless dryers work best in spaces where airflow is at least somewhat decent, and where you won’t have to worry about moisture buildup or cramped conditions.

3. Basement are fine for ventless dryers but be cautious with closet installations

In New Jersey, many homes have basements that work well for ventless dryers. Basements generally have more natural airflow, so the humidity from drying clothes can dissipate more easily. 

But if you’re thinking of putting your dryer in a small closet, you’ll need to be extra cautious. That’s because small enclosed spaces without ventilation can trap moisture and create a damp environment. 

I suggest you place a dehumidifier or make sure the space has good airflow to prevent such issues.

4. Energy savings may or may-not offset the initial cost 

Heat-pump dryers are energy-efficient, but it’s important you think about how often you run your dryer. 

If you do laundry frequently, a heat-pump model can save you money over time. 

However, heat-pump dryers also have higher upfront costs. So, do consider your typical usage and if energy savings can alone offset the initial cost. 

TL;DR, here’s what New Jersey residents should know before installing ventless dryers: 

ConsiderationWhat to Keep in Mind
HumidityNJ’s humid summers can cause moisture buildup if there’s no ventilation.
Space and Building TypeGreat for homes with no venting options, but airflow and space matter.
PlacementBasements are fine; small closets may need extra ventilation to prevent moisture.
Energy CostsHeat-pump dryers save energy, but consider your usage and upfront cost.

When to install a ventless dryer, and when not to? 

Install a ventless dryer if:

  • You live in an apartment/condo or older home with no practical exterior vent.
  • You need flexible placement (closet, kitchen, interior laundry).
  • You want the most energy-efficient option available. 
  • You do mostly small to medium loads.

Don’t install a ventless dryer if:

  • You need rapid, frequent drying for large loads.
  • You already have a good exterior vent and don’t want extra indoor humidity.
  • You want the lowest upfront cost and fastest dry cycles.
Clean-Air-Technologies's Logo
Angies Super Service
Accredited Business
Aeroseal

Schedule Your Free Estimate Today

Contact us to improve your indoor air
quality with our expert cleaning services in NJ.

Final words

By now, I am sure you know all the ventless dryer pros and cons. 

You see, these dryers are an excellent solution for many New Jersey homes, especially where venting is difficult or impossible. 

But you should be prepared for slower cycles and pay extra attention to indoor humidity and maintenance.

Got more questions or want to schedule routine HVAC maintenance?

You can get in touch with us!

At Clean Air Technologies, we are seasoned HVAC professionals with 3+ decades of experience serving New Jersey homes. And we’ve got all your HVAC cleaning and maintenance needs covered on a budget. 

FAQs about ventless dryers 

Are ventless dryers safe?

Yes, ventless dryers are safe when installed and maintained properly. Unlike traditional dryers, they don’t expel hot air or lint through an exterior vent, which eliminates the risk of duct fires due to lint buildup. 

However, the key safety concern is moisture buildup in the room where the dryer is located. If moisture isn’t properly managed, it can lead to mold or mildew. 

Do ventless dryers use less energy?

Heat-pump ventless dryers are generally more energy-efficient than traditional vented dryers.

They work by recycling the hot air inside the unit, rather than venting it outside, which means less energy is wasted. 

This process not only reduces electricity consumption but also makes them a more environmentally friendly choice. 

Condenser models are somewhat energy-efficient but not as much as heat-pump versions. 

Can I install a ventless dryer in a closet?

Yes, in most cases, ventless dryers can be installed in a closet, as long as there’s sufficient clearance and ventilation. 

Unlike traditional dryers, ventless models don’t require an external vent, making them ideal for smaller or enclosed spaces. 

However, it’s crucial to consider airflow and humidity. Without proper ventilation, moisture from the drying process can accumulate, leading to dampness, mold, or unpleasant odors.

Will my clothes wear out faster?

No, ventless dryers, especially heat-pump models, are actually gentler on clothes compared to traditional dryers. They operate at lower temperatures, which helps prevent fabrics from shrinking, fading, or losing their shape. 

High-heat drying cycles can be harsh on delicate fabrics, but heat-pump dryers use a more gentle drying method that maintains fabric integrity. This makes them an excellent choice for items like wool, silk, and delicate synthetics.

How often do I need to clean a ventless dryer?

You should clean the lint screen after every load to prevent lint buildup.

Also, if your model has a water reservoir, you should empty it  regularly, usually after each load. 

For models with a condenser or heat pump, you will need to clean the condenser and filters every few months. 

How To Vent A Portable Air Conditioner Without A Window? 7 Easy Methods

Got a portable air conditioner only to realize there’s no convenient window to vent it out of?

Well, you’re not alone. 

This is one of the most common headaches for renters, condo owners, and homeowners with interior bedrooms or unusual layouts.

After all, you’ve got to vent the hot exhaust somewhere. Otherwise the unit just moves heat and humidity around your home and can cause moisture problems. 

The good part is there are several ways you can get that hot air outside without a standard window sash; plus you can easily do vent cleaning too. 

Some of the options are temporary and renter-friendly; others are semi-permanent or permanent and work great for homeowners. 

In this blog, I will walk you through 7 ways you can vent a portable air conditioner. These are all DIY-friendly and suited for typical New Jersey homes. 

So, let’s get started. 

Key takeaways:

  • A portable AC should vent outside, or it won’t cool the room.
  • You can vent it through a sliding door, a DIY door panel, or a small wall hole depending on your home and budget.
  • The best vent performance comes from a permanent wall vent with an exterior hood.
  • Renters should use easy no-damage options like sliding-door kits.
  • Never vent into attics, crawlspaces, or shared vents because it causes moisture, mold, and safety issues.
  • If you truly can’t vent outside, hoseless or evaporative coolers work, but only in dry climates. They are not ideal for New Jersey climate.

7 DIY-friendly ways to vent a portable air conditioner   

1. Sliding-door vent kit (fast and renter-friendly option)

Woman checking indoor humidity levels on her smartphone while sitting near a portable air purifier in a modern living room.

If you’re renting, or if you want a quick, easy, and non-permanent solution to vent your portable air conditioner, the sliding-door vent kit is one of the best choices. 

It is super simple to install and can be taken down without leaving any marks or damage. This is perfect for renters or those who need something temporary. 

The kit works best particularly for homes with sliding glass doors or patio doors, which are common in apartments or homes with access to outdoor spaces.

How does this kit work? 

The sliding-door vent kit is designed to fit into the gap between your sliding door and the fixed panel (or in the track of the door). 

This creates a sealed space for your AC exhaust hose to safely vent the hot air outside, keeping your indoor environment cooler and drier.

How to vent a portable air conditioner using this kit?

  1. Measure your door: Start by measuring the height and width of the gap between the sliding door and the fixed panel. This ensures you buy a kit that’s the right size, and you might need to trim the kit for a perfect fit.
  2. Clean the track: Before you start, clean the track and surrounding surfaces. This helps ensure a good seal later.
  3. Install the adjustable panel: Insert the adjustable panel into the track as per the kit instructions. Make sure the door can still close securely against it.
  4. Attach the AC exhaust hose: The kit will come with a round hole where you’ll attach your AC’s exhaust hose. Clamp it into place and secure it to the adapter.
  5. Seal the gaps: Use weatherstripping tape around the panel and door to prevent any drafts, air leaks, or pests from sneaking in. You can even add a locking bar for extra security if you’re worried about safety.
  6. Position your AC: Place your portable air conditioner near the vent panel, and keep the exhaust hose as short and straight as possible to avoid any loss in performance.
Clean-Air-Technologies's Logo
Angies Super Service
Accredited Business
Aeroseal

Schedule Your Free Estimate Today

Contact us to improve your indoor air
quality with our expert cleaning services in NJ.

What are the pros and cons of using this kit? 

Pros:
  • There are no permanent changes to your door, which makes it a renter-friendly option.
  • The kit is affordable with prices ranging from $20 to $120, depending on quality.
  • Quick and easy installation, as it takes only 10-30 minutes.
  • Ideal for temporary fixes and quick setups.
Cons: 
  • There is slight energy leakage compared to a sealed wall vent, but this is fine for temporary use.
  • Security concerns as sliding doors can be less secure than walls, so consider adding a lock bar.
  • Hose should be kept short and straight for best performance; uneven hose placement can lead to your AC blowing out smoke.

What’s the installation cost and time?

  • The kit costs between $20 and $120
  • Installation takes between 10-30 minutes

2. Door panel/pet-door style cutout (most affordable option)

Woman assembling or adjusting a portable electric heater on the floor of a modern living room.

For those of you who’ve got a solid door (like a standard wooden door) rather than a sliding door, creating a door panel is an affordable and low-tech solution. 

This is perfect if you’re looking for a simple way to vent your AC without having to buy a full kit.

Plus, this method is temporary and reversible if you don’t want to make any permanent changes to your door.

How does it work? 

This method involves cutting a hole in a piece of plywood or acrylic to fit the AC hose. You’ll then fit that panel into your door, creating a seal that prevents air leaks. 

It’s a simple DIY-friendly solution that gets the job done.

How to vent portable AC using this method?

  1. Measure the door: Measure the door opening to cut the panel to size. It should fit snugly inside.
  2. Cut the hole: Use a circular hole saw (typically 5-6 inches) to cut a hole in the panel that matches the diameter of your AC exhaust hose.
  3. Seal the panel: Once you’ve cut the panel, insert it into the door. Use weatherstripping or foam tape to seal around the edges, ensuring no air escapes.
  4. Attach the hose: Clamp the exhaust hose to the hole in the panel. You can add extra protection or a removable hood on the outside if desired to shield it from the elements.

What are the pros and cons of using this kit? 

Pros:
  • Low-cost option that’s cheaper than buying a full vent kit.
  • It is reversible, so If you don’t screw into the door, you can easily remove the panel when needed.
  • It is better than leaving the door open and it seals out more air and pests.
Cons:
  • Not as tidy as an installed wall vent.
  • There’s a security trade-off and you’ve got to make sure the door is securely fastened to prevent any break-ins.

What’s the installation cost and time?

  • Installation materials cost anywhere between $10 and $60
  • Installation takes anywhere between 30 and 90 minutes

3. Wall penetration and exterior Hood (permanent solution)

Indoor air vent unit placed beside a modern white sofa, showing typical home ventilation equipment in a living room setting.

For homeowners who are looking for a permanent, clean, and efficient solution, a wall penetration with an exterior hood is the way to go. 

This option gives you the most efficient and quietest airflow, with the least risk of condensation buildup. 

It’s a great choice if you want your portable AC to function at its best without worrying about frequent maintenance or efficiency drops.

How does this method work?

This method involves creating a hole in the wall and installing a vent sleeve with an exterior hood. 

The hose from your portable AC will connect directly to this sleeve, venting the hot air outside.

Also, the exterior hood will prevent pests and debris from getting into the system.

How to vent your AC using this method?

  1. Choose a location: Pick a spot that’s clear of wiring and plumbing. You should ideally place the vent higher than ground level to avoid water splash and moisture buildup.
  2. Locate studs and utilities: Use a stud finder and a wire detector to ensure you don’t cut into any important utilities. If you’re unsure, hire a professional.
  3. Cut the hole: Drill a pilot hole first, then use a hole saw or reciprocating saw to cut the wall to size.
  4. Install the sleeve and hood: Insert the sleeve through the wall from the inside, then fit the exterior hood and grille on the outside. Make sure it’s level and sealed tightly.
  5. Seal and insulate: Use silicone caulk outside and HVAC tape inside to seal any gaps. You can also fill the space around the sleeve with low-expansion foam for extra insulation.
  6. Connect the hose and test: Attach the AC exhaust hose to the sleeve, check for leaks, and make sure everything is sealed correctly.

This the best of all venting options, here’s why: 

  • The hose path is shortest, which ensures better efficiency and airflow.
  • It prevents pests and weather entry with the exterior hood.
  • It has a clean look as there’s no bulky vent kits or door panels.
  • It operates quietly since the AC has direct access to the outside air.

What’s the installation cost and time?

  • DIY installation costs between $80 and $250
  • Professional installation costs between $300-$900
  • Install takes between 2 and 6 hours (or longer if you’re repairing drywall or siding)

4. Drop ceiling plenum routing (great for offices and retrofits)

Woman sitting on a yellow chair with a laptop while a portable electric heater runs on a rug in a bright living room.

If you’re working in an office with a suspended drop ceiling, or in a home with an existing plenum that allows for venting, this can be an effective option. 

This method routes the AC exhaust hose into the plenum above the ceiling tiles, which then leads the hot air to the outside. It’s mostly used in office spaces or retrofits, and it is very efficient when done right.

However, if you’re using this method to vent a portable AC, there are two things you should be aware of: 

  • Local codes: Many local codes forbid venting into plenums unless specifically designed for exhaust, so be sure to check your local codes.
  • Moisture risks: Any condensation in the plenum can damage ceiling tiles, insulation, and other components.

How to vent your AC using this method?

  1. Check local code and talk to your building management: Before you proceed, confirm that venting into the plenum is allowed by local codes or building management.
  2. Install a ceiling lit: If venting into the plenum is allowed, use a ceiling kit designed to fit the tile opening and support the hose. Also,ensure the hose is short and doesn’t have any upward slopes.
  3. Consider condensate traps: To prevent moisture buildup, you might want to install a condensate trap or route the hose slightly downward.

What are the pros and cons of this method?

Pros: 
  • It offers a clean, hidden installation as hoses stay above the ceiling and out of sight.
  • Great for offices where cutting walls and installing exterior vents is not allowed.
  • It is a quick and reversible method as there are no structural changes to the unit or the building.
  • Allows temporary or short-term AC installations without exterior modifications.
Cons: 
  • Might violate local building codes as many areas forbid dumping AC exhaust into a return plenum.
  • Risk of moisture damage to tiles, wires, or insulation if condensation forms.
  • Improper plenum venting can disrupt building airflow balance.
  • Not suitable for residential attics as these are rarely designed to accept exhaust airflow.
  • There will be reduced efficiency if plenum airflow is stagnant or improperly vented.

What’s the installation cost and time?

  • Ceiling vent tile kit costs between $30-$120, while hose extensions and insulation costs another $10-$40
  • Installation takes 20-60 minutes, depending on ceiling height and accessibility

5. Existing exterior vents (don’t use this unless you’ve no other option left)

Portable air conditioner placed in a modern living room, showing how a unit operates indoors before venting the exhaust outside.

A lot of homeowners ask me if they can use existing vents, like the ones for their dryer or bathroom fan, to vent their portable air conditioner. 

Now, while it might seem like an easy shortcut, this is something I don’t recommend. 

You see, these systems are designed for very specific types of airflow and venting, which don’t align with the exhaust requirements of a portable AC unit. 

In fact, trying to share a vent between appliances can lead to serious issues.

Why should you not use this method? 

  • Backflow and blockages: Connecting your AC hose to a dryer vent or bathroom fan can cause backflow. Here, exhaust gases (including hot air) flow back into your home, which is dangerous and inefficient. Plus, lint from your dryer or moisture from a bathroom fan can build up in the hose, causing blockages.
  • Code Violations: Many local building codes forbid mixing exhaust systems because it can cause hazardous conditions. More so when there’s a chance of contaminating the air with carbon monoxide, dryer lint, or moisture.

When can this method really work?

If you really need to consider this option, I suggest you consult a professional first. 

A licensed contractor or HVAC specialist can tell you if it’s possible to use an existing vent. Also, they will tell you whether any modifications can be made to ensure it’s safe and compliant with local building codes. 

In most cases, the best option will still be creating a dedicated vent for your portable AC.

6. Short exterior runs to sidewalls with custom grille (semi-permanent option)

Siamese cat sitting beside a modern portable air device in a bright living room with large windows and indoor plants.

For homeowners looking for a semi-permanent solution, this method creates a short vent route to the outside of your home through a soffit, side wall, or another accessible area. 

This is an affordable and effective way to route the exhaust outside while keeping the setup tidy and neat.

How does it work?

This option is similar to the wall penetration method but is typically simpler and involves installing a small custom grille or louver on the outside of the building. And it works well if you want to avoid cutting a larger hole or making a major modification to your home.

How to vent a portable air conditioner without a window using this method? 

  1. Choose the location: Look for a spot on your exterior wall that’s close to your portable AC unit. Ideally, it should be a place that’s easy to access and not prone to getting blocked by plants, debris, or heavy rainfall.
  2. Drill a hole: Depending on where you’re venting, you’ll need to drill a small hole through your wall to fit the exhaust hose. This hole should be just big enough for the hose to pass through comfortably but small enough that it can be sealed properly.
  3. Install the grille or louver: Once the hole is made, you can install a custom grille or louver on the exterior of the building. The grille will protect the opening from debris and animals, while the louver will help to keep out rain and pests.
  4. Attach the hose: Connect the exhaust hose to the opening. You might need to use a short adapter to ensure a tight and secure fit. Also, use HVAC tape to seal the connection for extra security and to avoid air leaks.
  5. Seal and insulate: Seal any gaps between the hose and the opening using weatherstripping or foam insulation. This helps keep the hot air contained and prevents drafts from sneaking back into your home.

What are the pros and cons of this method?

Pros: 
  • It is less intrusive than cutting a large hole for a full wall vent.
  • It is customizable as you can install a small grille or louver that blends well with your home’s exterior.
  • It is a long-term solution, but it’s still easy to undo if needed.
Cons: 
  • You have to make sure that the hole you cut is properly sealed to prevent moisture from entering the home.
  • Weatherproofing is crucial. Without a good seal, water can easily enter the wall, causing potential damage and mold growth.
  • Vent length matters a lot here and you’ve to try to keep the hose short. Also, you’ve to avoid any unnecessary bends or curves to maintain efficiency.

What’s the installation cost and time?

  • Installation materials cost between $20 and $80, depending on grille and hose fittings
  • Installation takes 1-2 hours for a quick DIY job, but you need more time if you’re installing a custom grille

7. Use evaporative coolers or hoseless AC units (no venting needed)

Portable air conditioner placed on a wooden floor inside a room with wood-paneled walls.

If you live somewhere with a low-humidity climate or if you absolutely cannot vent your portable AC to the outside, there are alternative cooling systems available. 

These options, however, come with some important caveats that you should know about before deciding. 

Here are the cooling systems I am talking about and things you should know about these: 

A. Evaporative coolers 

Evaporative coolers, commonly known as swamp coolers, are an option for those who live in dry areas where humidity is low. 

These coolers work by evaporating water into the air, which helps cool the environment.

However, they require low humidity to function effectively, which means they’re not ideal for places like New Jersey, where the humidity can be very high during the summer months.

But, If you live in places like the south west, where humidity levels are lower, evaporative coolers can be a very energy-efficient and environmentally-friendly cooling solution.

B. Hoseless portable AC units

Some manufacturers claim to offer hoseless portable air conditioners that don’t require any venting at all. 

These units use advanced evaporation or thermoelectric technology to cool the air, but their effectiveness is limited.

How do they work? 

These units draw in air, cool it, and then circulate it within the room. However, they don’t vent the heat outside, so the cooling is usually not as efficient.

What are their limitations? 

These units are not true air conditioners in the sense that they don’t remove heat from the room. Instead. They simply recirculate the air, and often don’t cool the room effectively in warm and humid conditions. 

You can expect them to work poorly in more humid environments like New Jersey.

TL;DR, here’s how to vent a portable air conditioner without a window:

MethodTypeDifficultyPermanent?Best ForCostInstall Time
1. Sliding-door vent kitDoor-based kitEasyNoRenters, quick setups$20-$12010-30 min
2. Door panel cutoutDIY panelModerateNoLow-budget setups$10-$6030-90 min
3. Wall penetration + exterior hoodWall ventHardYesHomeowners wanting best performanceDIY: $80-$250 / Pro: $300–$9002-6 hrs
4. Drop ceiling plenumCeiling routingModerateNoOffices, retrofits$40-$16020-60 min
5. Existing exterior ventsShared ventRiskyNoOnly last-resort casesVariesVaries
6. Short exterior run + custom grilleSmall wall ventModerateSemiHomeowners wanting lighter install$20-$801-2 hrs
7. Hoseless optionsAlternative coolingEasyN/ANo-vent scenariosVariesNone

Bonus: Follow this safety checklist before venting a portable air conditioner 

  • Never vent into an attic or crawlspace as moisture can cause mold and rot.
  • Check for hidden utilities before cutting walls/ceilings. You can use a detector or call in a professional.
  • Don’t block dryer vents or bathroom vents with AC exhaust.
  • Secure sliding door/seal wall penetrations to prevent pests and drafts.
  • Consider permits too as some towns require permits for new exterior penetrations. 
  • Watch for condensation, and if you see water stains near vents, pause and reevaluate the routing.

You might also want to read: How Much Does HVAC UV Light Installation Cost In New Jersey?

Clean-Air-Technologies's Logo
Angies Super Service
Accredited Business
Aeroseal

Schedule Your Free Estimate Today

Contact us to improve your indoor air
quality with our expert cleaning services in NJ.

Final thoughts

As you can see, there are plenty of ways you can vent a portable air conditioner without a window. 

If you want perfect AC performance and you own the space, go for the wall penetration method. 

But, if you’re renting or want a quick fix, the sliding-door kit is a smart inexpensive choice. 

Plus, there are no vent options too if you’ve got absolutely nowhere to vent. 

Got more questions or need assistance with HVAC upkeep? 

You can get in touch with us!

At Clean Air Technologies we’re seasoned HVAC professionals with three decades of expertise in New Jersey. And we’ve got all your HVAC needs covered on a budget. 

Frequently asked questions about venting portable AC 

Can I vent the portable AC into the attic?

No, don’t vent your portable AC into the attic. 

Attics aren’t designed to handle the hot, humid exhaust air that portable ACs produce. When that moisture gets trapped up there, it can soak into insulation, create mold, and even weaken wood or drywall over time. 

Plus, the heat you’re dumping into the attic can radiate right back into your home, making your AC work harder. 

It might seem like a quick solution, but it can quickly turn into a very expensive repair job.

Always vent your AC directly outdoors, and never into a closed space.

Will a sliding-door kit reduce efficiency?

Yes, slightly, but not enough to worry about for most people. 

Sliding-door vent kits aren’t as airtight or insulated as a permanent wall vent, so you might get a bit of warm air sneaking in around the edges. 

That said, if you apply weatherstripping and seal it well, these kits work surprisingly well for apartments and temporary setups. They’re renter-friendly, easy to install, and good for everyday use during the summer. 

If you want maximum efficiency, a wall penetration is the top option, but a well-installed sliding-door kit is absolutely fine for most situations.

My hose keeps dripping, what’s wrong?

If your portable AC hose is dripping, it almost always means condensation is pooling inside the hose. 

This usually happens when the hose has a sag, dip, or upward curve that traps moisture instead of letting it flow out. 

To fix it, reroute your hose so it runs in a smooth, gentle downward slope toward the vent with no low points. 

You might need to support the hose with hooks or zip ties. Also, check that the hose is tightly connected and sealed. 

Moisture should drain or evaporate properly once the airflow path is corrected.

Are hoseless portable ACs real?

Yes, they exist, but they don’t work the way most people hope. 

Hoseless portable AC units typically rely on water evaporation or thermoelectric cooling, which means they don’t actually remove heat from the room like a real air conditioner does. 

Instead, they cool a small amount of air while still releasing heat back into the space. 

In dry climates they can help a bit, but in humid places they can make the room feel muggier.

Think of them more like improved evaporative coolers, not actual AC replacements. They’re fine in specific conditions, but not a full substitute.

How To Clean Air Vents In Your Home? (Easy DIY Guide)

Most homeowners don’t think twice about their air vents. At least not until they start seeing dust buildup, smelling something funky, or noticing uneven airflow.

This is especially true for New Jersey where your typical air vents collect a lot of dust, pet hair, pollen, and even mold spores. 

And when that happens, it’s not just your air quality that takes a hit. That’s because dirty vents can trigger allergies, increase energy bills, and reduce your HVAC system’s lifespan. 

But there’s a silver lining too.

You see, cleaning your vents doesn’t have to be complicated. In fact, with a few basic tools and a little elbow grease, you can get the job done in less than an hour.

In this blog, I’ll walk you through exactly how to clean air vents the right way. You’ll learn:

  • Simple steps to clean air vents  
  • When to schedule air vent cleaning 
  • Why is air vent cleaning so important
  • When to DIY it and when to call in the pros

So, let’s get started. 

Key takeaways 

  • Dirty air vents can cause poor air quality, odors, and higher energy bills.
  • You can clean vents at home using basic tools like a vacuum and screwdriver.
  • Always turn off your HVAC system before starting the cleaning process.
  • Soak, scrub, and dry the vent covers for best results.
  • Vacuum inside the vents to remove dust, dirt, and allergens.
  • Wipe surrounding areas to prevent re-contamination.
  • Clean air vents every 3-6 months, or monthly if you have pets or allergies.
  • Regular cleaning improves airflow, reduces allergens, and extends HVAC life.
  • Call a professional if there’s mold, pests, or deep buildup in your ducts.

How to clean air vents the right way? 

Man using vacuum cleaner with brush attachment to remove dust from ceiling air vent in New Jersey home

Cleaning air vents might sound complicated at first. But it is much easier than you might think, especially when you have the right tools on hand. 

You won’t need anything fancy, just everyday household items like a vacuum with a brush attachment, a screwdriver, and some warm soapy water. 

The process is straightforward too: Turn off your HVAC system, take off the vent covers, clean both the covers and inside the ducts, then put everything back in place. 

That sounds easy, doesn’t it? 

I’ve explained how to clean the vents from start to finish in detail. Let’s have a look. 

First off, get the right tools for cleaning 

The best part about cleaning air vents at home is you don’t need any special equipment or expensive tools. In fact, you might already have most of the necessary tools lying around your house.

Overall, here are all the tools you’ll need: 

Basic cleaning supplies like: 

  • Vacuum cleaner (with hose and brush attachment)
  • Screwdriver (to remove vent covers)
  • Bucket of warm, soapy water (mild dish soap works great)
  • Microfiber cloths or old rags
  • Paper towels (optional)
  • Soft-bristled brush or old toothbrush

Other optional cleaning essentials like:  

  • White vinegar (for disinfecting vent covers)
  • Degreaser (for kitchen vents that get greasy)
  • Dryer vent brush or long flexible brush (for deeper reaches)
  • Face mask and gloves (especially if you’re dust-sensitive or dealing with mold)

In short, here are all the tools you’ll need to clean air vents: 

Basic ToolsOptional Add-ons
Vacuum with brush attachmentWhite vinegar (for disinfecting)
ScrewdriverDegreaser (for greasy vents)
Warm soapy water (mild soap)Dryer vent brush or long flexible brush
Microfiber cloths or old ragsFace mask and gloves (for allergies/mold)
Paper towels (optional)Rubber band & cloth (DIY brush attachment)
Soft-bristled brush/toothbrush

Pro tip: if you don’t have a vacuum brush attachment, simply wrap a cloth around the hose and secure it with a rubber band. This will help trap dust without scratching anything.

Clean-Air-Technologies's Logo
Angies Super Service
Accredited Business
Aeroseal

Schedule Your Free Estimate Today

Contact us to improve your indoor air
quality with our expert cleaning services in NJ.

Then, follow the right steps to clean air vents

Person wearing gloves using a vacuum hose to deep clean a ceiling air vent at home

Now that you’ve got your tools ready, let me walk through exactly how to clean air vents without making a mess or damaging anything. 

Whether you’re cleaning floor vents in your living room or ceiling vents in the bathroom, these steps apply to every type of HVAC vent in your home. 

I will keep it simple, safe, and effective. Just follow along, and by the end, your vents will be breathing better (and so will you).

Step 1: Turn off your HVAC system 

Before you do anything, make sure your heating or cooling system is turned off.

Why? 

Well, because if the system kicks on while you’re cleaning, it can blow dust all over the place. Or worse, suck loose debris deeper into the ducts. 

You definitely don’t want that. 

So, just head over to your thermostat and switch the system off completely. And if you want to be extra safe, you can also flip the breaker for your HVAC system, especially if you’re cleaning multiple vents at once.

Now you’re ready to get started. 

Step 2: Remove the vent covers

Once your system is off, go ahead and remove the vent covers. These are the grilles or registers you see on your floors, ceilings, or walls.

Most vent covers are secured with just a couple of screws, so grab your screwdriver and carefully loosen them. And if they’re not screwed in, they will simply lift out with a little tug.

Be gentle here, especially with older covers, as they can crack or bend easily. 

Once removed, set the screws aside in a small container so you don’t lose them. You’ll need them when it’s time to put everything back.

Step 3: Soak and scrub the covers 

Now that the covers are off, it’s time to give them a good cleaning. You’d be surprised how much dust, grease, and even pet hair can build up on them over time.

Fill a bucket or sink with warm water and a few drops of mild dish soap. If the covers are grimy (like kitchen vents), you can add a splash of white vinegar or a bit of degreaser.

Let them soak for 10-15 minutes, then scrub them gently with a soft brush or old toothbrush. Then, rinse thoroughly and set them aside to dry completely.

Step 4: Vacuum inside the vent  

While your vent covers are drying, it’s time to tackle the inside of the vents themselves.

You can use your vacuum cleaner with a hose and brush attachment to carefully remove dust, dirt, and debris from inside the vent openings. 

Gently reach as far as you can into the duct without forcing the hose or damaging the ductwork. And if you notice any stubborn buildup, use a soft brush to loosen it before vacuuming again.

This step helps prevent dust from blowing back into your home when you turn your HVAC system back on.

Step 5: Wipe down the vent edges and nearby areas 

Next, take a damp microfiber cloth or rag and wipe around the edges of the vent opening as well as the surrounding wall, floor, or ceiling area.

This helps catch any lingering dust or dirt that the vacuum might have missed and prevents it from settling back once you reinstall the covers.

Note: If you spot any stubborn grime, a gentle all-purpose cleaner can do the trick. Just avoid soaking the area too much to protect your walls and floors.

Step 6: Reattach the vent covers

Once your vent covers are completely dry, it’s time to put them back.

Carefully align the covers with the vent openings and secure them with the screws you set aside earlier. If your covers just snap in place, press gently but firmly to avoid bending or cracking.

Make sure everything is snug but not over-tightened. This prevents damage and keeps the vents looking neat.

Step 7: Turn system back on 

Now that everything is clean and back in place, it’s time to switch your HVAC system back on.

You should immediately notice fresher, cleaner air circulating through your home. Plus, your system will run more efficiently without dust and debris clogging up the vents.

In short, here are all the steps to clean air vents: 

StepWhat to Do
1. Turn off HVAC systemPrevents dust from spreading or debris being sucked in.
2. Remove vent coversUse a screwdriver or lift gently to avoid damage.
3. Soak & scrub vent coversClean with warm soapy water and soft brush; add vinegar for grime.
4. Vacuum inside ventsUse a brush attachment to remove dust and debris from duct openings.
5. Wipe surrounding areaClean the wall/floor around the vents with a damp cloth.
6. Reattach dry coversOnce dry, secure vent covers back in place.
7. Turn system back onEnjoy cleaner air and more efficient airflow.

How often should you clean air vents in New Jersey?

Man using a long vacuum hose to clean inside a ceiling air vent for better airflow

So far, you know how to clean air vents and maintain a good indoor air quality. 

But how often should you clean them in NJ? 

This is something that depends on your home, location, and overall lifestyle. 

Here’s when you need to dust, deep clean, and pay extra attention.

Light dusting every few weeks

Dust tends to build up quickly on vent covers. So, a simple dusting every few weeks helps keep surface dirt from accumulating and blowing into your rooms.

Deep cleaning every 3 to 6 months 

A thorough cleaning of your vents every 3 to 6 months helps remove deeper dust, debris, and allergens, just like the ideal air duct cleaning frequency. This keeps your air fresh and your HVAC system running smoothly.  

Pet owners and allergy prone homeowners should clean every month

If you have pets or suffer from allergies, you should clean air vents and change air filters every month. This extra care reduces allergens and helps everyone breathe easier.

In short, here’s how often to clean air vents in New Jersey: 

SituationCleaning Frequency
General maintenanceEvery 3-6 months
Dusting the vent coversEvery few weeks
Homes with pets or allergy sufferersEvery month
Deep duct cleaning Every 3-5 years

Why is it so important to clean the vents? 

You might be thinking, it’s just a little dust, what’s the big deal?

Well, a lot more goes on inside your vents than most people realize. 

Over time, dust, dirt, pet hair, pollen, and even mold spores can build up inside your air vents. And once your HVAC system turns on, all of that gets blown right back into the air you breathe.

Still not convinced? 

Here’s why it is essential to clean your HVAC air vents: 

1. Better air quality

When your vents are clogged with dust and debris, your HVAC system ends up circulating dirty air throughout your home. 

This leads to more sneezing, coughing, and flare-ups for anyone with asthma or allergies, especially during allergy season in New Jersey.

2. More efficient airflow

Dusty vents and registers make it harder for air to pass through. And that forces your system to work harder, which means longer run times, higher energy bills, and uneven temperatures in your rooms. 

Cleaning the vents regularly gives your system room to breathe and run efficiently.

3. Fewer odors and less mold

Musty smells coming from your vents? 

This could be moisture buildup. And where there’s moisture, mold can follow. 

Regular vent cleaning helps prevent those nasty odors and keeps moisture-prone areas like bathrooms and laundry rooms healthier.

4. Longer-lasting HVAC system

When your vents are clogged, your system has to work double time just to push air through.

This extra strain can wear out parts faster and shorten your HVAC system’s lifespan. So, a little cleaning now can save you big money down the road.

5. Fire safety (especially for dryer vents)

Lint and debris buildup in dryer vents is one of the most common causes of house fires. And while this guide focuses on HVAC air vents, it’s a good idea to clean out your dryer vent every 6-12 months

Bottom line: Clean vents don’t just look better, they help your home feel better. And if you’ve got kids, pets, or allergies in the mix, it’s even more important to stay ahead of the dust.

Clean-Air-Technologies's Logo
Angies Super Service
Accredited Business
Aeroseal

Schedule Your Free Estimate Today

Contact us to improve your indoor air
quality with our expert cleaning services in NJ.

Final thoughts

By now, you know how to clean air vent at home using basic tools and handyman skills.

As you can see, cleaning your air vents isn’t as hard as it sounds. Also, doing it regularly can make your home feel noticeably fresher, cleaner, and healthier.

With just a few basic tools and a little time, you can reduce dust, improve airflow, and help your HVAC system run more efficiently.

Not sure where to start? 

We can help!

At Clean Air Technologies, we’ve been keeping New Jersey homes fresh and healthy for over 28 years. And our HVAC technicians can help you keep your air vents clean affordably for months.

FAQs about how to clean vents in home

Close-up of vacuum nozzle cleaning dust buildup from a ceiling air vent grill

Do I need to clean both the vent covers and the inside of the vents?

Yes! 

Wiping just the covers helps a little. But it’s the inside of the vent where dust, dirt, and allergens collect. 

Cleaning both the covers and the inside of the vent ensures better airflow and a fresher home.

How can I tell if my vents are dirty enough to need cleaning?

Some signs include:

  • Dust buildup around or inside the vent grilles
  • Reduced airflow from your vents
  • More dust than usual settling on your furniture
  • Musty or stale odors when your HVAC system is running

If you’re seeing or smelling any of these, it’s time for a cleaning. 

What’s the difference between cleaning air vents and duct cleaning?

Cleaning air vents involves removing dust and dirt from the visible parts, like the grilles and the first few feet of duct behind them.

Air duct cleaning, on the other hand, is a professional service that goes deep into your HVAC system to remove debris, mold, and allergens from the entire ductwork.

You can read my blog on the difference between ducting and venting to understand how vents and ducts differ. 

Can dirty vents really affect my health?

Yes, especially if you have allergies, asthma, or other respiratory sensitivities. 

Dirty vents can circulate dust, pollen, pet dander, and even mold spores throughout your home.

Regular vent cleaning reduces airborne irritants and improves the overall quality of the air you breathe.

Is it safe to clean vents myself, or should I always hire a pro?

Cleaning vent covers and the first section of ductwork is totally safe and doable as a DIY project. Just be gentle and use the right tools.

However, if you suspect mold, pest problems, or large buildups deep in your ducts, it’s best to call in professionals for a thorough job.

What type of vents can I clean using this guide?

This guide works for most common household vents, including:

  • Floor vents
  • Wall vents
  • Ceiling vents
  • Return air grilles

You can use the same steps whether your HVAC system is heating or cooling your home.

Kitchen and bathroom exhaust vents might need degreasing, but the overall process is similar.

What’s The Difference Between Ducting And Ventilation In Your Home?

A lot of homeowners use the words ducting and venting interchangeably, and it’s easy to see why. After all, both are connected to how air moves in and out of your home. 

However, although they work together, they’re not the same thing.

But why does the difference even matter to you? 

Well, it can explain why some rooms in your home feel stuffy while others are freezing, why your energy bills keep climbing, or why your bathroom always feels damp. Once you know the basics, it all makes perfect sense.

In this blog, I will break down all the differences between ducting and venting with real-life examples and HVAC system maintenance tips. You’ll learn:

  • What is ducting and venting 
  • How to spot the difference 
  • How each one works 

So, let’s get started. 

Key takeaways

  • Ducting moves heated or cooled air throughout your home.
  • Venting removes stale air and brings in fresh air.
  • Supply vents blow air in; return vents pull it back.
  • Exhaust vents push out humidity, odors, and gases.
  • Leaky ducts or poor ventilation can raise energy bills.
  • Ductless systems don’t use ductwork at all.
  • Closing vents doesn’t save energy; in fact, it can hurt efficiency.
  • Both ducting and venting are essential for comfort and health.

Ducting and venting: What’s the difference?

Round ceiling air vent diffuser used for HVAC ventilation in a home

At first look, venting and ducting might look like the same thing since both work to move air in your home. 

But they actually serve very different purposes. Here’s how: 

  • Ducting is the physical network of passages (usually hidden in walls, ceilings, or attics) that carries heated or cooled air from your HVAC system to different rooms.
  • Venting is the process of letting air in or out of your home. This includes bringing in fresh outdoor air, removing stale indoor air, and removing harmful gases from appliances like your furnace or dryer.

Simply put, while ducting moves air around inside your home, venting ensures exchange of air between indoors and outdoors.

Both are equally important because:

  • Ducting keeps your rooms comfortable
  • Venting keeps the air you breathe safe and healthy

Here’s a quick comparison of ducting & venting:

FeatureDuctingVenting
PurposeCirculates heated or cooled air inside the homeExchanges indoor air with outdoor air
VisibilityHidden behind walls, ceilings, floorsVisible as grilles or registers in rooms
Connected to HVACYesSome are connected (supply/return), some are independent
ExampleSheet metal ducts in atticBathroom fan, kitchen hood, dryer vent

I’ve explained them both in detail below. Let’s have a closer look. 

Clean-Air-Technologies's Logo
Angies Super Service
Accredited Business
Aeroseal

Schedule Your Free Estimate Today

Contact us to improve your indoor air
quality with our expert cleaning services in NJ.

What is ducting?

Rectangular ceiling air vent grilles used for HVAC supply and return airflow

Ducting is the hidden network of tubes or channels that carries hot or cool air through your home. 

Whenever you adjust your thermostat, your furnace or air conditioner pushes air into these ducts, which then deliver it to different rooms.

Talking about New Jersey homes, ducts made from sheet metal, fiberglass, or flexible plastic are common here. And they’re usually tucked away in attics, basements, crawl spaces, or behind walls. 

In short, you can think of ducting as your home’s air delivery system. 

What are the different types of ducts? 

For starters, ducts aren’t just for blowing air into your living room or bedroom as they also pull back stale air. 

You see, there are two types of ducts, namely:

  • Supply ducts that bring fresh air from the HVAC system 
  • Return ducts that pull indoor air back to the HVAC system to be filtered, reheated, or cooled again

This cycle keeps the air circulating and the temperature balanced throughout your home.

Duct TypeFunctionConnected to HVAC?Common Issues
Supply DuctsDeliver warm or cool air to roomsYesLeaks, crushed sections
Return DuctsPull air back to HVAC systemYesBlockages, dirty filters

How does ducting work? 

The way ducting works is fairly straightforward. Here’s a step-by-step look at how your HVAC system uses ductwork to keep your home comfortable year-round.

1. Air is heated or cooled

Your HVAC system works to either heat or cool the air, depending on how you adjust your thermostat. 

For instance, if it’s cold outside, your furnace kicks on to warm the air. Similarly, if it’s hot, your air conditioner or heat pump cools it down. 

2. The blower pushes the air

Once the air reaches the right temperature, the blower gets to work and pushes warm or cool air into your ductwork. 

3. Air travels through ducts

After the blower kicks in, the air moves into a network of supply ducts. These ducts are often behind walls, above ceilings, or under floors. 

4. Air enters your rooms

The air finally reaches the rooms in your home through supply vents. These vents are usually in walls, ceilings, or sometimes in the floor. 

You’ll feel warm or cool air blowing out of them when your HVAC system is running. 

Pro tip: If one room feels less comfortable than the others, it could be a sign of a ducting issue like a blockage or leak.

5. Return ducts pull air back

Once the air has circulated in your room, it doesn’t just stay there. Instead, it’s drawn back into the system through return ducts. These ducts pull in the used indoor air so it can be filtered, reconditioned, and sent out again. 

6. The cycle repeats

This entire process happens continuously while your system is running. The air is pulled back, cleaned through air filters, warmed or cooled again, and then sent back through the ducts.

When everything is working right, it’s a smooth, efficient cycle that keeps your home comfortable and your indoor air healthy. But if there are leaks, clogs, or disconnected ducts, you should get a thorough air duct cleaning or it can throw the whole system off. 

Here’s how ducting works step-by-step

StepWhat Happens
1. Air is conditionedHVAC heats or cools air depending on thermostat setting
2. Blower activatesBlower fan pushes air into supply ducts
3. Air travelsConditioned air moves through hidden ducts
4. Air enters roomsAir comes out of supply vents into your living spaces
5. Air is pulled backReturn vents collect used air and send it back to the HVAC
6. Cycle repeatsAir is re-filtered, reconditioned, and circulated again

What is venting?

Comparison of supply vent and return vent grilles used in home HVAC systems

Venting is all about exchanging air. It brings fresh air in and pushes unwanted air out. 

Also, unlike ducting, which mainly circulates heated or cooled air inside your home, venting works to maintain indoor air quality too.

SImply put, venting keeps your indoor air fresh, removes moisture and odors, and protects your family from harmful pollutants or gases.

What are the different types of vents? 

There are a few different types of vents working behind the scenes to keep your air clean, comfortable, and safe. 

Here, each vent type plays a distinct role. And while some work with your HVAC system, others operate independently. 

Let’s have a look at the most important ones: 

1. Supply vents

These vents are connected to your HVAC system and they blow warm or cool air into your rooms. 

You’ll typically find them on the floor, walls, or ceiling. And when your HVAC is running, these are the vents you’ll feel air coming out of.

2. Return vents 

Return vents pull air from your rooms back into the HVAC system to be filtered and conditioned again. These vents help keep the air moving in a continuous loop.

Your home might have one big return vent in the hallway or several smaller ones in different rooms.

3. Exhaust vents 

These vents aren’t connected to your heating and cooling system. Instead, they’re used to get rid of unwanted air. 

So, whether it’s moisture from your bathroom, smoke from cooking, or heat from your dryer, exhaust vents push that stale or damp air outside. And this is crucial to preventing problems like mold or poor indoor air quality.

Vent TypeFunctionLocationConnected to HVAC?Example
SupplyPush warm/cool air into roomsFloors, walls, ceilingsYesFloor register, diffuser
ReturnPull air back into the HVAC systemWalls, ceilings, central hallsYesReturn grille, filter grille
ExhaustRemove stale, moist, or polluted air from homeBathrooms, kitchens, laundryNo (vents outside)Bathroom fan, dryer vent

How does venting work? 

Venting works by moving stale, humid, or contaminated air out of your home and replacing it with cleaner air. 

Here’s what does a vent do:

1. Air is collected

Fans, vents, or openings gather indoor air that needs to be removed like steam from a shower, smoke or odors from cooking, or gases from a furnace.

2. Air is pushed out

The air is then sent outdoors through an exhaust vent, flue, or duct.

3. Fresh air replaces it

Fresh outdoor air is brought in mechanically through a dedicated system like an HRV (heat recovery ventilator) or ERV (energy recovery ventilator).

Here’s how venting works step- by-step

StepWhat Happens
1. Air is collectedFans or vents gather indoor air (steam, smoke, gas)
2. Air is expelledAir is pushed out through exhaust vents, ducts, or flues
3. Fresh air comes inOutdoor air enters through mechanical systems or open windows

How to tell what’s duct and what’s vent?

It is easy to confuse ducts and vents since they’re both part of the same system. But here’s how you can quickly tell them apart:

  • Ducts are hidden: They’re the channels behind your walls, ceilings, attic, or basement. So, unless you’re doing construction or looking into an unfinished space, you usually won’t see them.
  • Vents are visible: These are the grilles or covers you see on your walls, floors, or ceilings. They’re the points where air enters or leaves a room.

Conclusion

HVAC vent and duct might sound similar, but they’re completely different.

  • Ducting is the network that moves heated or cooled air around inside your home.
  • Venting is about exchanging air, bringing fresh air in, pushing stale or humid air out, and safely exhausting gases.

Both work hand in hand to keep your home comfortable, efficient, and safe. 

Got more questions or want to schedule a full HVAC maintenance?

You can get in touch with us!

At Clean Air Technologies, we are seasoned HVAC service professionals with three decades of hands-on experience serving all of New Jersey. And from duct and vent upkeep to HVAC efficiency and indoor air quality, we’ve got it all covered for you on a budget. 

Clean-Air-Technologies's Logo
Angies Super Service
Accredited Business
Aeroseal

Schedule Your Free Estimate Today

Contact us to improve your indoor air
quality with our expert cleaning services in NJ.

FAQs about ducting and venting

Do ductless systems have ducts or vents?

No, ductless systems like mini-splits don’t use ducts at all. Instead, they blow conditioned air directly into a room through a wall-mounted unit. 

They still have an outdoor unit and refrigerant lines, but no ducting is needed here.

How often should your ducts be inspected or sealed?

It’s a good idea to have ducts checked every one or two years. If your home is older, you notice uneven airflow, or your energy bills are unusually high, sealing and insulating your ducts can make a big difference.

Is duct cleaning the same as dryer vent cleaning?

Not at all. 

Duct cleaning involves removing dust and debris from your HVAC system’s ductwork. 

Dryer vent cleaning, on the other hand, involves removing lint buildup from the vent pipe that carries air from your clothes dryer outside. 

Can closing vents save energy?

No.

In fact, it can cause problems. Closing vents increases pressure in your ducts, which can lead to leaks and reduce efficiency. 

So, it’s better to keep vents open and let your system balance airflow as designed.

What’s the difference between a vent register and a grille?

Both are types of vents you see in your living space.

A register is a vent cover with an adjustable damper, so you can control how much air comes out. 

A grille is a simple cover with no damper, usually found on return vents.

What Are The Different Types Of Air Vents In New Jersey Homes?

For most people, air vents are just those openings that blow warm or cool air into your rooms, and that’s fair. 

But what if I told you that there are different types of air vents, and all do completely different jobs.

For instance, some vents are there to pull stale air out and send it back to your HVAC system. At the same time, others push unwanted air and moisture outside your home.

Now, you might not have given much thought to this. But knowing the different air vent types, where they are, and how they work can actually help you:

  • Keep your air vents clean and home more comfortable year-round.
  • Improve your indoor air quality.
  • Avoid common airflow problems (like that one room that’s always too hot or too cold).
  • Even save a little money on your energy bill.

In this blog, I will break it all down. You’ll know: 

  • The three main types of vents in your home.
  • The difference between a supply vent and a return vent.
  • The different vent styles and which ones you have.
  • What vent types are common in New Jersey homes. 

So, let’s get started. 

Key takeaways

  • There are 3 main types of air vents: supply, return, and exhaust.
  • Supply vents blow heated or cooled air into rooms.
  • Return vents pull stale air back to your HVAC system.
  • Exhaust vents remove moisture, odors, and heat from your home.
  • Common NJ homes often use ceiling vents upstairs and floor vents downstairs.
  • Older NJ homes may only have a few central vents due to retrofitting.
  • Ductless systems are common where installing vents isn’t feasible.
  • Clean and balanced vents improve airflow and lower energy costs.
  • Mini-split units are an alternative to vents in tight spaces.
  • The right vents depend on room type, airflow, and home design.

What are the different types of air vents? 

There are three main air vents types, supply, return, and exhaust. For starters, supply vents blow air into your rooms, return vents pull it back to the system, and exhaust vents push unwanted air outside. 

Here are the vent types and their function: 

Vent TypeFunctionCommon LocationsConnected To HVAC?Example
SupplyPush warm/cool air into roomsFloors, walls, ceilingsYesFloor register, ceiling diffuser
ReturnPull air back to systemWalls, ceilings, central hallwaysYesReturn grille, filter grille
ExhaustRemove stale/moist air from homeBathrooms, kitchens, attic, laundryNo (leads outside)Bath fan, dryer vent

Let’s take a closer look at how each one works.

1. Supply vents 

Wall-mounted split AC unit blowing cool air indoors for home cooling in New Jersey.

Supply vents bring warm or cool air into your rooms. You can think of them as the delivery guys of your HVAC system. 

So, when you turn your furnace or air conditioner on, the air comes out of these vents and keeps your home cozy. 

What are the different types of supply vents? 

While supply vents are one of the three air vent types, they are also of different kinds, including:

  • Floor Registers: Push warm air up from the floor.
  • Low/High Wall Registers: Blow air from walls. 
  • Ceiling Diffusers: Spread cool air from the ceiling evenly.
  • Round Ceiling Diffusers: Circular vents that mix air well in open rooms.
  • Linear Slot Diffusers: Long and sleek vents that spread air across wide spaces.
  • Baseboard Registers: Sit low on the wall to push air out quietly.
  • Toe-Kick Registers: Hidden under cabinets to warm floors in small areas.
  • Smart Registers: Motorized vents that direct air where it’s needed most.
Here’s how different supply vent types are used
Vent StyleBest ForLocation
Floor RegisterHeating first floorsFloor near windows
Ceiling DiffuserCooling upper floorsCeiling
Wall RegisterGeneral HVAC useHigh or low wall
Baseboard RegisterQuiet heat in older homesAlong baseboards
Toe-Kick RegisterSmall spaces/kitchensUnder cabinets
Smart RegisterZoned airflow controlAny room

Where will you find supply vents? 

You’ll usually find supply vents in spots where they can spread air evenly through the room. This includes:

  • On the floor near windows or exterior walls (especially in older homes)
  • High up on the wall (popular in modern homes)
  • In the ceiling (often in multi-story houses or homes with ducts above)

Not sure if you’re looking at a supply vent? 

Here’s a super simple test: Take a tissue or a small piece of paper, and hold it in front of the vent when your system is running. If the paper blows away from the vent, you’ve found a supply vent. 

Clean-Air-Technologies's Logo
Angies Super Service
Accredited Business
Aeroseal

Schedule Your Free Estimate Today

Contact us to improve your indoor air
quality with our expert cleaning services in NJ.

2. Return vents 

Outdoor AC condenser unit illustration for home cooling

Unlike supply vents that bring air in, return vents pull air out of the room and send it back to your HVAC system to be heated or cooled again. 

These help your HVAC system have enough air to supply, circulate air properly, and keep your indoor air fresh by cycling it through your filters.

What are the different types of return vents? 

Just like supply vents, return vents are also of different kinds, which include: 

  • Standard Return Grilles: Pull used air back from walls or ceilings.
  • Filter Grilles: Return vents with built-in filters for easy cleaning.
  • High/Low Return Pairs: Let you switch air pickup for summer or winter.
  • Central Hallway Return: One big return vent serving the whole house.
  • Transfer Grilles / Jump Ducts:  Help air move between rooms when doors are closed.
Here’s how different return vent types are used
TypeFeatureWhere It’s Used
Standard Return GrilleBasic air returnWalls/ceilings
Filter GrilleHas built-in air filterNear HVAC unit or central hallway
High/Low Return PairSeasonal air pickup switchingHomes with two-level return setup
Central Hallway ReturnOne vent serving large areaHallways in smaller homes
Transfer Grille / Jump DuctAllows airflow between closed roomsBedrooms, offices without return vents

Where will you find return ducts? 

Return vents are usually larger than supply vents, and placed in the following areas of your home:

  • Central areas like hallways or big rooms
  • High on walls or low near the floor, depending on your system’s design

Curious how to spot one?

Try the same tissue test. But this time, if the paper gets sucked toward the vent, it’s a return vent.

Also, most return vents don’t have a lever or damper. And that’s intentional because you don’t want to block or close return vents, as that can reduce air pressure, system efficiency, and even cause damage to your system.

3. Exhaust vents 

Exhaust vents have a different job altogether, which is kicking unwanted air out of your house completely. This includes:

  • Moisture from hot showers
  • Cooking smells and smoke
  • Lint and heat from your dryer
  • Hot attic air that builds up in summer

Also, unlike supply and return vents, which are part of your heating/cooling loop, exhaust vents connect to the outside. They send air through ducts that exit your home and help prevent moisture damage, odor buildup, and air quality issues.

What are the different types of exhaust vents? 

Different exhaust vents that you’ll find in your home include: 

  • Bathroom Exhaust Fan: Removes steam and moisture after showers.
  • Kitchen Range Hood: Vents cooking smells, grease, and heat.
  • Dryer Vent: Sends hot and damp air and lint outside.
  • Attic Vents (Ridge/Soffit): Let heat and moisture escape your attic.

Where will you find exhaust vents? 

You’ll find exhaust vents in very specific locations, such as:

  • Bathroom ceilings (part of the bath fan system)
  • Above the stove (your range hood)
  • Behind the dryer
  • In the attic (attic fans or passive exhaust vents)

Here’s how you can spot one: 

Look for vents that seem to connect to something with a motor or fan, especially if they’re:

  • Mounted on the ceiling or high on a wall
  • Near appliances or moisture-heavy areas

Pro tip: If they don’t blow air in or suck air back into your HVAC system, they’re exhaust vents.

Bonus: Exhaust vents are more important than you might think 

Exhaust vents are your first line of defense against mold, mildew, and musty odors. 

How?

You see, bathrooms without working exhaust fans can develop peeling paint, damp walls, or worse, hidden mold inside walls. The same thing goes for kitchens and laundry rooms.

Now, exhaust vents remove moisture early on and help keep the space dry, preventing all of these problems down the road. 

Wondering how much you’ll likely pay to get these vents cleaned? 

Go through my blog on air vent cleaning cost in New Jersey and know the latest price average. 

What are the types of air vents common in New Jersey homes?

HVAC thermostat control panel for heating and cooling in New Jersey homes

Although all vents work the same way, i.e., blow air in, pull it back, or push it outside, the way they are installed can vary a lot. And this depends largely on where you live. 

Take New Jersey, for example, where age of the home, type of heating system, and available duct space all play a big role in where vents are placed.

Let’s take a look at what air vent types are common in the state.

1. Two-story homes 

In most two-story homes across New Jersey, the supply vents upstairs are often in the ceilings. That’s because it’s easier to run ductwork through the attic than behind finished walls.
At the same time, the supply vents downstairs are usually on the floor or low on the wall. This is mainly because the ducts run either through the basement or crawlspace.
Talking about return vents, most two-storied NJ homes don’t have return vents in every single room. Instead, there’s usually one large return grille per floor, usually in a hallway or open area.

2. Older NJ homes 

A lot of homes in New Jersey were originally built with boilers and baseboard heat, and not central air systems. Here, air vents were added later, often during renovations or when central AC was retrofitted. 

Now, when centralized HVAC was added to older homes, it was much easier to run ducts through the attic to reach upstairs rooms. That’s why you’ll often see ceiling vents or diffusers in second-floor bedrooms.

However, you might only see a few wall or floor vents downstairs, often in main rooms like the living room or dining room. 

Also, older homes might only have one big return vent, and it’s usually somewhere on the first floor.

3, Homes with limited duct space

Not every home in New Jersey has the space to run full-size ductwork to every room. And In these homes, HVAC installers got a bit creative.

How? 

You might notice some rooms have no vents whatsoever, but instead have a sleek wall-mounted unit. 

That’s a mini-split system or a ductless system which provides both heating and cooling without needing air vents at all. They are popular in older homes, bonus rooms, and renovations where adding ductwork would be too invasive or expensive.

Also, some homeowners install transfer grilles or jump ducts to help with air movement in homes with limited return vents. 

In short, here are the common vent setups in NJ homes

Home TypeSupply Vent LocationReturn Vent SetupNotes
Two-Story HomeCeiling (upstairs), floor (downstairs)One large return per floorDuctwork routed through attic/basement
Older NJ HomeLimited vents, retrofitted laterOne central return on first floorOften upgraded from boiler/baseboard systems
Homes w/ Limited Duct SpaceMini-splits or ductless unitsJump ducts or transfer grillesGreat for renovations or tight spaces

How to choose the right air vent for your NJ home? 

More than look, picking the right air vent is about comfort, airflow, and making sure every room feels just right. And to that end, here’s how you can choose the right air vents for your home: 

1. They should be compatible with the room 

For starters, different rooms need different vents. Here are a few examples: 

  • Bedrooms: Smaller vents work best so you don’t wake up freezing from a blast of cold air.
  • Living rooms: Bigger spaces need bigger vents (or more of them) to stay comfy.
  • Bathrooms: Always need an exhaust vent to get rid of steam and smells.

So, you should make sure that the vents are made for the specific room. 

2. They should complement the airflow

Air behaves in predictable ways, ie., cool air sinks and warm air rises. 

This means, if you’re cooling a second-floor room, ceiling vents work best. Similarly, if you’re heating a space on the first floor, floor vents are ideal. 

3. They should keep the airflow balanced

Great airflow is all about balance. So, you should try to balance comfort and efficiency.

For instance, if you’ve got too many supply vents and not enough returns, you’ll get weak airflow and uneven temperatures. 

Also, get too many returns without enough supply vents, and your room might never feel warm or cool enough. 

5. They should go well with your home’s aesthetics

Vents aren’t just functional, they’re also a part of your interior space. 

And to that end, I suggest you get sleek flush-mount vents or covers that you can paint to match your walls, ceilings, and floor. 

Not sure what kind of vents are right for your home? 

Reach out to our team and know the ideal vent type for your space. 

Clean-Air-Technologies's Logo
Angies Super Service
Accredited Business
Aeroseal

Schedule Your Free Estimate Today

Contact us to improve your indoor air
quality with our expert cleaning services in NJ.

Wrapping it up

At first look, the vents around your home might seem like small forgettable details. But by now, you know they’re actually a huge part of what keeps your space comfortable, your air clean, and your energy bills in check.

And the best part is that once you know what’s what, it’s much easier to:

  • Spot problems early
  • Keep air flowing freely
  • Work with your HVAC technician when something needs fixing

Got more questions or need a complete air vent cleaning for your NJ home?

You can get in touch with us!

At Clean Air Technologies, we are New Jersey’s most seasoned HVAC cleaning and maintenance professionals with about three decades of expertise. And we’ve got all your HVAC upkeep needs covered on a budget. 

FAQs about types of air vents

What’s the difference between a vent, a register, and a grille?

Although they look similar, vents, registers, and grilles, all serve different purposes. Here’s how: 

  • Vent is the general term for the opening where air comes in or goes out.
  • Register is a vent with an adjustable damper (you can open or close it).
  • Grille is a vent cover without a damper. It’s fixed in place.

How do I know if a vent is supply or return?

Here’s how you can tell the difference between supply and return vents: 

  • Supply vents blow air out (you’ll feel airflow when the system is running).
  • Return vents pull air in (you won’t feel air blowing out).

A quick hand test while the system is on can tell you which is which.

Should I close vents in unused rooms to save money?

Nope, closing vents can actually raise air pressure in your ducts, cause leaks, and make your HVAC system work harder.

How often should I clean my vents?

I suggest you give vent covers a quick vacuum every couple of weeks and a deeper wash every few months. And if you see dust building up fast, your air filter may need changing more often.

Why is one of my vents blowing weak air?

This could be:

  • A closed damper.
  • A blocked duct.
  • Dirty air filter. 

If the issue affects multiple vents, it’s time to call an HVAC technician.

Are there special vent types for allergies or dust?

Yes, some vent covers have built-in filters designed to trap dust, pollen, and pet hair. These can help improve indoor air quality but should be cleaned or replaced regularly.

Do vents affect my energy bills?

Absolutely. 

Clean and unblocked vents help your HVAC run efficiently, which can reduce energy costs. Dirty or blocked vents, at the same time, force the system to work harder, wasting energy and money.

How Much Does It Cost To Get Your Vents Cleaned In 2026

Air vent cleaning is one of those home services that’s super important every once in a while. This is especially if you’re dealing with dust, allergies, weird smells, or just want cleaner air in your home. 

But as soon as you start looking into it, you see different price tags all over the place. 

For instance, while some companies quote $99 specials, others throw numbers like $800 or more. 

And this might leave you wondering: How much does it cost to get your vents cleaned exactly? 

In this guide, I will break it all down. You’ll learn:

  • What air vent cleaning usually costs in New Jersey
  • What affects the price
  • What’s worth paying for and what’s just upsell fluff
  • And what real homeowners are actually paying right now

Also, I will help you figure out what a fair price looks like and how you can avoid getting ripped off.

So, let’s get started. 

Key takeaways

  • Most NJ homeowners pay $300-$500 for air vent cleaning.
  • Costs vary by home size, vent count, and HVAC systems.
  • Companies charge by vent, square foot, flat rate, or hourly.
  • Add-ons like mold removal or dryer vent cleaning raise the price.
  • Watch out for $99 bait-and-switch scams with surprise upsells.
  • A legit cleaning (as per NADCA) includes all vents, coils, and blower parts.
  • Good vent cleaning takes 2-4 hours, not 30 minutes.
  • Choose NADCA-certified pros with upfront pricing and solid reviews.

How much does it cost to get your vents cleaned in New Jersey?

HVAC technician in protective gear performing professional vent cleaning in a New Jersey basement.

Let’s start with the typical air vent cleaning cost that you can expect to pay anywhere in New Jersey. 

For most homeowners, this price usually falls between $300 and $500 for a standard-sized home. And it covers a full professional service, including cleaning the supply and return vents, brushing the ducts, and vacuuming everything with standard equipment.

But there’s one catch.

You see, although the above price range is typical for most homes, it might vary depending on your home’s size. Here’s how:

  • Some smaller homes with fewer vents might pay in the range of $250-$300.
  • Larger homes or homes with extra vents could end up paying anywhere from $600 to $1,000.

In fact, some homeowners even tell me they’ve paid as high as $1,200, though that often included add-ons like mold treatment or dryer vent cleaning.

In short, here’s a quick breakdown of air vent cleaning costs in NJ

Home TypeTypical Price Range
Small condo or apartment$250 – $350
Average single-family home$300 – $500
Large home or 2 HVAC zones$600 – $1,000+

In short: While prices can vary a lot, most homeowners should expect to spend around $400.

Clean-Air-Technologies's Logo
Angies Super Service
Accredited Business
Aeroseal

Schedule Your Free Estimate Today

Contact us to improve your indoor air
quality with our expert cleaning services in NJ.

How much does air vent cleaning cost based on the pricing method? 

Man cleaning a dusty window sill in a rustic attic bedroom with morning sunlight shining through the window.

When you ask for a quote on vent cleaning, you’ll notice that not all companies price things the same way. 

For instance, some companies charge you per air vent, some by square footage, and others just give you a flat rate for the whole system.

And while the final cost will still be in the above range, these pricing models will surely confuse you.

Let me break down what each pricing model actually means and what you might expect to pay.

1. Per vent pricing

Pricing by the vent is one of the most common ways companies charge for vent cleaning. 

And this is straightforward: The cleaning company counts how many vents you have and charges you for each one. 

Here, supply vents (where warm or cool air blows out) typically cost you between $25 and $50 each.

However, the return vents (where air goes back into the system) are a bit pricier, usually costing $40 to $75 each. 

But why the difference? 

Well, return vents are often larger and dirtier, and they take more time to clean.

So, how much can you expect to pay in total? 

If you 10 supply vents and 2 return vents, your total vent cleaning cost will be $410. 

Here’s how: (10 x $35) + (2 x $60) = $410

This method is great if you know exactly how many vents you have and want a clear cost.

2. Per square foot pricing

This is yet another pricing method where instead of counting vents, companies charge you based on the total size of your home. 

Here, companies usually ask for your home’s square footage and then give you a quote based on a standard rate. And this is usually between $0.15 to $0.40 per square foot. 

For instance, let’s say your home is 2,000 square feet. In this case, here’s how much you can expect to pay: 

At $0.15 per sq ft, you’ll pay $300
At $0.40 per sq ft, you’ll pay $800

On average, you can expect to pay $550 under this method. 

This model works really well for larger homes or homes with tricky layouts and hard to reach vents. 

Also, if you don’t know how many vents you have or if the ductwork is more complex than usual, this model is ideal. 

3. Flat rate system

Flat rate pricing is super simple: There’s one price that covers the whole job. You don’t need to count vents or measure square footage. 

Now, most companies in New Jersey that offer this model will quote a flat fee between $300 and $700. 

The exact quote, however, will depend on the size of your home, how easy the vents are to access, and whether you have one HVAC system or two.

This is a popular choice for people who want a no-surprises kind of deal.

Pro tip: Be sure to ask what the flat rate includes. That’s because some companies might add extra fees for deep cleaning or sanitizing unless it’s included in the base rate.

4. Hourly charges

This method is a bit less common but still used by some local technicians and small New Jersey-based companies. Here they’ll charge by the hour, usually between $90 and $125 per hour. 

Now, since a typical vent cleaning job takes 2 to 4 hours, your total could range from $180 to $500 depending on how long it takes.

This method works best when you’re hiring someone for a small job or if you’re bundling vent cleaning with other HVAC work. 

However, it’s a good idea to ask for an estimate ahead of time so you’re not caught off guard by the final bill.

Overall, here’s how much air vent cleaning costs based on pricing method

Pricing MethodWhat You’ll Pay
Per vent$25–$75 per vent
Per square foot$0.15–$0.40 per sq ft
Flat rate$300–$700 (whole system)
Hourly$90–$125/hr (2-4 hrs total)

What are the factors that decide your total air vent cleaning price? 

Close-up of gloved hands inspecting attic insulation for mold or dust contamination during home cleaning.

A lot of homeowners have asked me why some people pay less than $300 for vent cleaning while others get quoted way over $900. 

Now, being an HVAC cleaning professional, I can tell you these are not random quotes. That’s because there are a lot of factors that affect the final price of air vent cleaning. 

Here are some key factors that make all the difference:

1. Size of your home

The bigger your home, the more vents you’re likely to have. And this means more work for the cleaning crew. 

For instance, a small apartment might only have 4 to 6 vents, while a big two-story house could have over 20. So, it’s obvious that the bigger house will pay a higher cost. 

2. How many HVAC systems you have

Some homes, especially larger ones, have more than one HVAC system. For instance, there are usually two HVACs in most multi-storied homes, one for each floor. 

And since cleaning two systems doubles the work, you can expect to pay an extra $200-$400. 

3. Pets, allergies, or smokers in the house

Pets shed hair and dander, and if someone in the home smokes indoors, the residue can cling to the inside of your vents.

And this buildup doesn’t just affect air quality, it also makes the cleaning job tougher, and, thus, increases your quote.

4. Mold, mildew, or pests

If a technician discovers mold, mildew, mice, or other pests in your ductwork, that’s a whole different kind of job. That’s because mold removal from air ducts alone can cost from $1,000 to $3,000 or more, depending on how bad it is. 

5. Your home’s layout

The way your HVAC is set up matters a lot when it comes to determining vent cleaning costs.

Why?

Well, if the vents are in tight crawl spaces, attics, or behind furniture, it’s harder and slower for the crew to reach them. This means more labor and the need for special equipment, which can result in a higher bill. 

6. Where you live

Location plays a big role in pricing and vent cleaning in places like Jersey City often costs more than in smaller towns like Sussex. 

This is mainly because city-based companies have higher costs for labor, parking, permits, and transportation. So even if the job is the same, the price can vary based on your zip code.

7. Level of dirt and neglect

If your vents haven’t been cleaned in over a decade, they’re probably packed with dust, debris, and maybe even toys or trash that fell in. 

And since cleaning heavily neglected systems takes a lot more time and elbow grease than regular maintenance, companies often charge more.

In short, here’s what raises or lowers the price

FactorWhat It Does to Cost
Bigger houseIncreases
More vents or systemsIncreases
Mold or pestsBig increase
Hard-to-reach areasSlight increase
Clean or newe homeLowers
Fewer ventsLowers

Some add-on services that increase air vent cleaning cost

When you book an air vent cleaning, the base price usually covers just that. But companies often offer extra services, and these can push the price up fast.

Here’s what’s commonly added and what each one might cost:

1. Dryer vent cleaning

A clogged dryer vent is a fire hazard and can make your dryer less efficient. And here’s how much it costs you:

  • When added along with air vent cleaning: $100-$170
  • When you get it cleaned separately: $100-$250

2. Mold removal 

If a company finds mold in your vents, they’ll usually recommend mold removal plus a sanitizing spray to kill spores. Here’s how much it might cost you:

  • Typical cost of full mold removal: $1,000-$3,000+
  • Fogging treatment only: $75–$250

3. Deodorizing or disinfecting sprays

Some companies offer “fresh air” or “anti-bacterial” treatments to remove smells or allergens. These are optional, and not always necessary unless there’s an odor issue.

  • Typical cost: $50-$150

4. Duct sealing

Sometimes after vent cleaning, technicians also offer to seal up leaky ducts to help improve airflow and reduce energy bills.

  • Cost can range: $250–$1,000+

5. UV light installation or filter upgrades

Some cleaning companies might recommend installing UV lights or upgraded air filters to improve indoor air quality after cleaning. And here’s how much they cost:

  • UV light systems: $300-$700+
  • HEPA filter upgrade: $100-$250

In short, here are all the add-on services and their cost

Add-On ServiceTypical Cost
Dryer vent cleaning$100–$170 
Mold remediation$1,000–$3,000+
Antimicrobial spray$75–$250
Deodorizing/fogging$50–$150
Duct sealing$250–$1,000+
UV light installation$300–$700+
Filter upgrade$100–$250

Air vent cleaning cost: Scams to watch out for

HVAC technician wearing gloves and a face mask cleaning an air vent in a professional setting.

If you’ve ever Googled “vent cleaning near me,” chances are you’ve seen those tempting $99 whole-house specials. 

Sounds like a deal, right?

Not so fast.

Most of the time, those ultra-cheap offers are just a foot in the door. That’s because once the technician shows up, the price suddenly balloons, and now you’re being told your vents are full of mold, dead rodents, or “dangerous levels of dust.” 

And they’ll then try to upsell you hundreds or even thousands of dollars in extra services.

Here’s what a homeowner posted about one such scam on Reddit:

“We had some guys come in with that clean your HVAC for $99 thing. Well 99 turned into 400, which then recommended a cleaning of the mold, and installing a UV light.”

 — Most_Bag494, Reddit /r/Homeowners

Here are some common vent cleaning scams you should watch out for

  • Bait-and-switch pricing: The $99 is just to get in the door. Nothing is really included.
  • Mold discovery scare tactic: They tell you there’s mold, even if there isn’t.
  • Fake before/after photos: They show you stock images to justify extra charges.
  • Vague service descriptions: Basic cleaning could mean a quick vacuum and nothing more.
  • Cash-only payment or no invoice: Big red flag.

Here’s how to protect yourself

  • Ask for the full price up front, including how many vents are covered.
  • Know what mold in air vents and ducts really looks and feels like.
  • Get a written estimate before work starts.
  • Ask if they’re NADCA certified (National Air Duct Cleaners Association).
  • Check reviews on Google or Yelp, especially 1-star ones.
  • Walk away from high-pressure sales tactics.

What does a legit vent cleaning include?

According to NADCA, a proper cleaning should involve:

  • All supply and return ducts
  • Main trunk lines
  • Air handler/furnace components (like blower motor and coils)
  • High-powered vacuum system with HEPA filter
  • Brushes or agitation tools to loosen debris

In short: If a company can’t explain exactly what they’ll do, or avoids your questions, that’s a sign to keep shopping.

Clean-Air-Technologies's Logo
Angies Super Service
Accredited Business
Aeroseal

Schedule Your Free Estimate Today

Contact us to improve your indoor air
quality with our expert cleaning services in NJ.

Final words

By now, you know how much does it cost to get your vents cleaned in New Jersey. You also know how much you can expect to pay based on the pricing method of the cleaning company.

Now, at this point you might wonder: Is vent cleaning actually worth it with all those big-ticket costs?

The honest answer: Yes, but only if you need it, and only if it’s done right.

You see, vent cleaning is not a magic fix, but it’s not useless either. 

Vent cleaning won’t fix every issue in your home. It won’t replace your HVAC system. And it won’t instantly cure your allergies.

But it is absolutely worth it if:

  • You haven’t cleaned your vents in 5+ years,
  • You’ve recently renovated,
  • You have pets, asthma, or a mold/pest history.

Got more questions or want to get your vents cleaned by seasoned professionals?

You can get in touch with us!
At Clean Air Technologies, we are vent and duct cleaning experts with about three decades of experience serving all of New Jersey. And we’ve got all your HVAC cleaning needs covered on a budget. 

Frequently asked questions about air vent cleaning price 

Young woman adjusting the thermostat in a cozy, bright living room with clean air.

What’s the average cost to clean vents in 2026?

The national average is around $500, but pricing depends on the size of your home, the number of vents, and your location. Most homeowners end up paying in the range of $350-$700 for full-home vent cleaning.

Are those “$99 vent cleaning” ads legit?

Usually not.

They’re often bait-and-switch offers. The company quotes $99 to get in the door, then adds on hidden charges for each vent, return, or extra “services.”

Always read reviews and ask for full pricing upfront.

Can I clean my vents myself and save money?

You can clean vent covers and the first few feet of duct with a vacuum and brush.

But deep duct cleaning (especially if there’s mold, pests, or years of dust) needs pro equipment and know-how.

DIY is fine for upkeep, not full system cleaning.

How long does vent cleaning take?

A proper full-home cleaning usually takes 2 to 4 hours, depending on the size of the home and how dirty the system is.

Note: Beware of companies that finish in 30 minutes as they’re likely rushing or skipping key steps.

What certifications should a vent cleaning company have?

You should look for the following: