Clean-Air-Technologies's logo

A Complete Step-By-Step Mold Remediation Process In New Jersey

If you’ve just found mold in your home, you’re probably thinking two things right away:

How do I get rid of this the right way?

And even more importantly, how do I make sure it doesn’t come back?

Now, before we begin, let me first tell you this isn’t something you should panic about. 

A lot of homes in New Jersey run into this problem, and they get rid of it entirely. 

The problem is, when you search online, the advice usually goes one of two ways. It either makes mold sound like something you can fix with a spray bottle and paper towels, or it throws so much technical jargon that it feels overwhelming.

But, this blog is different.

Here, I am going to walk you through the mold remediation process step by step. This is the same process that the Environmental Protection Agency recommends professionals to follow. 

So, let’s get started with it. 

Key takeaways 

  • Mold grows because of moisture, not dirt.
  • Professionals always fix the water source first.
  • Mold spores can spread easily if not contained.
  • Deep cleaning and drying prevent mold from coming back.
  • DIY remediation is risky and often ineffective.
  • Mold prevention is cheaper than remediation. 

What is mold remediation?

For starters, mold remediation is the professional process of finding, removing, and preventing mold growth inside a home. And it isn’t just just about scrubbing a stain off the wall as remediation focuses on removing moisture, which is the root cause of mold.

You see, when mold appears, it usually means something has been wet for too long. So, remediation begins by identifying the moisture source, be it a leak, humidity, or water damage.

The affected area is then carefully contained so mold spores don’t spread through the air. Also, contaminated materials are removed, surfaces deeply cleaned, and everything is thoroughly dried.

This is similar to mold removal in air ducts, but it covers your entire home and not just HVAC components. 

Clean-Air-Technologies's Logo
Angies Super Service
Accredited Business
Aeroseal

Schedule Your Free Estimate Today

Contact us to improve your indoor air
quality with our expert cleaning services in NJ.

Here’s the complete mold remediation process followed by professionals in New Jersey

Professional mold inspection and damage assessment on indoor wall in New Jersey home

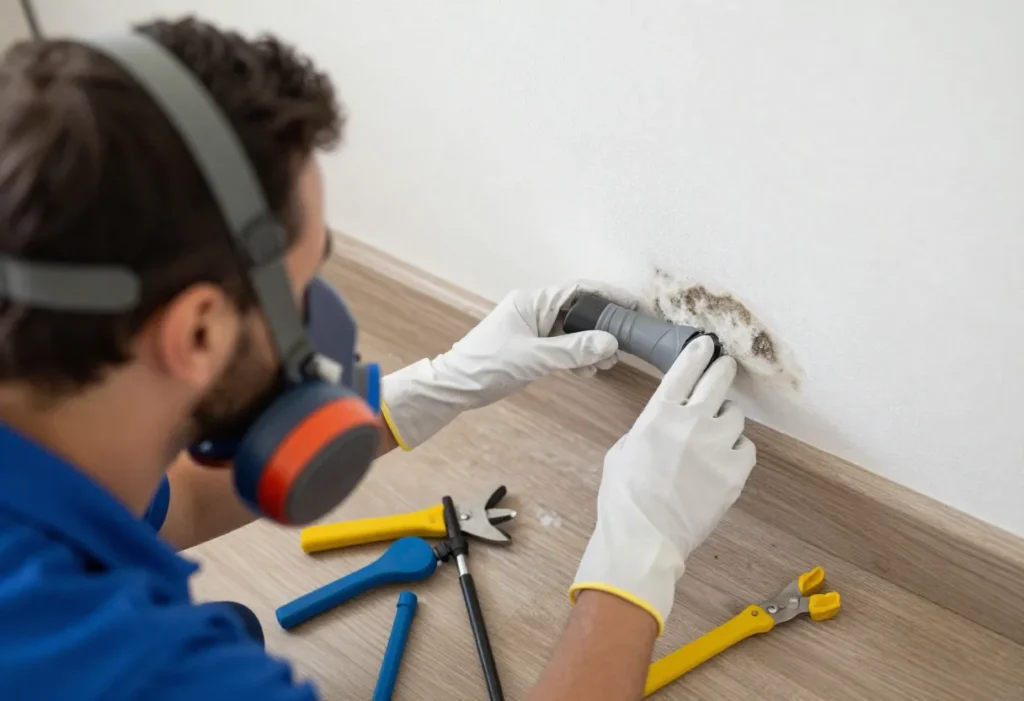
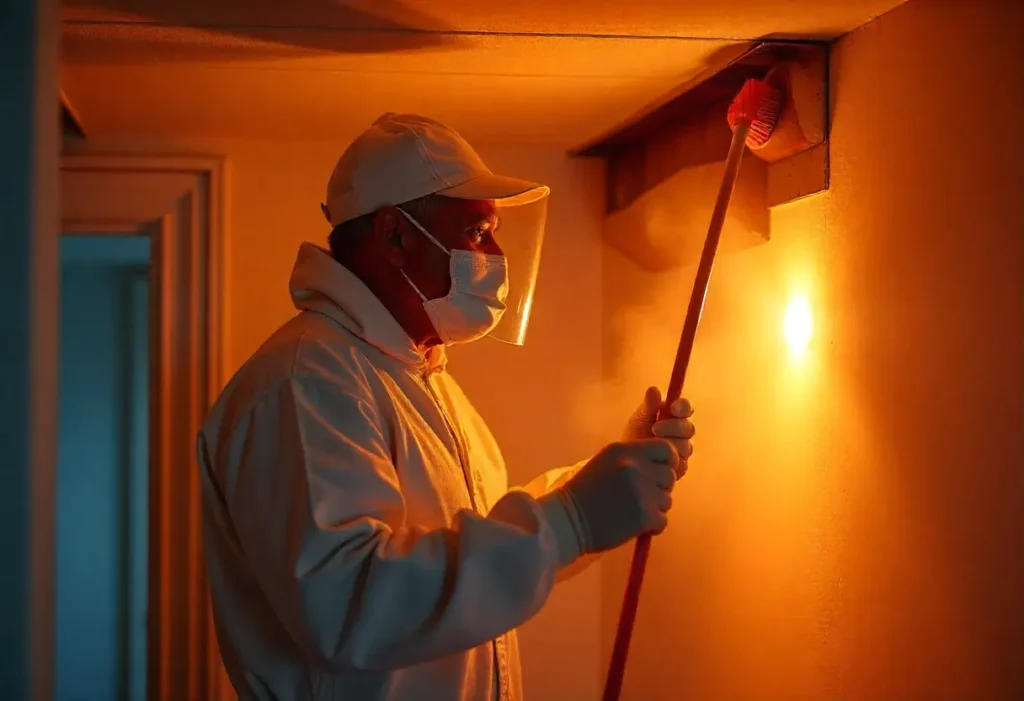
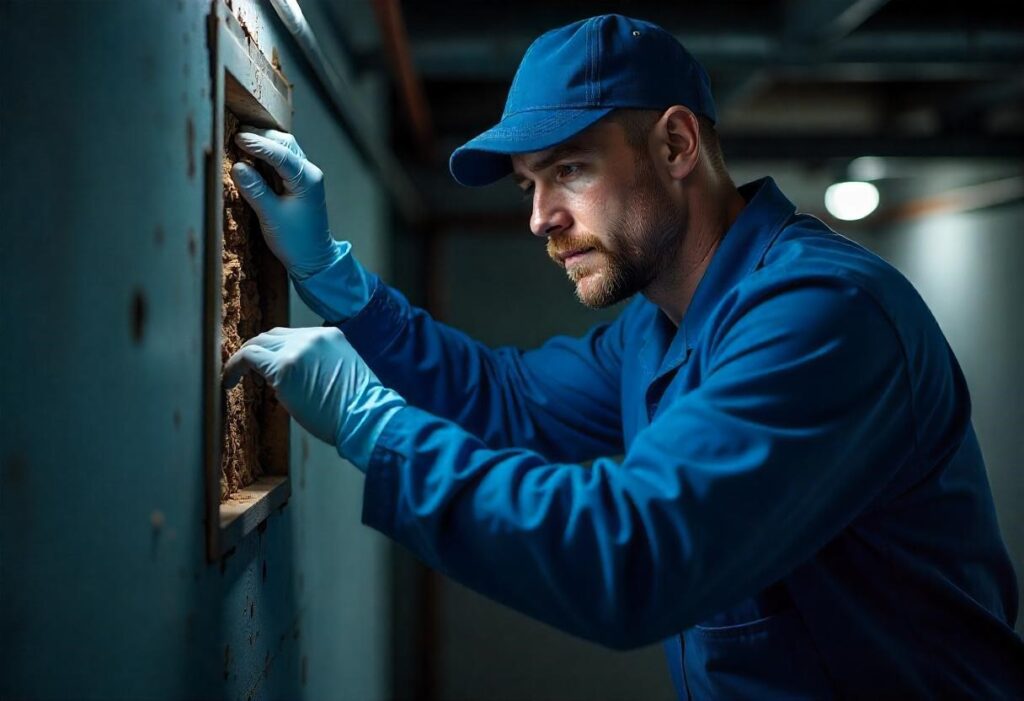
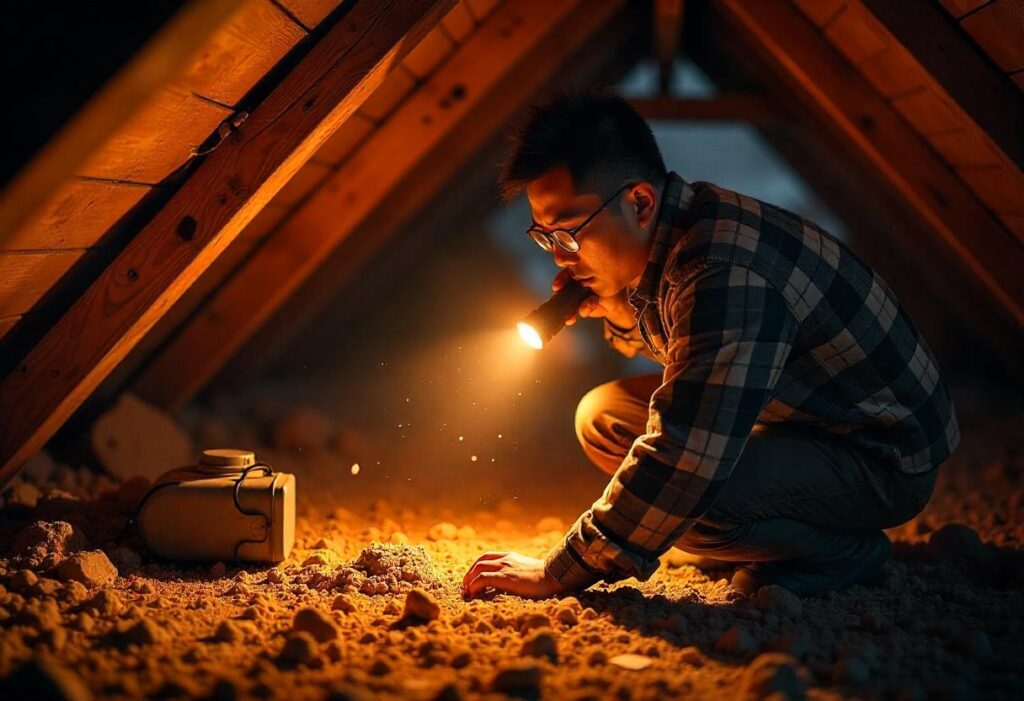
Step 1. Mold inspection and damage assessment

The first step of mold removal process involves professionals figuring out what extent of mold damage you’re dealing with.

That’s because when you spot mold, it’s usually just a small stain on a wall or ceiling. But what you see is often only part of the story. 

Mold has a way of spreading quietly behind drywall, under flooring, or inside insulation.

A proper inspection looks at where mold is visible and also where it might be hiding. Here, professionals check moisture levels, test the walls, and identify the source of the problem.

This step is important because it defines everything that comes next. If you don’t understand the full scope of the problem, you can’t fix it the right way.

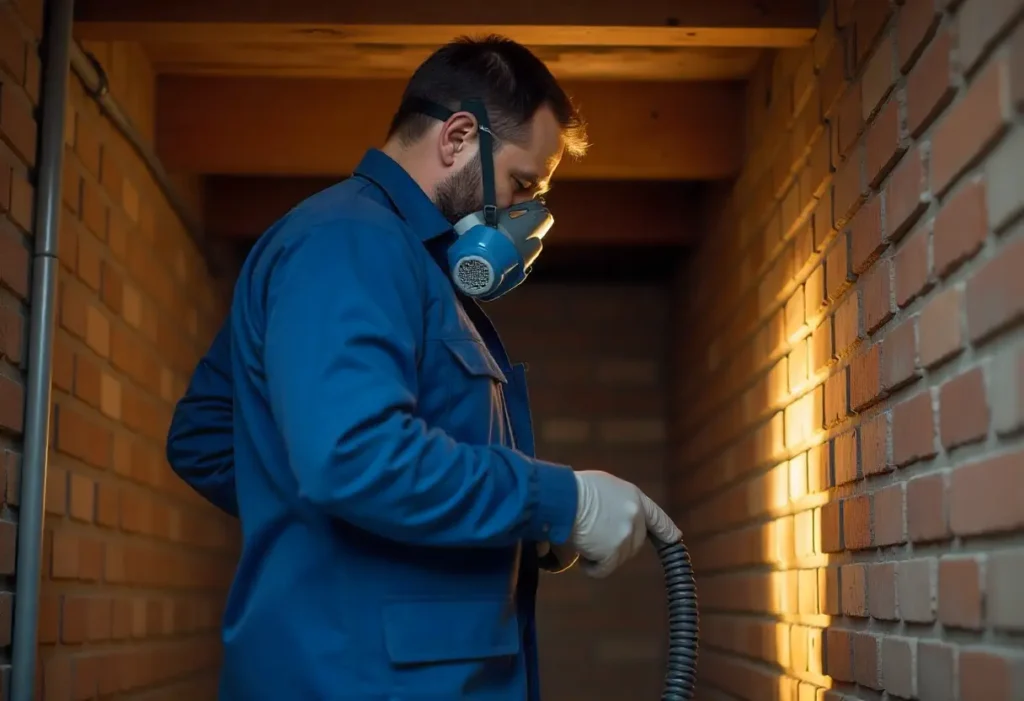
Step 2. Fixing the moisture problem 

At its very basic mold is a moisture problem. It doesn’t grow because a home is dirty, but it grows because something is wet or has been wet for too long.

So, finding and fixing the moisture source is one of the essential mold removal steps. Here, professionals focus on fixing a plumbing leak, sealing foundation seepage, repairing a roof issue, improving ventilation, or lowering indoor humidity.

Now, since high indoor humidity is also a part of the problem, professionals might also suggest you get an HVAC system cleaning. The idea is to ensure your HVAC system works efficiently and humidity levels are under control. 

I suggest you don’t skip this step, as skipping might cause mold remediation to fail. That’s because even if you remove every visible trace of mold, if moisture is still present, mold will return.

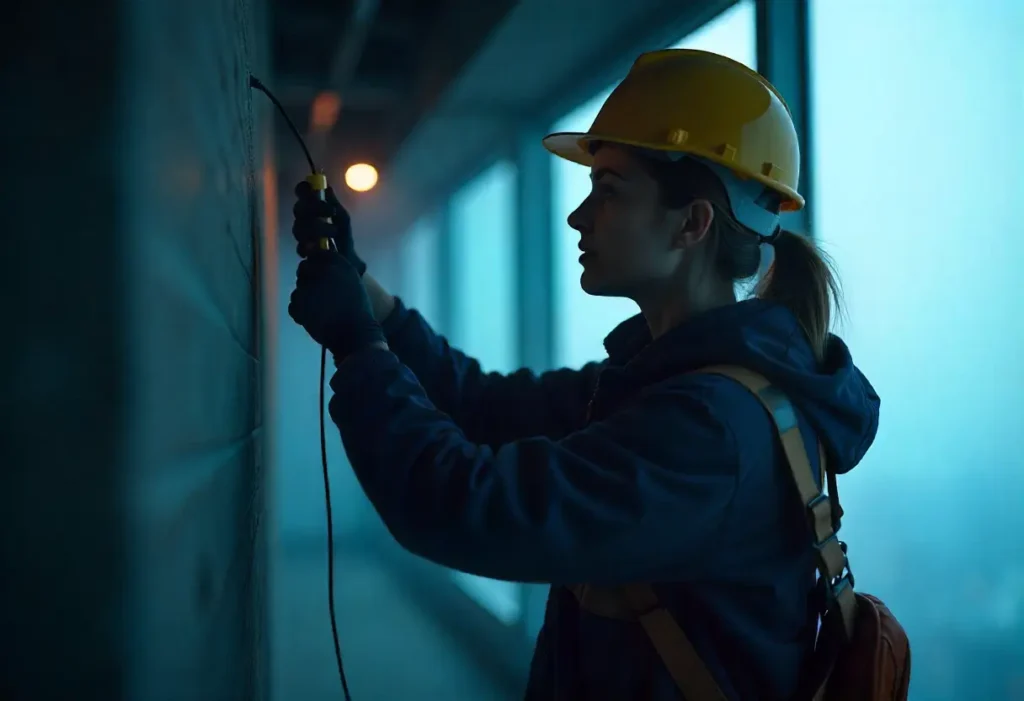
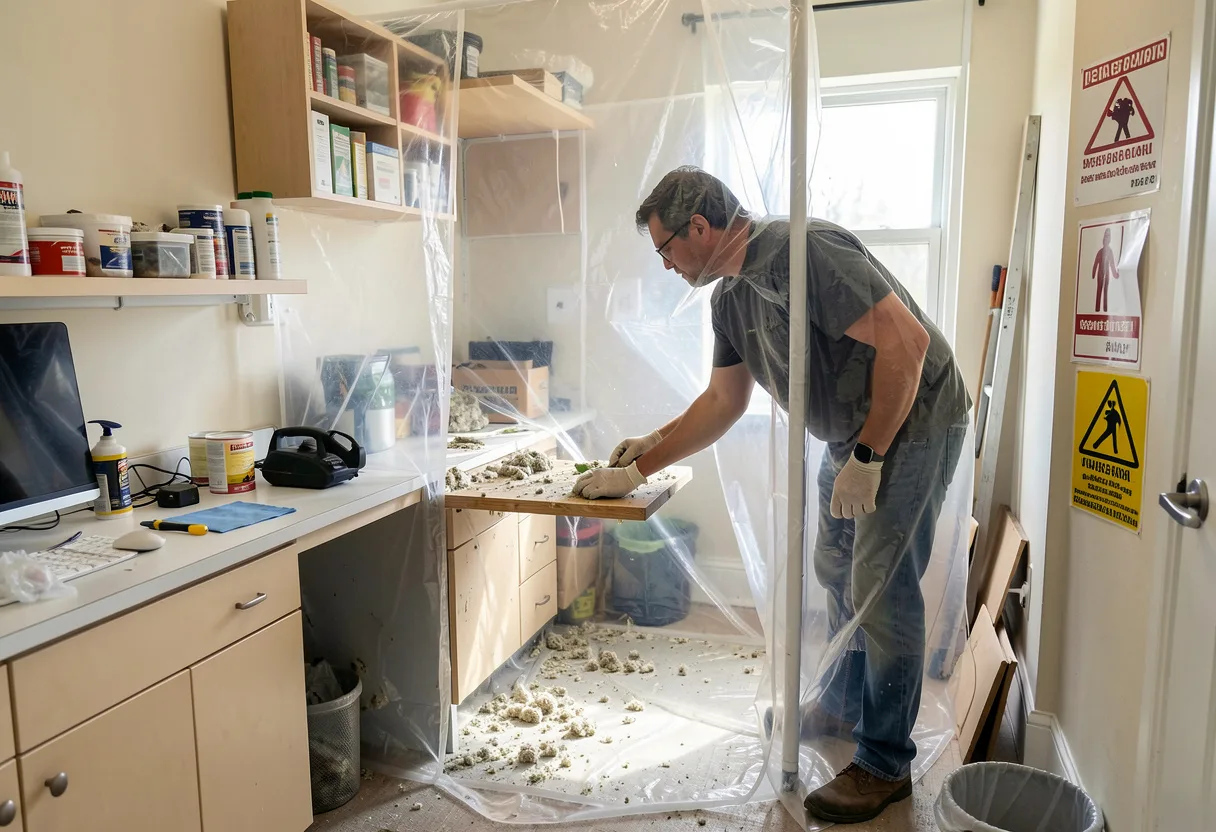
Step 3. Containing mold spores from spreading

This is the step where the actual mold remediation process starts. 

You see, when mold is disturbed, it releases microscopic spores into the air. You can’t see them, but they travel easily. 

And without containment, those spores can spread to other parts of your home.

This is why professionals seal the affected area before mold removal begins. They use plastic barriers, sealed doorways, and controlled entry points to isolate the space. 

Here, the goal is to keep the mold spores contained and protect the rest of your home while the work is being done. 

It is a critical safety step that prevents a small issue from becoming a much larger one.

Step 4. Cleaning and controlling the air

After the affected area is sealed off, professionals clean the air inside that space.

And to do so, they use special air machines with strong filters (called HEPA filters) that capture these tiny particles. These machines pull air in one direction so spores don’t escape into the rest of your home.

Think of it like vacuuming the air while mold removal is underway. This step keeps mold from spreading to hallways, bedrooms, or your HVAC system. 

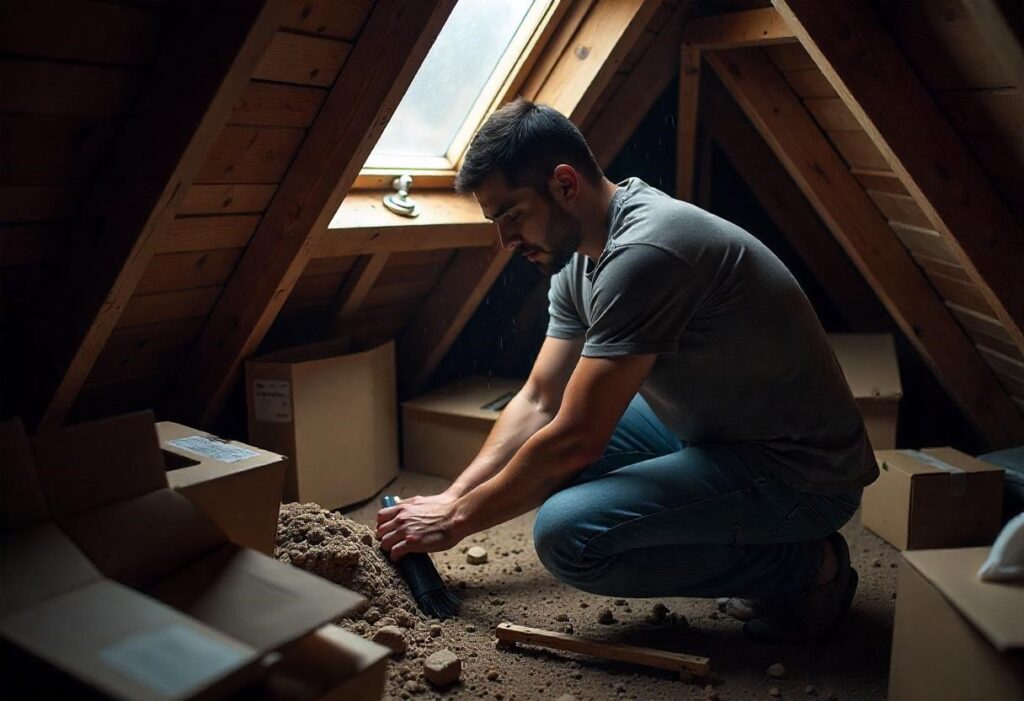
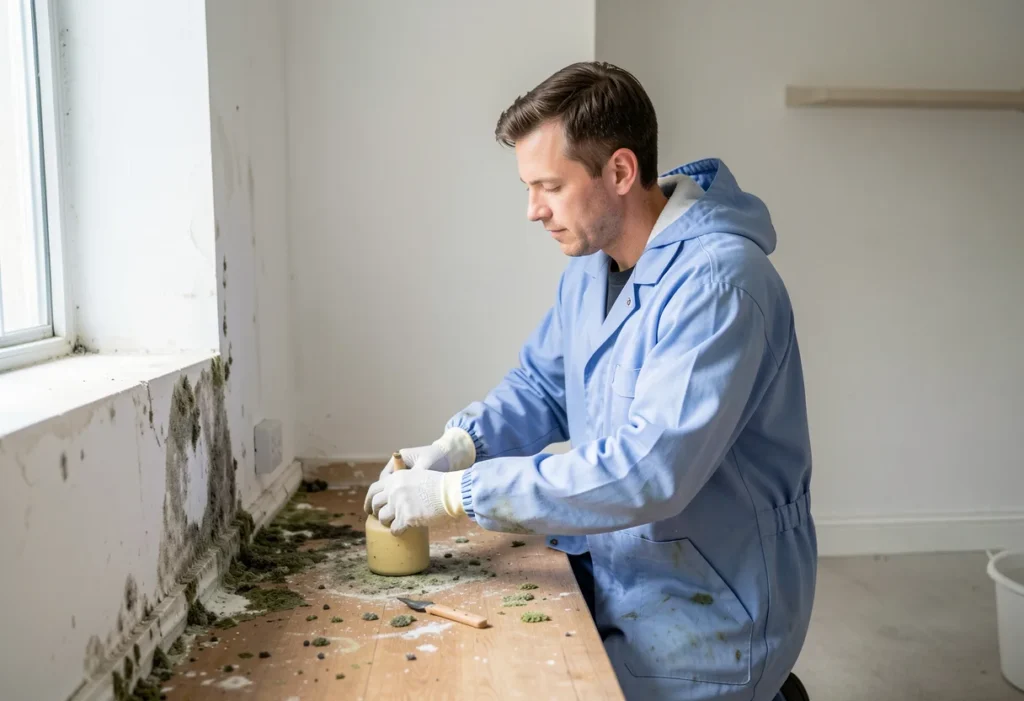
Step 5. Removing mold-contaminated materials

Not everything can be cleaned.

Materials like drywall, insulation, carpet padding, ceiling tiles, and some soft wood products are porous. This means mold doesn’t just sit on the surface, it grows into the material.

Once that happens, wiping the outside won’t fix it.

In these cases, professionals go about tearing off mold contaminated materials and carefully removing them. They are sealed in heavy bags and taken out of the home safely to prevent spreading spores.

This step might feel like a lot. But removing damaged materials is often the only way to solve the problem.

Step 6. Detailed cleaning of all remaining surfaces

Cleaning mold from wall during mold remediation process in New Jersey home

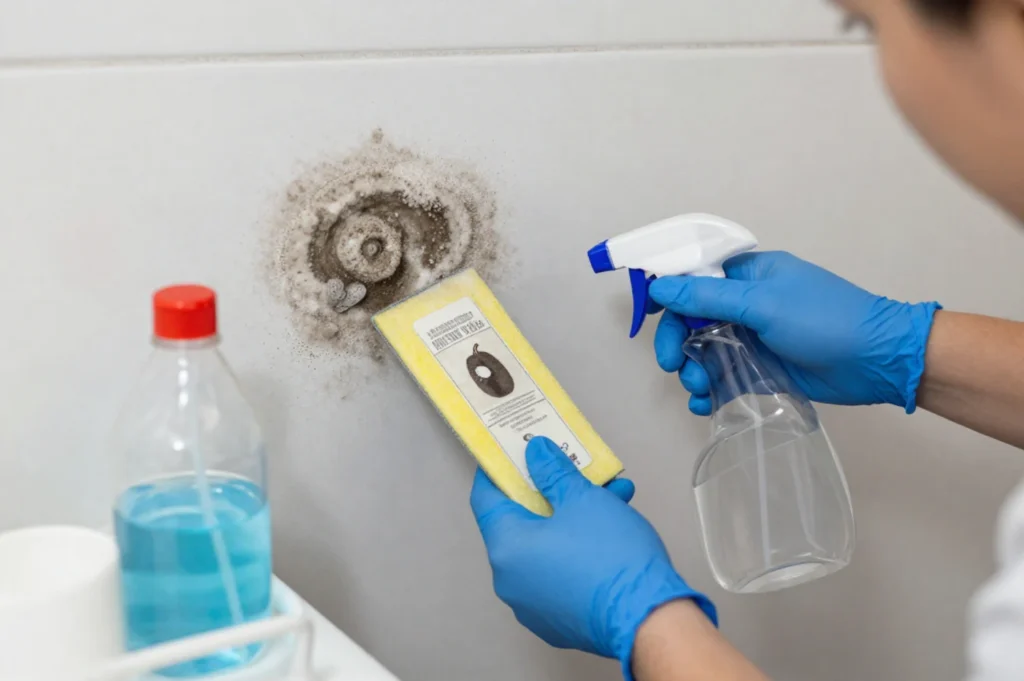
Once damaged materials are removed, you shouldn’t assume that it’s all done. In fact, this is where the deep cleaning really begins.

Here, every exposed surface inside the contained space is carefully cleaned. This includes framing, subfloors, and any solid materials that remain.

Professionals use a HEPA vacuum cleaner to capture fine dust and mold particles. Then they physically wipe and scrub surfaces using specialized cleaning solutions. 

This isn’t just spraying something and walking away. Instead, it’s hands-on, detailed work.

But why is this process so thorough, you might wonder?

Well, that’s because even after removal, tiny spores and debris can still linger. And if they aren’t cleaned properly, they can settle and grow again if moisture returns.

Step 8. Drying and dehumidification

Now comes one of the most important part, which is drying everything completely.

You see, even if your household materials feel dry to the touch, moisture can still be trapped inside walls, framing, or concrete. And this hidden dampness is exactly what mold needs to grow back.

This is exactly why using commercial dehumidifiers and high-powered air movers is a part of any professional mold remediation process. It helps pull moisture out of the air and building materials. 

Also, moisture levels are monitored carefully during this stage. The goal here is to bring moisture levels back to normal and stable.

Step 9. Final cleaning and containment removal

Once everything is dry, the area goes through one more round of cleaning.

During this step, surfaces are wiped down again, floors are vacuumed, and any remaining dust or fine particles are removed.

Only after this does the containment come down.

And this is done very carefully.

By the end of this step, your space feels clean, dust-free, and fresh. 

This is where you’ll usually notice the difference. The musty smell should be gone by now and the air should feel lighter.

Step 10. Post-remediation verification 

Before you rebuild anything, the earlier mold removal steps need to be re-checked.

This step is all about confirmation.

Here, your home is carefully inspected to make sure:

  • No visible mold remains
  • Moisture levels are back to normal
  • The original water problem has been corrected

In some cases, additional air or surface testing is also done for peace of mind.

Step 11. Repair and rebuild

If drywall, insulation, or flooring was removed during the mold remediation process, this is the stage where you’ll rebuild them.

But here’s what’s important: Rebuilding only happens after the environment is confirmed safe and dry. Otherwise, you risk sealing moisture back inside the walls and starting the cycle all over again.

Here are all the mold removal steps in short: 

StepWhat HappensWhy It Matters
1. InspectionCheck where mold is and where moisture is coming fromUnderstand the full problem before fixing it
2. Fix MoistureRepair leaks, improve ventilation, reduce humidityMold will come back if moisture isn’t fixed
3. ContainmentSeal off the affected area with plastic and barriersKeeps spores from spreading to the rest of the home
4. Air ControlUse HEPA filters and negative air pressurePrevents spores from moving into clean areas
5. Protective GearWear masks, gloves, suits, and eye protectionKeeps workers safe and stops spreading spores
6. Remove MaterialsTake out moldy drywall, insulation, carpet paddingPorous materials can’t be cleaned; mold grows inside them
7. Deep CleaningScrub and HEPA-vacuum remaining surfacesRemoves leftover spores and dust
8. DryingUse dehumidifiers and air movers; monitor moisturePrevents mold from regrowing
9. Final CleaningWipe surfaces again and remove containmentLeaves the space clean, dust-free, and safe
10. VerificationInspect, check moisture, and sometimes testConfirms mold is gone before rebuilding
11. RebuildReplace drywall, insulation, floors, and finish workRestores the home safely after mold is removed

How long does the mold remediation process take in New Jersey?

The honest answer is: It depends on how big the problem is and how wet the materials are.

For a small, contained area, like a section of drywall in a bathroom or a small basement spot, remediation can be completed in 1 to 2 days.

But if you’re dealing with a larger basement section or a full room, it usually takes 2 to 4 days.

Also, bigger projects involving multiple rooms or heavy moisture can take 4 to 7 days or more.

A good remediation team focuses on doing it thoroughly and not quickly. So, if they take an extra day to dry properly, it is always better than doing the job twice.

Here’s how long mold remediation process typically takes in short:

Project sizeTypical time
Small localized area1-2 days
Medium basement or room2-4 days
Large or multi-area projects4-7+ days

Note: Drying and verification often determine the total duration.

How much does mold remediation cost in New Jersey?

The next big question is cost.

Mold remediation in New Jersey can vary quite a bit because every situation is different. The size of the affected area, how much material needs to be removed, and how long equipment must run all play a role.

For a small, contained area, you can expect the cost to range between $800 and $2,000.

But if a full room or a basement section is involved, you’re typically looking at $2,000 to $4,500.

Also, larger or multi-room projects can range from $4,500 to $10,000 or more, depending on complexity.

The biggest cost factors include:

  • How much drywall or insulation must be removed
  • How extensive containment needs to be
  • How long drying and air filtration equipment must run

Here’s how much mold remediation costs in short: 

Project typeTypical NJ cost range
Small contained area$800-$2,000
Single room or basement section$2,000-$4,500
Large or multi-room remediation$4,500-$10,000+

Note: You should never DIY the mold remediation process

Professional mold remediation technician cleaning mold from wall surface

Some mold problems might look small, but the truth is that mold can be tricky and dangerous. That’s why you should never try to handle it yourself.

The mold might look like a tiny spot, but it might have spread inside walls, ceilings, or your HVAC system. Also, you don’t know where the moisture is coming from, which is the root cause of mold. 

Now, trying to clean mold yourself in these situations can make the problem worse, spread spores through your home, or even harm your health.

Bonus: Here’s how to prevent mold after remediation

  • Keep basement humidity below 50%
  • Use dehumidifiers during summer
  • Fix grading and drainage outside
  • Keep gutters clean
  • Ensure bathroom and kitchen exhaust fans work properly
  • Get HVAC systems properly cleaned every once in a while
Clean-Air-Technologies's Logo
Angies Super Service
Accredited Business
Aeroseal

Schedule Your Free Estimate Today

Contact us to improve your indoor air
quality with our expert cleaning services in NJ.

Final thoughts 

I am sure by now you know what a typical mold remediation process in New Jersey looks like. Also, you know the ideal timeline and cost of mold removal. 

You see, mold remediation might seem like something you could handle yourself. But the truth is that it’s not a DIY job. 

Mold can hide in walls, ceilings, HVAC systems, and other hard-to-reach places. And disturbing it without the right tools, protective gear, and experience can actually make the problem worse.

Got more questions or want an air duct cleaning in NJ to prevent mold in your HVAC system? 

You can get in touch with us!

At Clean Air Technologies, we are seasoned NADCA-certified air duct cleaning professionals with three decades of hands-on duct cleaning expertise. And we’ve got all your residential and commercial duct cleaning needs covered on a budget. 

FAQs about mold remediation process

How long does mold remediation usually take in New Jersey homes?

In most New Jersey homes, mold remediation takes anywhere from one to five days. 

Small, localized areas can often be finished in one or two days. 

Larger projects, such as basements or multiple rooms, usually take longer because proper drying and air filtration are required. 

The timeline also depends on how wet the materials are and whether repairs are needed.

Is mold remediation the same as mold removal or cleaning?

No, mold remediation is much more than simple cleaning. 

Mold removal usually includes wiping or spraying visible mold. 

At the same time, remediation focuses on stopping the entire problem. This includes fixing moisture issues, sealing off the area, removing contaminated materials, cleaning remaining surfaces, and drying everything properly. 

Can I safely do mold remediation myself?

You can safely handle very small surface mold, such as a small patch on bathroom tile or a sealed wall. 

However, if mold is inside walls, ceilings, insulation, or spreads over a larger area, DIY remediation is not recommended. 

Disturbing mold without containment can spread spores through your home.

Do I need mold testing before or after remediation?

Mold testing is not always required, but it can be helpful in some situations. 

The most important step is a detailed inspection to identify the moisture source and affected areas. 

After remediation, some homeowners also choose a clearance or verification check for peace of mind. 

Will mold come back after remediation?

Mold can return if the moisture problem is not fixed. 

Proper remediation removes contaminated materials and cleans the affected area, but moisture control is what keeps mold from growing again. 

Leaks, high indoor humidity, poor ventilation, or foundation seepage can cause repeat issues.

This is why you should monitor humidity, repair water problems quickly, and keep basements and bathrooms well ventilated.

Is it safe to stay in the house during mold remediation?

In many cases, yes, you can remain in the home while remediation is taking place. 

The affected area is sealed off using containment barriers and filtered air systems to prevent spores from spreading. 

However, if large areas are involved or someone in the home has asthma, allergies, or a weakened immune system, it may be safer to stay elsewhere temporarily. 

How To Vent A Portable Air Conditioner Without A Window? 7 Easy Methods

Got a portable air conditioner only to realize there’s no convenient window to vent it out of?

Well, you’re not alone. 

This is one of the most common headaches for renters, condo owners, and homeowners with interior bedrooms or unusual layouts.

After all, you’ve got to vent the hot exhaust somewhere. Otherwise the unit just moves heat and humidity around your home and can cause moisture problems. 

The good part is there are several ways you can get that hot air outside without a standard window sash; plus you can easily do vent cleaning too. 

Some of the options are temporary and renter-friendly; others are semi-permanent or permanent and work great for homeowners. 

In this blog, I will walk you through 7 ways you can vent a portable air conditioner. These are all DIY-friendly and suited for typical New Jersey homes. 

So, let’s get started. 

Key takeaways:

  • A portable AC should vent outside, or it won’t cool the room.
  • You can vent it through a sliding door, a DIY door panel, or a small wall hole depending on your home and budget.
  • The best vent performance comes from a permanent wall vent with an exterior hood.
  • Renters should use easy no-damage options like sliding-door kits.
  • Never vent into attics, crawlspaces, or shared vents because it causes moisture, mold, and safety issues.
  • If you truly can’t vent outside, hoseless or evaporative coolers work, but only in dry climates. They are not ideal for New Jersey climate.

7 DIY-friendly ways to vent a portable air conditioner   

1. Sliding-door vent kit (fast and renter-friendly option)

Woman checking indoor humidity levels on her smartphone while sitting near a portable air purifier in a modern living room.

If you’re renting, or if you want a quick, easy, and non-permanent solution to vent your portable air conditioner, the sliding-door vent kit is one of the best choices. 

It is super simple to install and can be taken down without leaving any marks or damage. This is perfect for renters or those who need something temporary. 

The kit works best particularly for homes with sliding glass doors or patio doors, which are common in apartments or homes with access to outdoor spaces.

How does this kit work? 

The sliding-door vent kit is designed to fit into the gap between your sliding door and the fixed panel (or in the track of the door). 

This creates a sealed space for your AC exhaust hose to safely vent the hot air outside, keeping your indoor environment cooler and drier.

How to vent a portable air conditioner using this kit?

  1. Measure your door: Start by measuring the height and width of the gap between the sliding door and the fixed panel. This ensures you buy a kit that’s the right size, and you might need to trim the kit for a perfect fit.
  2. Clean the track: Before you start, clean the track and surrounding surfaces. This helps ensure a good seal later.
  3. Install the adjustable panel: Insert the adjustable panel into the track as per the kit instructions. Make sure the door can still close securely against it.
  4. Attach the AC exhaust hose: The kit will come with a round hole where you’ll attach your AC’s exhaust hose. Clamp it into place and secure it to the adapter.
  5. Seal the gaps: Use weatherstripping tape around the panel and door to prevent any drafts, air leaks, or pests from sneaking in. You can even add a locking bar for extra security if you’re worried about safety.
  6. Position your AC: Place your portable air conditioner near the vent panel, and keep the exhaust hose as short and straight as possible to avoid any loss in performance.
Clean-Air-Technologies's Logo
Angies Super Service
Accredited Business
Aeroseal

Schedule Your Free Estimate Today

Contact us to improve your indoor air
quality with our expert cleaning services in NJ.

What are the pros and cons of using this kit? 

Pros:
  • There are no permanent changes to your door, which makes it a renter-friendly option.
  • The kit is affordable with prices ranging from $20 to $120, depending on quality.
  • Quick and easy installation, as it takes only 10-30 minutes.
  • Ideal for temporary fixes and quick setups.
Cons: 
  • There is slight energy leakage compared to a sealed wall vent, but this is fine for temporary use.
  • Security concerns as sliding doors can be less secure than walls, so consider adding a lock bar.
  • Hose should be kept short and straight for best performance; uneven hose placement can lead to your AC blowing out smoke.

What’s the installation cost and time?

  • The kit costs between $20 and $120
  • Installation takes between 10-30 minutes

2. Door panel/pet-door style cutout (most affordable option)

Woman assembling or adjusting a portable electric heater on the floor of a modern living room.

For those of you who’ve got a solid door (like a standard wooden door) rather than a sliding door, creating a door panel is an affordable and low-tech solution. 

This is perfect if you’re looking for a simple way to vent your AC without having to buy a full kit.

Plus, this method is temporary and reversible if you don’t want to make any permanent changes to your door.

How does it work? 

This method involves cutting a hole in a piece of plywood or acrylic to fit the AC hose. You’ll then fit that panel into your door, creating a seal that prevents air leaks. 

It’s a simple DIY-friendly solution that gets the job done.

How to vent portable AC using this method?

  1. Measure the door: Measure the door opening to cut the panel to size. It should fit snugly inside.
  2. Cut the hole: Use a circular hole saw (typically 5-6 inches) to cut a hole in the panel that matches the diameter of your AC exhaust hose.
  3. Seal the panel: Once you’ve cut the panel, insert it into the door. Use weatherstripping or foam tape to seal around the edges, ensuring no air escapes.
  4. Attach the hose: Clamp the exhaust hose to the hole in the panel. You can add extra protection or a removable hood on the outside if desired to shield it from the elements.

What are the pros and cons of using this kit? 

Pros:
  • Low-cost option that’s cheaper than buying a full vent kit.
  • It is reversible, so If you don’t screw into the door, you can easily remove the panel when needed.
  • It is better than leaving the door open and it seals out more air and pests.
Cons:
  • Not as tidy as an installed wall vent.
  • There’s a security trade-off and you’ve got to make sure the door is securely fastened to prevent any break-ins.

What’s the installation cost and time?

  • Installation materials cost anywhere between $10 and $60
  • Installation takes anywhere between 30 and 90 minutes

3. Wall penetration and exterior Hood (permanent solution)

Indoor air vent unit placed beside a modern white sofa, showing typical home ventilation equipment in a living room setting.

For homeowners who are looking for a permanent, clean, and efficient solution, a wall penetration with an exterior hood is the way to go. 

This option gives you the most efficient and quietest airflow, with the least risk of condensation buildup. 

It’s a great choice if you want your portable AC to function at its best without worrying about frequent maintenance or efficiency drops.

How does this method work?

This method involves creating a hole in the wall and installing a vent sleeve with an exterior hood. 

The hose from your portable AC will connect directly to this sleeve, venting the hot air outside.

Also, the exterior hood will prevent pests and debris from getting into the system.

How to vent your AC using this method?

  1. Choose a location: Pick a spot that’s clear of wiring and plumbing. You should ideally place the vent higher than ground level to avoid water splash and moisture buildup.
  2. Locate studs and utilities: Use a stud finder and a wire detector to ensure you don’t cut into any important utilities. If you’re unsure, hire a professional.
  3. Cut the hole: Drill a pilot hole first, then use a hole saw or reciprocating saw to cut the wall to size.
  4. Install the sleeve and hood: Insert the sleeve through the wall from the inside, then fit the exterior hood and grille on the outside. Make sure it’s level and sealed tightly.
  5. Seal and insulate: Use silicone caulk outside and HVAC tape inside to seal any gaps. You can also fill the space around the sleeve with low-expansion foam for extra insulation.
  6. Connect the hose and test: Attach the AC exhaust hose to the sleeve, check for leaks, and make sure everything is sealed correctly.

This the best of all venting options, here’s why: 

  • The hose path is shortest, which ensures better efficiency and airflow.
  • It prevents pests and weather entry with the exterior hood.
  • It has a clean look as there’s no bulky vent kits or door panels.
  • It operates quietly since the AC has direct access to the outside air.

What’s the installation cost and time?

  • DIY installation costs between $80 and $250
  • Professional installation costs between $300-$900
  • Install takes between 2 and 6 hours (or longer if you’re repairing drywall or siding)

4. Drop ceiling plenum routing (great for offices and retrofits)

Woman sitting on a yellow chair with a laptop while a portable electric heater runs on a rug in a bright living room.

If you’re working in an office with a suspended drop ceiling, or in a home with an existing plenum that allows for venting, this can be an effective option. 

This method routes the AC exhaust hose into the plenum above the ceiling tiles, which then leads the hot air to the outside. It’s mostly used in office spaces or retrofits, and it is very efficient when done right.

However, if you’re using this method to vent a portable AC, there are two things you should be aware of: 

  • Local codes: Many local codes forbid venting into plenums unless specifically designed for exhaust, so be sure to check your local codes.
  • Moisture risks: Any condensation in the plenum can damage ceiling tiles, insulation, and other components.

How to vent your AC using this method?

  1. Check local code and talk to your building management: Before you proceed, confirm that venting into the plenum is allowed by local codes or building management.
  2. Install a ceiling lit: If venting into the plenum is allowed, use a ceiling kit designed to fit the tile opening and support the hose. Also,ensure the hose is short and doesn’t have any upward slopes.
  3. Consider condensate traps: To prevent moisture buildup, you might want to install a condensate trap or route the hose slightly downward.

What are the pros and cons of this method?

Pros: 
  • It offers a clean, hidden installation as hoses stay above the ceiling and out of sight.
  • Great for offices where cutting walls and installing exterior vents is not allowed.
  • It is a quick and reversible method as there are no structural changes to the unit or the building.
  • Allows temporary or short-term AC installations without exterior modifications.
Cons: 
  • Might violate local building codes as many areas forbid dumping AC exhaust into a return plenum.
  • Risk of moisture damage to tiles, wires, or insulation if condensation forms.
  • Improper plenum venting can disrupt building airflow balance.
  • Not suitable for residential attics as these are rarely designed to accept exhaust airflow.
  • There will be reduced efficiency if plenum airflow is stagnant or improperly vented.

What’s the installation cost and time?

  • Ceiling vent tile kit costs between $30-$120, while hose extensions and insulation costs another $10-$40
  • Installation takes 20-60 minutes, depending on ceiling height and accessibility

5. Existing exterior vents (don’t use this unless you’ve no other option left)

Portable air conditioner placed in a modern living room, showing how a unit operates indoors before venting the exhaust outside.

A lot of homeowners ask me if they can use existing vents, like the ones for their dryer or bathroom fan, to vent their portable air conditioner. 

Now, while it might seem like an easy shortcut, this is something I don’t recommend. 

You see, these systems are designed for very specific types of airflow and venting, which don’t align with the exhaust requirements of a portable AC unit. 

In fact, trying to share a vent between appliances can lead to serious issues.

Why should you not use this method? 

  • Backflow and blockages: Connecting your AC hose to a dryer vent or bathroom fan can cause backflow. Here, exhaust gases (including hot air) flow back into your home, which is dangerous and inefficient. Plus, lint from your dryer or moisture from a bathroom fan can build up in the hose, causing blockages.
  • Code Violations: Many local building codes forbid mixing exhaust systems because it can cause hazardous conditions. More so when there’s a chance of contaminating the air with carbon monoxide, dryer lint, or moisture.

When can this method really work?

If you really need to consider this option, I suggest you consult a professional first. 

A licensed contractor or HVAC specialist can tell you if it’s possible to use an existing vent. Also, they will tell you whether any modifications can be made to ensure it’s safe and compliant with local building codes. 

In most cases, the best option will still be creating a dedicated vent for your portable AC.

6. Short exterior runs to sidewalls with custom grille (semi-permanent option)

Siamese cat sitting beside a modern portable air device in a bright living room with large windows and indoor plants.

For homeowners looking for a semi-permanent solution, this method creates a short vent route to the outside of your home through a soffit, side wall, or another accessible area. 

This is an affordable and effective way to route the exhaust outside while keeping the setup tidy and neat.

How does it work?

This option is similar to the wall penetration method but is typically simpler and involves installing a small custom grille or louver on the outside of the building. And it works well if you want to avoid cutting a larger hole or making a major modification to your home.

How to vent a portable air conditioner without a window using this method? 

  1. Choose the location: Look for a spot on your exterior wall that’s close to your portable AC unit. Ideally, it should be a place that’s easy to access and not prone to getting blocked by plants, debris, or heavy rainfall.
  2. Drill a hole: Depending on where you’re venting, you’ll need to drill a small hole through your wall to fit the exhaust hose. This hole should be just big enough for the hose to pass through comfortably but small enough that it can be sealed properly.
  3. Install the grille or louver: Once the hole is made, you can install a custom grille or louver on the exterior of the building. The grille will protect the opening from debris and animals, while the louver will help to keep out rain and pests.
  4. Attach the hose: Connect the exhaust hose to the opening. You might need to use a short adapter to ensure a tight and secure fit. Also, use HVAC tape to seal the connection for extra security and to avoid air leaks.
  5. Seal and insulate: Seal any gaps between the hose and the opening using weatherstripping or foam insulation. This helps keep the hot air contained and prevents drafts from sneaking back into your home.

What are the pros and cons of this method?

Pros: 
  • It is less intrusive than cutting a large hole for a full wall vent.
  • It is customizable as you can install a small grille or louver that blends well with your home’s exterior.
  • It is a long-term solution, but it’s still easy to undo if needed.
Cons: 
  • You have to make sure that the hole you cut is properly sealed to prevent moisture from entering the home.
  • Weatherproofing is crucial. Without a good seal, water can easily enter the wall, causing potential damage and mold growth.
  • Vent length matters a lot here and you’ve to try to keep the hose short. Also, you’ve to avoid any unnecessary bends or curves to maintain efficiency.

What’s the installation cost and time?

  • Installation materials cost between $20 and $80, depending on grille and hose fittings
  • Installation takes 1-2 hours for a quick DIY job, but you need more time if you’re installing a custom grille

7. Use evaporative coolers or hoseless AC units (no venting needed)

Portable air conditioner placed on a wooden floor inside a room with wood-paneled walls.

If you live somewhere with a low-humidity climate or if you absolutely cannot vent your portable AC to the outside, there are alternative cooling systems available. 

These options, however, come with some important caveats that you should know about before deciding. 

Here are the cooling systems I am talking about and things you should know about these: 

A. Evaporative coolers 

Evaporative coolers, commonly known as swamp coolers, are an option for those who live in dry areas where humidity is low. 

These coolers work by evaporating water into the air, which helps cool the environment.

However, they require low humidity to function effectively, which means they’re not ideal for places like New Jersey, where the humidity can be very high during the summer months.

But, If you live in places like the south west, where humidity levels are lower, evaporative coolers can be a very energy-efficient and environmentally-friendly cooling solution.

B. Hoseless portable AC units

Some manufacturers claim to offer hoseless portable air conditioners that don’t require any venting at all. 

These units use advanced evaporation or thermoelectric technology to cool the air, but their effectiveness is limited.

How do they work? 

These units draw in air, cool it, and then circulate it within the room. However, they don’t vent the heat outside, so the cooling is usually not as efficient.

What are their limitations? 

These units are not true air conditioners in the sense that they don’t remove heat from the room. Instead. They simply recirculate the air, and often don’t cool the room effectively in warm and humid conditions. 

You can expect them to work poorly in more humid environments like New Jersey.

TL;DR, here’s how to vent a portable air conditioner without a window:

MethodTypeDifficultyPermanent?Best ForCostInstall Time
1. Sliding-door vent kitDoor-based kitEasyNoRenters, quick setups$20-$12010-30 min
2. Door panel cutoutDIY panelModerateNoLow-budget setups$10-$6030-90 min
3. Wall penetration + exterior hoodWall ventHardYesHomeowners wanting best performanceDIY: $80-$250 / Pro: $300–$9002-6 hrs
4. Drop ceiling plenumCeiling routingModerateNoOffices, retrofits$40-$16020-60 min
5. Existing exterior ventsShared ventRiskyNoOnly last-resort casesVariesVaries
6. Short exterior run + custom grilleSmall wall ventModerateSemiHomeowners wanting lighter install$20-$801-2 hrs
7. Hoseless optionsAlternative coolingEasyN/ANo-vent scenariosVariesNone

Bonus: Follow this safety checklist before venting a portable air conditioner 

  • Never vent into an attic or crawlspace as moisture can cause mold and rot.
  • Check for hidden utilities before cutting walls/ceilings. You can use a detector or call in a professional.
  • Don’t block dryer vents or bathroom vents with AC exhaust.
  • Secure sliding door/seal wall penetrations to prevent pests and drafts.
  • Consider permits too as some towns require permits for new exterior penetrations. 
  • Watch for condensation, and if you see water stains near vents, pause and reevaluate the routing.

You might also want to read: How Much Does HVAC UV Light Installation Cost In New Jersey?

Clean-Air-Technologies's Logo
Angies Super Service
Accredited Business
Aeroseal

Schedule Your Free Estimate Today

Contact us to improve your indoor air
quality with our expert cleaning services in NJ.

Final thoughts

As you can see, there are plenty of ways you can vent a portable air conditioner without a window. 

If you want perfect AC performance and you own the space, go for the wall penetration method. 

But, if you’re renting or want a quick fix, the sliding-door kit is a smart inexpensive choice. 

Plus, there are no vent options too if you’ve got absolutely nowhere to vent. 

Got more questions or need assistance with HVAC upkeep? 

You can get in touch with us!

At Clean Air Technologies we’re seasoned HVAC professionals with three decades of expertise in New Jersey. And we’ve got all your HVAC needs covered on a budget. 

Frequently asked questions about venting portable AC 

Can I vent the portable AC into the attic?

No, don’t vent your portable AC into the attic. 

Attics aren’t designed to handle the hot, humid exhaust air that portable ACs produce. When that moisture gets trapped up there, it can soak into insulation, create mold, and even weaken wood or drywall over time. 

Plus, the heat you’re dumping into the attic can radiate right back into your home, making your AC work harder. 

It might seem like a quick solution, but it can quickly turn into a very expensive repair job.

Always vent your AC directly outdoors, and never into a closed space.

Will a sliding-door kit reduce efficiency?

Yes, slightly, but not enough to worry about for most people. 

Sliding-door vent kits aren’t as airtight or insulated as a permanent wall vent, so you might get a bit of warm air sneaking in around the edges. 

That said, if you apply weatherstripping and seal it well, these kits work surprisingly well for apartments and temporary setups. They’re renter-friendly, easy to install, and good for everyday use during the summer. 

If you want maximum efficiency, a wall penetration is the top option, but a well-installed sliding-door kit is absolutely fine for most situations.

My hose keeps dripping, what’s wrong?

If your portable AC hose is dripping, it almost always means condensation is pooling inside the hose. 

This usually happens when the hose has a sag, dip, or upward curve that traps moisture instead of letting it flow out. 

To fix it, reroute your hose so it runs in a smooth, gentle downward slope toward the vent with no low points. 

You might need to support the hose with hooks or zip ties. Also, check that the hose is tightly connected and sealed. 

Moisture should drain or evaporate properly once the airflow path is corrected.

Are hoseless portable ACs real?

Yes, they exist, but they don’t work the way most people hope. 

Hoseless portable AC units typically rely on water evaporation or thermoelectric cooling, which means they don’t actually remove heat from the room like a real air conditioner does. 

Instead, they cool a small amount of air while still releasing heat back into the space. 

In dry climates they can help a bit, but in humid places they can make the room feel muggier.

Think of them more like improved evaporative coolers, not actual AC replacements. They’re fine in specific conditions, but not a full substitute.

7 Amazing Dryer Vent Cleaning Benefits For New Jersey Homes

Our dryers get a lot of use, especially when those chilly New Jersey winters hit.

But have you ever thought about what’s happening behind the scenes in the dryer vent? 

You might not give much thought to it until something goes wrong, like your clothes taking longer to dry or you smell something burning. 

Moreover, since these signs seem normal, a lot of people ignore them too. 

But here’s the thing: These are signs of clogged or dirty dryer vent. And from fire hazards to higher energy bills and dryer breakdowns, they can lead to serious issues, sometimes even putting your home at risk. 

Now, surprising as it might sound, you can prevent most of these problems by simply cleaning your dryer vent regularly.

After all, not only does dryer vent cleaning keep your home safer but can also save you time, money, and hassle.

In this blog, I’ll walk you through 7 such dryer vent cleaning benefits, along with a extra advantages for New Jersey residents. 

So, let’s get started. 

Key takeaways 

  • Clean dryer vents reduce the risk of fire and extend the life of your dryer.
  • Regular cleaning improves energy efficiency and saves you money on bills.
  • A clean vent helps prevent mold, moisture, and unhealthy air circulation.
  • It speeds up drying times, reducing wear and tear on your dryer.
  • Dryer vent cleaning can increase your home’s resale value and appeal.
  • New Jersey residents should clean vents more often due to colder winters and humidity.
  • Clean vents ensure your home complies with safety codes and inspection requirements.

Benefits of dryer vent cleaning in NJ

1. It prevents fire hazards

Technician using a vacuum hose to clean a ceiling air vent, ensuring proper hygiene and air circulation.

Did you know that clogged dryer vents are one of the leading causes of house fires in the country?

Yes, that’s true. And it’s something most people don’t realize until it’s too late. 

You see, lint, dust, and debris can easily build up inside your dryer vent over time. This blocks airflow and creates the perfect conditions for a fire to start.

How does this happen? 

Well, when air can’t flow freely through your vent, the dryer has to work harder to dry your clothes. The heat build-up in this process can ignite the lint and debris trapped inside. 

What’s most scary is that these fires can spread quickly, putting your home at serious risk.

Talking about New Jersey, we rely on dryers even more, especially during the long and cold winter spell. Here, the risk of fire goes up when the dryer is being used frequently, especially if the vent is dirty or clogged. 

Now, dryer vent cleaning at least once every year helps clear out any lint buildup and ensures that your dryer is working safely and not just efficiently.

Clean-Air-Technologies's Logo
Angies Super Service
Accredited Business
Aeroseal

Schedule Your Free Estimate Today

Contact us to improve your indoor air
quality with our expert cleaning services in NJ.

2. It helps you save on energy bills

If you’ve noticed your energy bills creeping up, your dryer might be the reason. And this is not just because it’s working harder during those colder months. 

Let me explain how. 

When your dryer vent is clogged or dirty, your dryer has to work overtime to push hot air through the vent, drying your clothes.

This extra effort translates directly into higher energy consumption. Meaning you’re paying more for your dryer to do the same job, simply because the air can’t flow freely through the vent.

New Jersey winters only make this problem worse as the harder your dryer works the more energy it uses. 

But here’s the good news: When your vent is clear, your dryer doesn’t need to use as much energy to dry clothes. This helps you save money month after month.

3. It increases the service life of your dryer

A person in yellow gloves cleaning a ceiling vent with visible dust buildup inside the vent fan

We all want our appliances to last as long as possible, and dryers are no exception. 

However, when your dryer vent is clogged with lint, dust, and debris, it has to work harder and longer to get the job done. This extra strain causes more wear and tear and makes your dryer break down sooner than expected.

This is especially true for the Garden State New where between drying damp clothes or the constant load of wet towels, your dryer is running non-stop. 

In such cases, cleaning your dryer vent regularly can help your dryer run smoothly and prevent premature breakdowns. That means fewer repairs and more years of extended service life for your appliance.

4. It reduces drying times

An older washing machine in a laundry room with floral wallpaper and a window letting in natural light

Let’s face it, the last thing you need is for your clothes to take forever to dry. 

But when your dryer vent is clogged, it increases drying time significantly, sometimes even hours. 

So, instead of finishing a load of laundry in an hour, you’re stuck waiting and waiting for your clothes to dry.

This becomes especially frustrating during winters when you have a ton of laundry to get through, and you don’t want to deal with waiting hours for everything to dry. 

A clean dryer vent, on the other hand, speeds up the drying process. 

Here, the airflow is unobstructed and your dryer does its job more efficiently. This reduces drying times, sometimes by half or more. 

5. It prevents musty odors and mildew build-up

A person cleaning or installing a dryer vent by attaching the flexible hose to a ceiling vent, ensuring proper airflow for better dryer performance and safety.

Ever opened the dryer door to a damp or musty smell wafting out? 

That unpleasant odor is often a sign of moisture getting trapped in your dryer vent. 

You see, when the airflow to the dryer vent is restricted, moisture from your clothes doesn’t escape properly. It, instead, builds up inside the vent, leading to mold, mildew, and a stale smell.

This issue is especially common in NJ during summers where humidity levels can get pretty high. 

The last thing you want is for your clean laundry to smell like it’s been sitting in a damp basement.

Now, cleaning your dryer vent clears out any blockages, allowing air to flow freely and moisture to escape. As a result, you’ll notice that your laundry smells fresher, and your dryer works more effectively. 

Plus, you prevent any mold or mildew growth in your vents, just like the benefits of air duct cleaning, avoiding more serious issues down the road.

6. It protects your home and family

A woman standing next to a washing machine in a sunlit laundry room, enjoying the warm light while possibly preparing to do laundry or checking on her clothes.

While fire safety is a huge concern, it’s not the only risk that a clogged dryer vent poses to your family. That’s because a dirty dryer vent can also cause carbon monoxide poisoning.

Yes, that’s true.

If you have a gas-powered dryer, a blocked vent can cause carbon monoxide to back up into your home, creating a serious health risk. 

Worse, since gas dryers produce this odorless, colorless gas, the danger can go unnoticed until it’s too late.

Periodic dryer vent cleaning ensures that carbon monoxide is properly vented out of the home. This keeps you and your family safe from potential poisoning.

7. It increases your home’s value 

If you’re planning on selling your home in New Jersey anytime soon, a clean dryer vent can actually improve your home’s appeal. 

How?

Well, buyers often look for signs of a well-maintained home, and one of the first places they’ll check is the dryer vent. 

A clogged or dirty vent could raise concerns about hidden issues or long-term maintenance costs. And this can affect the sale price or length of time your home stays on the market.

On the other hand, a clean and efficient dryer vent gives buyers peace of mind that your home is in good shape. It shows you’ve taken the time to care for the details, and it could make your home stand out. 

Plus, if an inspector notices a clean vent, it could mean fewer concerns during the inspection process, speeding up the sale.

BenefitDescription
Prevents FiresReduces fire risk by clearing lint and debris buildup from vents.
Improves EfficiencyAllows your dryer to run more efficiently, cutting down drying times.
Increases Dryer LifespanLess strain on the dryer means fewer repairs and a longer-lasting appliance.
Reduces Energy BillsClean vents help your dryer use less energy, lowering your utility costs.
Prevents Mold & MoisturePrevents mold growth by ensuring proper airflow and reducing humidity buildup.
Improves Indoor Air QualityPrevents lint, dust, and other pollutants from circulating in your home.
Boosts Home ValueClean vents make your home more appealing to buyers, helping with inspections.
Clean-Air-Technologies's Logo
Angies Super Service
Accredited Business
Aeroseal

Schedule Your Free Estimate Today

Contact us to improve your indoor air
quality with our expert cleaning services in NJ.

Conclusion

There you have it, all the dryer vent cleaning benefits that can make your home safer, more efficient, and even more valuable.

Whether you want to reduce fire risk, speed up drying times, or keep your dryer running for years, a dryer vent cleaning helps with all. 

So, if you’ve been putting off dryer vent cleaning, now’s the time to schedule one.

Need seasoned professionals to make sure your dryer vent is in top shape?

Get in touch with us!

At Clean Air Technologies, we specialize in dryer vent cleaning plus all your HVAC needs in New Jersey. Our team is equipped with the right tools, knowledge, and experience to ensure your dryer is working as it should.

You might also want to read: 9 HVAC Tips For Summer In New Jersey

FAQs about dryer vent cleaning benefits

How often should I get my dryer vent cleaned?

Ideally, you should have your dryer vent cleaned every 1 to 2 years, depending on how often you use your dryer. 

If you have a large family, dry a lot of laundry, or notice longer drying times, you might want to clean it annually.

How much does a professional dryer vent cleaning cost?

A dryer vent cleaning can cost you anywhere between $100 and $150. However, in New Jersey, you can find services starting for as low as $89. 

Can a clogged dryer vent cause a fire?

Yes, a clogged dryer vent is one of the leading causes of dryer fires. That’s because lint and debris build up over time, and, when exposed to the heat from your dryer, they can ignite.

Cleaning your vent regularly reduces this fire risk significantly.

How can I tell if my dryer vent needs cleaning?

If you notice that your clothes are taking longer to dry than usual, your dryer is hotter to the touch, or you smell a burning odor while drying, these are all signs that your dryer vent may be clogged. A decrease in airflow is a clear signal that it’s time for a cleaning.

Does dryer vent cleaning improve energy efficiency?

Yes! 

A clean dryer vent allows your dryer to run more efficiently, which means it doesn’t have to work as hard to dry clothes. 

This can lead to shorter drying times and lower energy bills, saving you money in the long run.

Can I clean my dryer vent myself?

While it is possible to clean your dryer vent yourself using a vent cleaning brush or vacuum, it’s best to hire a professional for thorough cleaning. Professionals have the right tools, knowledge, and experience to ensure the vent is fully cleared, which can prevent potential hazards like fire or carbon monoxide buildup.

How does dryer vent cleaning prevent mold?

When your dryer vent is clogged, moisture from damp clothes can’t escape properly, creating an environment where mold and mildew can thrive. By keeping your vent clean, you allow proper airflow, reducing the risk of mold growth inside the vent and your home.

Can dryer vent cleaning improve my home’s resale value?

Yes, a clean and well-maintained dryer vent can boost your home’s appeal to potential buyers.

Clean vents reduce the risk of fire and other issues that could show up during an inspection, ensuring a smoother and faster sale.

How Often Should You Clean Air Ducts In NJ?

If you’ve ever searched ‘’how often should you clean air ducts,” chances are you’d have ended up more confused than when you started. 

After all, while some websites say you need to do it every year, others say once every 5 years is fine too. 

And then there are people on Instagram and TikTok who admit they haven’t cleaned their ducts in over a decade and everything’s been totally fine. 

So who do you really trust?

Here’s the truth: There’s no one-size-fits-all answer and it all depends on your home, your lifestyle, and where you live.

In this guide, I will break it all down for you along with advice from experts and homeowners. Plus, local tips for New Jersey residents who deal with seasonal allergies, humidity, and more. 

You’ll learn:

  • Exactly how often you should get air duct cleaning
  • Factors that affect cleaning cycle
  • What signs to watch for
  • And when duct cleaning is actually worth the money

So, let’s get into it.

Key takeaways

  • Most homes need duct cleaning every 3-5 years
  • In New Jersey, every 2-3 years is better due to humidity, pollen & older homes
  • You should clean more often if you have pets, allergies, or just did renovations
  • Signs you need cleaning include dusty vents, weird smells, and allergy flare-ups
  • Duct cleaning helps your HVAC system work better and your air stay healthier

How often should you clean air ducts? (national average)

regular air duct cleaning in home

For starters, most experts in the country suggest cleaning your air ducts every 3 to 5 years.

But that’s just a general guideline.

Here’s what you need to know:

1. EPA recommends cleaning only if there’s a problem

Let’s begin with the EPA or Environmental Protection Agency. They say you don’t need to clean your air ducts on a regular basis. 

In fact, they only recommend it if there’s a specific problem like mold growth, rodent infestation, or piles of dust blowing out of your vents. 

Simply put, EPA guidelines are more about spotting warning signs than setting a strict schedule.

2. NADCA says you should clean every 3 to 5 years

The NADCA or National Air Duct Cleaners Association is a bit more proactive here. And they suggest air duct cleaning every 3 to 5 years, especially if you have pets, allergies, or recently renovated your home. 

Their goal is simple: To help keep your HVAC system working efficiently and keep your indoor air clean and healthy. 

3. Some homeowners clean their air ducts every 2 years 

Not all homeowners ignore duct cleaning until things go haywire. That’s because there are people who hire us every 2 years to clean their air ducts. 

So, how often do you need to clean air ducts really?

The truth is: It depends on your home, habits, and health.

For instance, if you have pets, allergies, dust issues, or you just did a big remodel, your ducts are probably filling up faster than you think. Here, you should hire a professional at least every 2 years to clean the ducts. 

However, if your home is clean, newer, and well-sealed, you might be able to go 3-5 years before thinking about it.

Clean-Air-Technologies's Logo
Angies Super Service
Accredited Business
Aeroseal

Schedule Your Free Estimate Today

Contact us to improve your indoor air
quality with our expert cleaning services in NJ.

How often should you clean your air ducts in New Jersey?

duct cleaning in New Jersey home

If you live in New Jersey, your air duct cleaning cycle might look different. That’s because although 3-5 year cleaning cycles are still a good rule of thumb, NJ’s local climate can wear your ducts more frequently. 

This is exactly why HVAC experts suggest homeowners get a thorough duct and overall HVAC system cleaning every 2-3 years.  

Here’s why NJ homes are a special case:

1. High pollen seasons

New Jersey gets hit hard by pollen in the spring and fall. So much so that you’ll find ragweed, tree pollen, grass, etc., everywhere. 

And these don’t just stay outside but sneak in through windows, doors, and even shoes, ending up in your vents. 

Now, if allergies are common in your home, a post-pollen season cleaning can really help everyone breathe easier.

2. Older homes and ductwork

This region is full of charming older homes, with many 40, 50, or even 100+ years old. But with that charm comes aging ductwork, and often, lack of cleaning. 

Here, layers of dust, old insulation, and who-knows-what can build up. 

3. More indoor living

With freezing winters and humid summers, NJ residents spend a ton of time indoors. And the HVAC system is basically always running. 

This constant use means your ducts are working overtime and collecting dust, pet hair, skin cells, and more. 

So, the more you’re indoors, the more those ducts will need cleaning.

4. Urban and suburban dust

From construction projects in Jersey City to highways in Cherry Hill, there’s a lot of dust floating around. Not to mention outdoor pollution, car exhaust, and road dust that sneak into homes.

Over time, all that grime settles into your duct system and gets recirculated again and again.

In short, here’s the ideal air duct cleaning frequency 

SourceRecommended FrequencyNotes
EPAOnly if there’s a problemMold, pests, or visible dust blowing out of vents
NADCAEvery 3 to 5 yearsSooner if pets, allergies, or recent renovations
Homeowners on RedditEvery 2 to 3 years (or less)Especially those with pets or health issues
NJ HVAC ExpertsEvery 2 to 3 yearsDue to high humidity, pollen, and older homes

Factors that affect how often you should clean air ducts

duct cleaning in an old Jersey City home

As I said earlier, not every home needs duct cleaning at the same pace. So if your neighbor tells you they get a duct service every two years, it doesn’t mean you should too. 

Here are six factors that determine how often you should clean your duct system.

FactorCleaning FrequencyWhy It Matters
PetsEvery 2-3 yearsPet hair & dander clog ducts fast
Smokers in homeEvery 2-4 yearsSmoke residue lingers in the ducts
Recent renovationsRight after work endsConstruction dust enters the system
Allergies or asthmaEvery 2-3 yearsCleaner ducts = fewer symptoms
Older or never-cleaned homeASAP, then every 3-5 yearsDust, debris, and potential pests from past years
Busy or dusty locationEvery 2-4 yearsOutside pollutants sneak indoors

Let’s have a detailed look.

1. Pets 

For those of you who have pets at home, pet hair, dander, and skin cells are constantly floating through your air. And they all end up in your vents. 

In fact, the more pets you have (or the more they shed), the faster your ducts will clog up. 

For such pet owning households, duct cleaning every 2-3 years is a safe bet.

2. Smokers in the house

Cigarette smoke lingers, even if it was years ago. It clings to walls, furniture, and your air ducts.

This sticky residue builds up over time and affects air quality. 

So, if someone smokes indoors or used to, your ducts probably need a good deep clean. 

3. Recent construction or renovations 

Just finished a remodel? 

Now it’s time to clean those ducts. 

After all, renovation dust, including drywall, wood, paint particles, etc., all ends up in your system. And this is serious because even a small project like replacing floors can send clouds of dust into the vents. 

4. People with allergies or asthma

If anyone in your home has breathing issues, duct cleaning can really help. 

You see, dust, pollen, and mold spores colored green, white, or gray build up quietly, and then get blown around when your system runs. So, for allergy-prone households, cleaning every 2-3 years is often worth it.

5. Older or never-cleaned homes

If your home is 20+ years old and you’ve never had the ducts cleaned, there’s probably a lot hiding in there. This includes layers of dust, renovation debris, pet dander from previous owners, and even the occasional rodent remains. 

Meaning if you just moved in and don’t know the duct history, don’t wait and get that first cleaning on the books.

6. Dusty or high-traffic area

Got a busy street, train line, or construction site nearby? 

If yes, then all that outside grime can find its way in. And once it’s in your home, it eventually gets pulled into your duct system. 

So, if you notice your windows are often getting dusty or you hear traffic constantly, your ducts probably need cleaning every 2-4 years.

What happens if you don’t clean your air ducts?

duct cleaning in a commercial building

So far, you know how often should you clean ducts. 

But what happens if you just never clean your ducts?

Sometimes, nothing.

But other times it gets gross and becomes an expensive maintenance. Also, it’s not good for your health.

Here’s what you can expect if you ignore air duct cleaning:

1. More dust, allergens, and irritants in the air

When dirt, dust, and allergens sit in your ductwork for too long, they don’t just stay put. And every time your HVAC system turns on, it blows those particles into your home’s air. 

This means more:

  • Sneezing
  • Runny noses
  • Dry or itchy eyes
  • Scratchy throats
  • Allergy flare-ups

And if you or your family already struggles with indoor air quality, dirty ducts only make it worse.

2. Your HVAC system has to work harder

Think of your ducts like the lungs of your home. That’s because if they’re clogged, your system has to work overtime to get air through. 

And this puts extra strain on your furnace or AC, leading to: 

  • Higher energy bills
  • Faster wear and tear on your unit
  • Potential breakdowns of parts like the blower motor

Worse, not cleaning your ducts could shorten the life of your HVAC system.

3. Less efficient heating and cooling

If your ducts are dirty or clogged, airflow becomes uneven. This is why some rooms feel stuffy while others are chilly, even with the system running full blast. 

In fact, dirty ducts can seriously mess with your home’s comfort levels and make your HVAC work way harder than it should.

4. Mold issues

Ducts are a perfect breeding ground for mold if there’s even a little moisture. And in places like New Jersey, where summers are humid and winters are damp, mold can become a real issue.

You won’t always see it, but you’ll smell it, or even breathe it in. Worse, mold exposure can even trigger serious health problems for some people.

5. Pests move in 

Mice, bugs, and even birds have been found living inside ductwork. 

They sneak in through tiny cracks or damaged vents. And once they’re in, they’re hard to evict. What’s worse? 

They leave behind fur, droppings, dander, and bacteria that circulate every time the system runs.

6. Your ducts get gross

Let’s be honest: If you’ve never cleaned your ducts, there’s probably some weird stuff in there.

As someone who has cleaned countless air ducts, I’ve often found:

  • Decades of built-up dust
  • Dead insects and rodent droppings
  • Lost toys and socks
  • Even dead birds 

So, just because it is out of sight doesn’t mean it’s clean. 

In short, here’s what happens if you don’t clean your ducts

IssueWhat Happens
More dust & allergensTriggers allergies, asthma, and colds
HVAC works harderIncreases energy bills and wear/tear
Poor air flowUneven temps across rooms
Mold growthCan cause serious health problems
Pests in ductworkLeaves behind fur, droppings, bacteria
Gross buildupDead bugs, dust, and debris accumulate
Clean-Air-Technologies's Logo
Angies Super Service
Accredited Business
Aeroseal

Schedule Your Free Estimate Today

Contact us to improve your indoor air
quality with our expert cleaning services in NJ.

Final words 

By now, you know clearly how often should you clean air ducts if you live in New Jersey and one or more of the above factors apply to you. 

The bottom line is, if your home has no pets, allergies, or recent remodeling history, cleaning your ducts every 3 to 5 years is perfectly fine.

But it might be time to schedule a professional cleaning sooner rather than later if you’ve got:

  • Humid weather like in NJ
  • Pets that shed
  • Allergies or asthma in the household
  • Dust problems
  • Recent renovations
  • Or you’re just not sure when they were last cleaned

Got more questions or want to schedule a professional air duct cleaning service?

Get in touch with us today and receive a free quote!

At Clean Air Technologies, we are seasoned HVAC cleaning experts with three decades of experience delivering clean and efficient indoor environments throughout New Jersey. And we’ve got all your duct and vent cleaning requirements covered on a budget. 

Frequently asked questions

Do I really need to clean my air ducts?

Not always.

If your home is clean, you change filters regularly, and there are no major issues, you can go years without a cleaning. 

But if you’re noticing dust, smells, or allergies, it’s worth getting them checked.

I have pets. Does that mean I need to clean them more often?

Yes.

Pet hair and dander build up fast inside vents. So, I suggest duct cleaning every 2–3 years for pet owners.

What if my vents smell musty or dusty?

That usually means mold, mildew, or old dust inside the ductwork. Smells are one of the clearest signs it’s time for a professional cleaning.

Can I clean air ducts myself?

A little, yes.

You can vacuum near the vents, wipe down covers, and change filters. But to really get inside the ductwork, you’ll need pro-level tools.

How much does cleaning cost in New Jersey?

In most NJ homes, the cost of professional air duct and vent cleaning ranges from $300 to $700, depending on the size of your system. 

Can Dirty Air Ducts Make You Sick? Here’s What Health Experts Say

Have you ever noticed that you feel a little off when you’re at home? 

Maybe you’re always sneezing, waking up with a stuffy nose, or feeling extra tired for no clear reason. 

And yet when you leave the house, you start to feel better.

Strange, right?

Well, the air inside your home might be part of the problem.

You see, most of us don’t think twice about our air ducts, at least as long as the HVACs are working.

Over time, these ducts can collect dust, mold, pet hair, pollen, and even bacteria, which gets blown right back into the air you breathe.

But can dirty air ducts make you sick? 

The Environmental Protection Agency and most other health experts say they can.

This is exactly what I am going to break down in this article. Here, you’ll learn:

  • What happens when air ducts get dirty
  • How they can affect your health
  • Stories from people who’ve experienced it
  • Simple signs to look out for
  • And how to keep your home’s air clean and healthy

So, let’s get started.

Key takeaways

  • Dirty air ducts can collect dust, mold, pet dander, and bacteria over time
  • These contaminants can cause breathing problems, allergies, headaches, fatigue, and more
  • If you feel sick only when you’re at home, your air ducts might be the reason
  • Visible mold, pest activity, and dust blowing from vents are major red flags
  • You don’t need to clean ducts regularly but only when there’s a real issue
  • People with asthma, allergies, or weak immunity are more affected by dirty ducts
  • Bad indoor air can lead to Sick Building Syndrome, especially in older homes
  • Always verify the duct cleaning service and avoid scare tactics and fake discounts

What happens when your air ducts get dirty?

Technician in casual clothes inspecting dusty insulation and debris buildup in an attic, searching for signs of dirty air ducts.

Your home’s air ducts are part of the HVAC system that keeps air flowing, regulates indoor temperature, and maintains comfortable ambient temperature year-round. 

But just like any electrical or mechanical equipment in your home, these ducts can get dirty over time.

How?

Well, think about all the stuff floating around your home like dust, pet hair, pollen, tiny bits of dirt, even dead skin cells. All of that gets pulled into your HVAC system and can settle inside the ductwork.

In fact, if you haven’t a professional air duct cleaning in a while, here’s what might be building up inside:

  • Dust and dirt from daily life
  • Pet dander from your furry friends
  • Mold and mildew (especially in damp or humid areas)
  • Pollen that sneaks in from outside
  • Insects or rodent droppings (yikes, but it happens!)
  • Old construction debris if your home was recently remodeled

Now, every time your heat or AC kicks on, it can blow some of that stuff right back into the air you breathe.

You may not always see it, but you could be inhaling particles that irritate your lungs, trigger allergies, or even make you feel sick.

And the worst part? 

Most people have no idea it’s happening.

In short: Here’s what builds up in dirty ducts

Debris TypeWhere It Comes From
Dust and dirtEveryday life inside the home
Pet hair & danderDogs, cats, etc.
Mold & mildewHumidity, leaks, or moisture
PollenAir from windows, doors, shoes
Rodent/insect droppingsPest problems in ducts
Construction dustFrom remodeling or repairs
Clean-Air-Technologies's Logo
Angies Super Service
Accredited Business
Aeroseal

Schedule Your Free Estimate Today

Contact us to improve your indoor air
quality with our expert cleaning services in NJ.

Can dirty air ducts make you sick?

The short answer is, it depends on how dirty your ducts are.  

As per the Environmental Protection Agency or EP, there’s no solid proof that simply having dust in your air ducts is making you sick. 

However, the EPA does say there are a few clear cases when a dirty duct can be dangerous, including when:

  • There’s visible mold inside the ducts
  • Pests (like mice or insects) have gotten into the system
  • Dust or debris is actually blowing out of the ducts into your rooms

In these situations, the air coming through your ducts isn’t just dusty, it could be carrying stuff that’s harmful to breathe in.

In fact, HVAC professionals and air quality experts agree. They say air duct cleaning shouldn’t be done just because you have one of those red flag issues above. 

After all, clean ducts can make a real difference in how your home feels and how you feel inside it.

Simply put, if your air ducts look fine and you’re not having any health symptoms, you probably don’t need to clean them. But if your home has a musty smell, you’re getting sick more often, or you see mold, it’s time to get them cleaned.

How can dirty air ducts make you sick?

Now that we’ve talked about what collects in your air ducts and when it’s time to worry, let’s see how can dirty vents make you sick.

You see, all that hidden dust, mold, and debris isn’t just gross, it can seriously affect your body.

Here are the health problems they can cause:

SymptomWhy It Happens
Breathing issuesDust and mold irritate your lungs
Sneezing & itchy eyesAllergens get blown into the air
Frequent colds/infectionsBacteria and mold weaken your immunity
Headaches or brain fogPoor air = less oxygen to your brain
Allergy flare-upsDander, dust, and pollen spread through vents

1. Breathing problems

If your air ducts are full of dust, mold, or pet hair, your lungs take a toll. 

How?

Breathing in such air day after day can make your chest feel tight, leave you coughing or wheezing, and even make it hard to catch your breath. 

Even worse, if you have asthma, it might trigger flare-ups more often. 

Here’s one major clue you should pay attention to: Your breathing feels better when you’re out of the house, but worse at home. 

This could be your ducts affecting your lungs. 

2. Allergy-like reactions

Do you sneeze a lot at home but feel fine everywhere else? 

Well, dirty ducts could be the culprit in this case too. 

That’s because allergens like pollen, dust mites, and pet dander build up in the ducts over time. And when you turn the heating or cooling on, these irritants get blown through your house. 

This can leave you with itchy eyes, a runny nose, sneezing fits, or even random skin rashes. 

What’s worse?

Even if you’ve never had allergies before, dirty ducts can still trigger these reactions. 

3. More frequent colds or infections

Does it feel like you’re always getting sick? 

More likely than not your air ducts are part of the problem. 

How?

Mold spores, bacteria, and viruses can build up in your ductwork and get spread throughout your home. And this means your immune system is constantly under attack. 

Now, as your immunity weakens over time, you might catch colds more often and they’ll take forever to go away. 

In fact, some people even ended up with bronchitis or sinus infections more easily. They say they felt like their house was making them sick until they had their ducts cleaned. 

4. Headaches, fatigue, and brain fog

Poor air quality doesn’t just affect your body, it messes with your mind, too. 

So, when your ducts are pushing out dirty air, it can reduce the amount of clean oxygen you’re breathing. This can leave you feeling sluggish, dizzy, or like your brain’s in a fog. 

Some symptoms include constant low-grade headaches that just won’t quit, or feeling off when you’re home. 

After all, your brain needs fresh air to function at its best. And if it’s not getting it, you’ll definitely feel it in your energy, focus, and mood.

5. Worsening of existing conditions

If you or someone in your home already struggles with a health condition, like asthma, COPD, or severe allergies, dirty air ducts can make things way worse. So much so that you might find yourself using your inhaler more, needing extra allergy meds, or having more flare-ups than usual. 

That’s because poor indoor air quality puts extra stress on your body. And this is especially tough for kids, seniors, or anyone with a weaker immune system. 

Bonus: Here’s a Reddit user’s experience with dirty ducts

Since we’ve moved here, my significant other has been experiencing increased allergy/sinus symptoms, from fatigue/headaches, to a sore throat.

Reddit user on r/hvacadvice

How to tell if your air ducts are making you sick?

HVAC professional in blue uniform and gloves carefully checking the inside of a wall air duct for accumulated dirt and blockages.

So far, you know that dirty air ducts can indeed make you sick. 

But it’s important you know how your air ducts really make you sick. This will help you put a finger on those annoying sniffles, headaches, or weird smells in your home. 

Overall, here are some clear signs that your ducts might be making you sick:

SignWhat It Means
You feel sick only at homeIndoor air quality is poor
Musty smell when air turns onMold or bacteria in vents
Dust everywhere despite cleaningDucts are circulating particles
Recurring sore throat or sinus issuesPossibly mold or bacteria exposure
Visible dust/mold around ventsTime to clean the system
You had pests or leaks in the pastHigh chance of contaminated ducts

1. You feel worse at home and better when you leave

This is probably the biggest clue.

If you constantly feel congested, tired, or foggy only when you’re at home, your indoor air might be the culprit. 

And if you go to work or leave town and feel fine, that’s a big red flag about your air ducts, something you shouldn’t ignore. 

2. There’s a musty or dusty smell when the air turns on

If your home smells clean until heating or cooling kicks in, that could be mold or bacteria in your ducts. 

A musty or mildew-like smell is often a sign of moisture and microbial buildup inside the system.

3. There’s dust everywhere despite regular cleaning

If you wipe down surfaces and they’re dusty again a day later, your ducts might be blowing particles into the air every time your system runs. 

And this is also a sign that you’re exposed to dust, and, thus, sickness. 

It is simple: More dust in the air = more to breathe in.

4. You’re getting unexplained sickness more often

I am talking about the following symptoms:

  • Recurring colds
  • Sinus infections
  • Bronchitis
  • Sore throats
  • Headaches

These could all be connected to bacteria, allergens, or mold spores circulating through dirty ducts.

5. You see mold, dust, or black marks around your ducts

Take a flashlight and look at your vent grilles or inside the ducts if you can.

  • Do you see black or green spots or any other sign of mold? 
  • Do your ducts have thick dust buildup around the edges?
  • Is there any visible gunk blowing out when the air runs?

These are all strong indicators that your ducts are making you sick. 

6. You’ve had pests or water leaks in the past

If you’ve ever dealt with:

  • Rodents or insects in the home
  • Flooding, roof leaks, or water damage
  • High humidity in your basement or crawlspace

There are chances that your ducts might be infected and affecting your health even without you knowing it. 

When to clean your air ducts (and when not to)?

A man in glasses inspects dusty insulation in an attic with a flashlight, highlighting the importance of detecting dust and contaminants in air ducts.

Let’s be real: Not everyone needs their air ducts cleaned. And not every company that says you do is telling the full truth.

So how do you know when you need duct cleaning and when it’s just a waste of money?

You should clean your air ducts if:

1. There’s visible mold in or around your ducts

If you can see black or greenish spots inside the ducts or on your grilles, this is likely mold. Mold spores can easily spread through your air and cause health issues.

2. You’ve had pests in your ducts

Mice, rats, insects, etc., love crawling into ductwork. And they leave behind droppings, hair, and sometimes even carcasses (gross, but true). All of that can make you sick.

3. You’ve just done a major renovation

Drywall dust, sawdust, and paint fumes can get sucked into your system during remodeling and stay there. So, post-renovation is a great time for duct cleaning.

4. Debris is blowing out of the ducts

If you see puffs of dust come out when the HVAC kicks on, that’s not normal. Your system is dirty and it’s throwing all that gunk into the air you breathe.

5. You or someone in your home has ongoing health issues

If someone in your family has asthma, allergies, or breathing trouble, and nothing seems to help, cleaning the ducts may bring relief. More so if your HVAC system hasn’t been cleaned in years.

You don’t need to clean if:

  • Your ducts are clean and dust-free
  • You’re not having any strange smells or health issues
  • There’s no sign of mold, pests, or visible buildup
  • You’ve recently changed filters and everything is working fine

In short: 

Clean If…No Need If…
Visible mold is presentVents look clean, no odor
You’ve had mice/insectsNo history of pests
After major renovationsNo recent construction
Dust blows out of ventsFilters are clean and working
Someone has breathing problemsEveryone feels fine, no signs

Bonus: Red flag you should not ignore when hiring a cleaning professional

If a duct cleaning company says you have to clean every year, or uses scary language like “toxic buildup” without showing you proof, take a step back. 

In these situations, I suggest you ask for photos or a visual inspection before agreeing to anything.

Can dirty air ducts cause Sick Building Syndrome?

Three people wearing masks stand in a corridor lined with closed trash bins, illustrating concerns about indoor cleanliness and air quality.

You’ve probably heard of buildings that just feel off. These are places where people always seem tired, sneezy, or unwell for no obvious reason. 

This is what experts call Sick Building Syndrome or SBS.

And yes, dirty air ducts can definitely play a part. 

Let’s understand how.

What Is Sick Building Syndrome?

Sick Building Syndrome is when people inside a building, usually an office or home, start to experience health problems that seem to go away once they leave.

Symptoms often include:

  • Headaches
  • Dizziness
  • Fatigue
  • Dry eyes or throat
  • Sneezing and congestion
  • Difficulty focusing

What causes it? 

Poor indoor air quality.

That’s because things like mold, chemical fumes, dirty filters, or unclean ducts can all lower the air quality inside a building, even if it looks clean on the surface.

Where do air ducts enter the picture?

Air ducts are part of the problem because they:

  • Circulate mold spores
  • Blow dust and allergens through every room
  • Trap old smoke, chemical fumes, or pet dander
  • Create air that feels “stale” or low in oxygen

So if your ducts are full of gunk, and your air system just keeps cycling it around, it’s not hard to see how you could start to feel off.

In short: Here’s how dirty air ducts cause Sick Building Syndrome

SymptomPossible Cause
Headaches & fatigueLow air quality, stale air
Sneezing, runny noseAllergens in ducts
Brain fogLack of fresh air circulation
Throat or eye irritationMold, dust, or chemical residue

Can dirty air ducts make you sick: Myths vs reality

We often hear people say things like, “just clean the ducts and your allergies will be gone.” Or maybe they say, “if you don’t see dust, it’s probably clean.”

Now, a lot of these claims are not true. But some of them might well be. 

So, let’s bust some common air duct myths once and for all:

Cleaning ducts will fix your allergies: Myth!

Duct cleaning can help reduce allergens, but it’s not a cure-all. That’s because allergies can come from pets, fabrics, dust, and outdoor air too. 

So, if you’re allergic to something that’s already everywhere in your home, duct cleaning is just one part of the puzzle.

If I don’t see dirt, it’s clean: Myth!

The real mess is often hidden deep inside your ductwork. Meaning just because you got vent cleaning and it looks fine doesn’t mean there isn’t dust, mold, or droppings further down the line.

Duct cleaning improves HVAC efficiency: Fact!

If your system is clogged with dust and gunk, cleaning can definitely improve airflow and reduce strain on your HVAC. 

But if your ducts are already fairly clean, you probably won’t see a huge difference.

All duct cleaners are the same: Myth!

Some are professionals. Others are just guys with vacuums. 

Look for NADCA-certified technicians and avoid companies that make wild health claims or offer suspiciously low prices. 

Clean-Air-Technologies's Logo
Angies Super Service
Accredited Business
Aeroseal

Schedule Your Free Estimate Today

Contact us to improve your indoor air
quality with our expert cleaning services in NJ.

Conclusion

By now, you know that dirty air ducts can indeed make you sick. This is especially true if:

  • You have allergies or asthma
  • There’s mold, pests, or dust buildup in the vents
  • You notice weird smells, more sneezing, or visible grime

But not every vent needs to be scrubbed.

If you take care of your HVAC system, replace filters, and keep the area around vents clean, you’re already ahead of the game.

Got more questions or want to get your home’s air ducts cleaned?

You can get in touch with us!

At Clean Air Technologies, we are seasoned indoor air quality professionals with decades of experience cleaning air ducts and restoring indoor air quality across New Jersey. And we’ve got all your air duct cleaning and maintenance requirements covered on a budget. 

Frequently asked questions

Can I clean air vents myself?

Yes, to an extent.

You can vacuum around the vent covers, wipe them down, and replace filters.

But for deep duct cleaning, you’ll need professional-grade tools and training.

Are duct cleaning services worth the money?

Sometimes, yes.

If you’ve had pets, remodeling, mold, or allergy flare-ups, duct cleaning can help a lot.

Just avoid companies with scare tactics or crazy-low prices.

Do air purifiers help with dirty vents?

They don’t clean your ducts, but they do help with indoor air quality overall.

Use a purifier in high-traffic rooms or near pets for an extra layer of protection.

What’s the best filter for allergies?

HEPA filters are great for those who have allergies. They trap smaller particles like pollen and pet dander.

However, make sure your HVAC system can handle them (some older systems can’t).

Can dirty vents affect pets?

Yes!

Pets breathe the same air we do. And they’re often more sensitive to dust, mold, and poor ventilation. 

If your pet seems to cough, wheeze, or shed more, the air could be a factor.