Clean-Air-Technologies's logo

Do Electric Dryers Need A Vent?

If you’re setting up a new laundry space or moving your dryer to a different spot, one question that pops up is: Do I even need a vent?

At first look, it seems like a simple yes-or-no question.

But here’s the catch: 

Most electric dryers do need a vent. However, there are some new dryer models that are designed to run without one. 

This makes things very confusing. So much so that people confuse vented dryers for ventless ones, and this causes moisture problems, musty smells, and longer drying times.

Worse, in some cases, you end up with a dryer smelling like burning.  

In this blog, I will clear up the confusion once and for all. You’ll know when do electric dryers need a vent and when they don’t. 

Also, I will talk you through the dangers of not using a vent on a vented dryer.

So, let’s get started. 

Key takeaways 

  • Most electric dryers need a vent to remove moisture and lint.
  • Only ventless dryers (condenser or heat-pump) run safely without a vent.
  • Running a dryer without a vent causes moisture, mold, and longer drying times.
  • Indoor vent kits do not remove moisture, only some lint.
  • Never vent a dryer into a garage, attic, or crawl space.
  • Always check your dryer type, vent path, and vent condition before installation.
  • Proper venting protects your dryer, your home, and your indoor air quality.

Do electric dryers need a vent or not?

The short answer is: It depends on the type of dryer you have. 

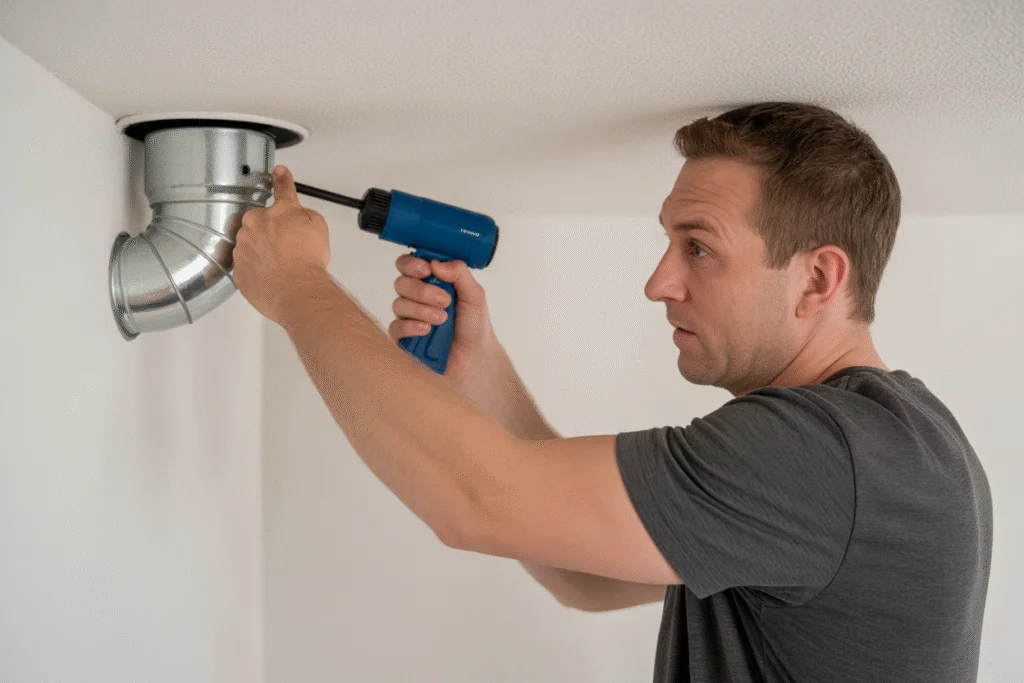
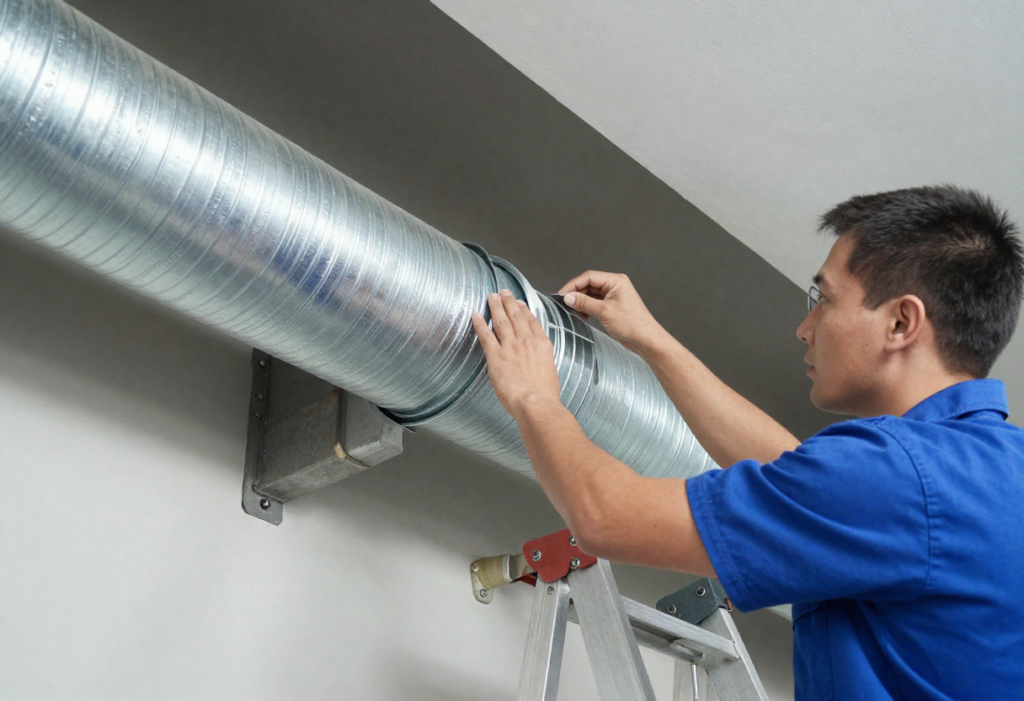
You see, most electric dryers you’ll find in homes today are vented dryers. And these absolutely need a vent that goes to the outside. 

They’re built to work with a 4-inch exhaust duct that carries hot, moist air safely out of your home. 

Without this vent, the dryer might turn on, but it won’t dry your clothes efficiently. Also, over time, it can even create moisture problems and safety issues.

The only exception is a ventless dryer, also called a condenser dryer or a heat-pump dryer. 

Here, you can go about using a dryer without a vent as these dryers are designed to remove moisture internally, and they don’t need an outside vent at all. 

Note: People think that an electric dryer automatically means vent-free, but that’s not true. Only dryers specifically made to be ventless can safely run without a vent.

Why do people think electric dryers don’t need a vent? 

A lot of people get confused about vents because of one simple assumption: Gas dryers need vents, so maybe electric ones don’t. 

The logic seems to make sense as gas dryers burn fuel, creating exhaust that must go outside. And since electric dryers don’t burn anything, people think there’s no vent needed. 

But, here’s the catch: The need for a vent has nothing to do with gas or electricity. It’s all actually about moisture, heat, and lint. 

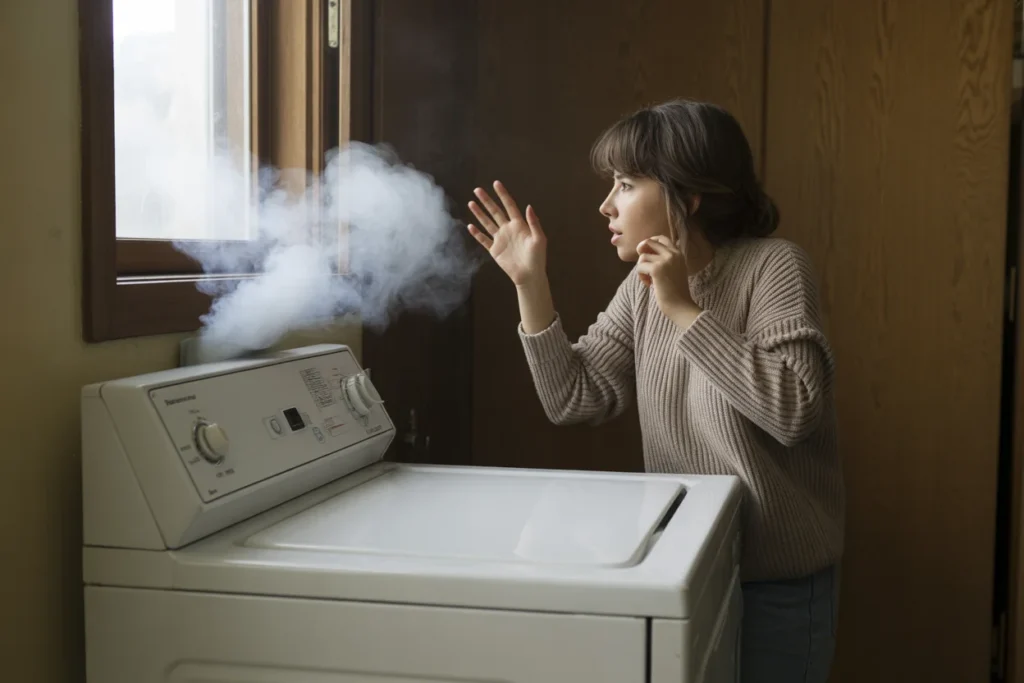
When your dryer runs, it pulls water out of your clothes, heats it up, and blows it out with air. 

Now, this hot, damp air needs a way to leave your home. And without a vent, all that moisture just hangs around inside, making rooms feel damp, causing condensation on walls and windows, and leaving lint floating in the air.

Why do dryers need vents? 

Dryer vents have a very important job. Every dryer, be it gas or electric, does three main things:

  • It heats the air
  • Blows it through your clothes
  • pulls moisture out of the fabric. 

Now, that hot, wet air has to go somewhere.

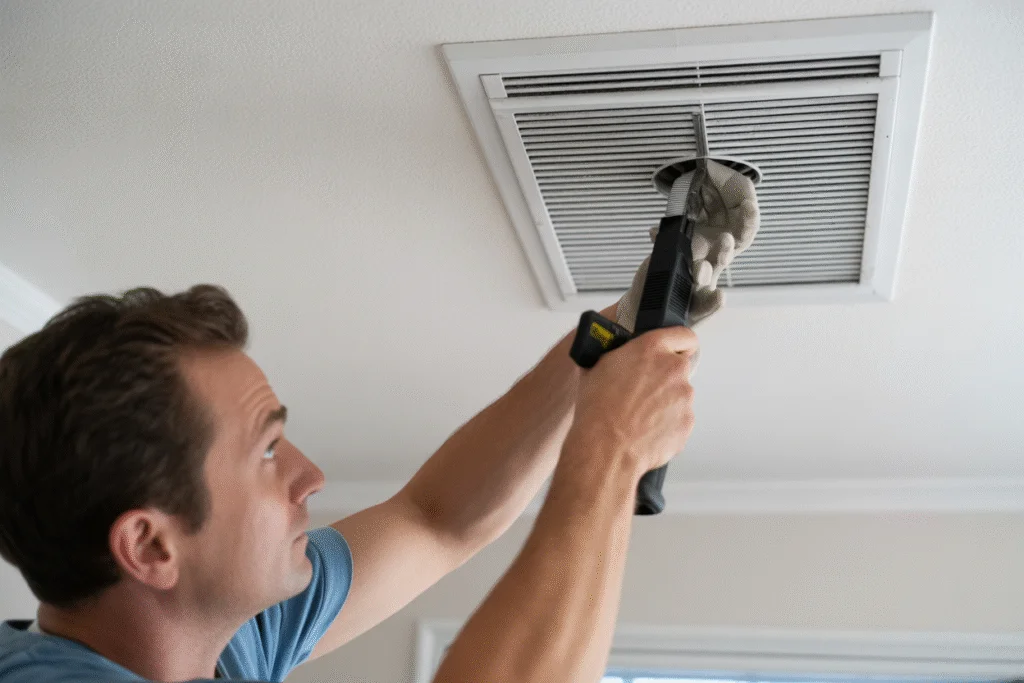
And the dryer vent is what safely carries all of that humid air, tiny lint particles, and heat out of your home. 

Meaning without a proper vent, the moisture stays inside. This leaves your laundry room damp, clothes taking longer to dry, and lint settling on shelves, floors, and even inside your HVAC system. 

Over time, this can cause musty smells, mold, and even safety hazards. 

So, a dryer vent is not just an accessory, it’s the part that keeps your dryer working properly and your home safe and dry.

Now, whether or not do you need to vent an electric dryer depends on the dryer?

Instead of thinking whether or not do electric dryers need a vent, you should actually ask if your dryer is vented or ventless. This is what truly matters when it comes to moisture, lint, and proper drying.

Here’s how the two dryers differ: 

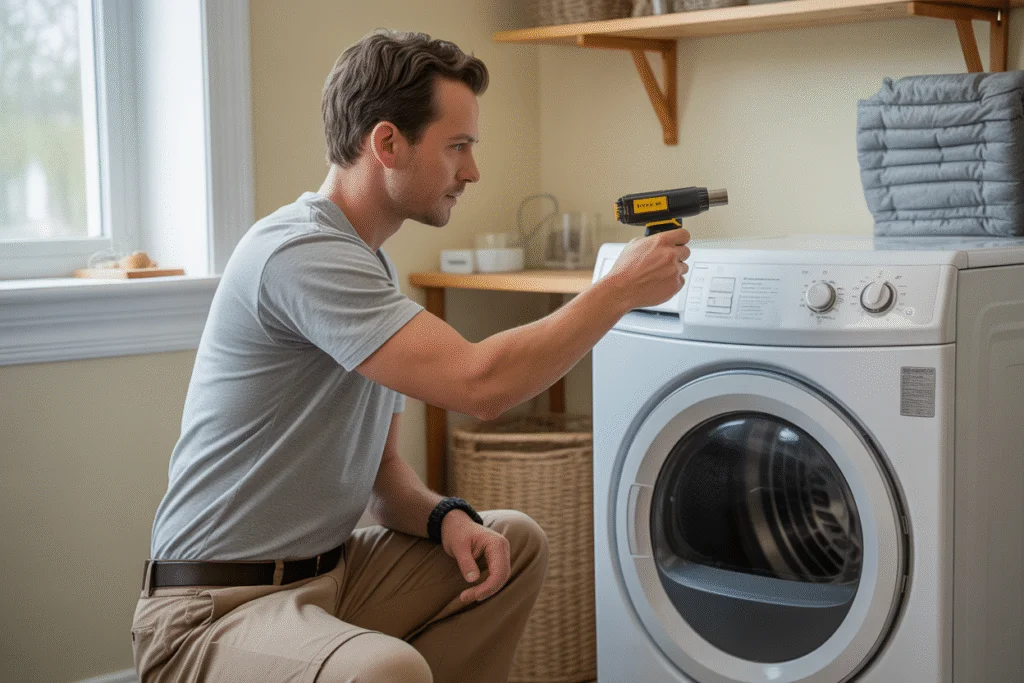
1. Vented electric dryers

Vented dryers are what most homes already have. And they need a duct that leads to the outside because they blow hot, moist air out of your home. 

They rely on this airflow to dry your clothes efficiently. Without a vent, your dryer struggles, clothes take longer to dry, and all that moisture and lint stay inside. 

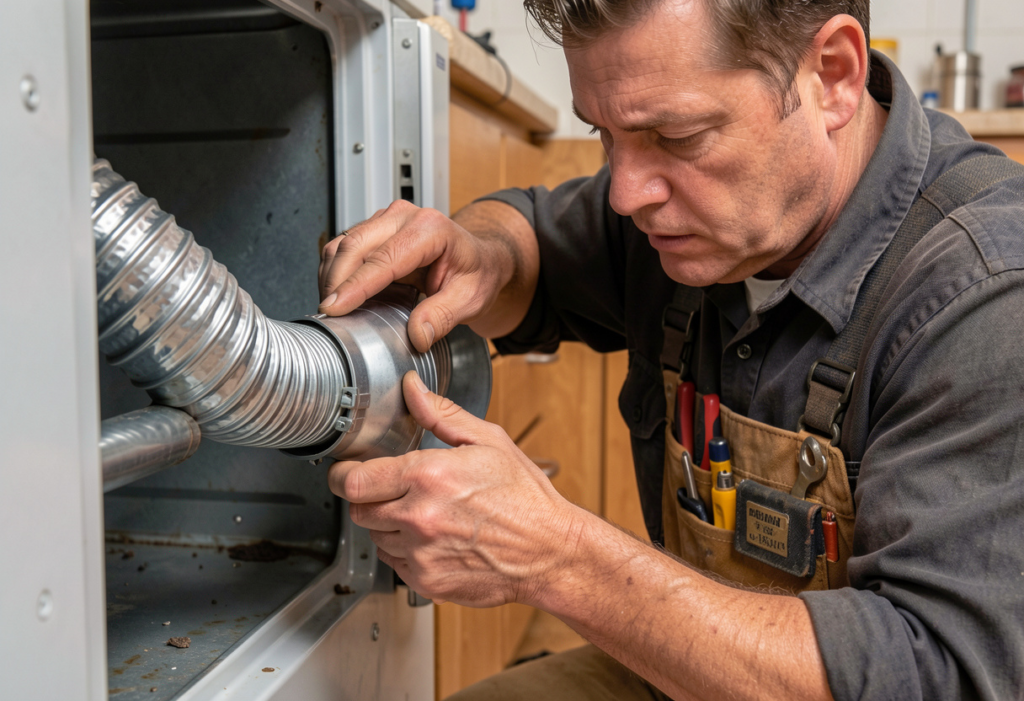
A simple way to tell if you have a vented dryer is to look at the back. If there’s a large round exhaust outlet, that’s your vent connection.

2. Ventless electric dryers

Ventless dryers work differently. They don’t need an outside vent because they remove moisture inside the machine. 

Here, some models collect water in a tank you empty, while others send it to a drain. 

Yes, there are many pros and cons of ventless dryers, especially when compared to vented ones. But they let you use a dryer without a vent. 

Note: You cannot convert a vented dryer into a ventless one. Only dryers designed to be ventless can safely run without a vent. And trying to bypass this can lead to moisture problems, long drying times, and even safety risks.

Here’s how vented and ventless dryers work, in short: 

TypeHow It WorksNotes
VentedPushes hot, moist air outsideMost common; requires ducting
VentlessRemoves moisture inside using tank or drainWorks with condenser or heat-pump; no duct needed

Here’s what happens if you are using a dryer without a vent

A lot of homeowners who are doing renovations, temporary installs, or basement projects ask me what happens if they use a dryer without a vent. 

And this is a valid question as you often need to temporarily remove the vents during renovation projects. But even if it is temporary, I suggest you not use a dryer without a vent. 

Here’s what really happens if you don’t vent your dryer: 

1. Moisture builds up inside your home

Your dryer pulls gallons of water out of your wet laundry every week. 

Normally, that moisture is carried outside through the vent. But if you run a dryer without a vent, all that damp air goes straight into your home instead. 

This can make your laundry room feel humid, nearby rooms sticky and uncomfortable, and even push moisture into your basement or walls over time. 

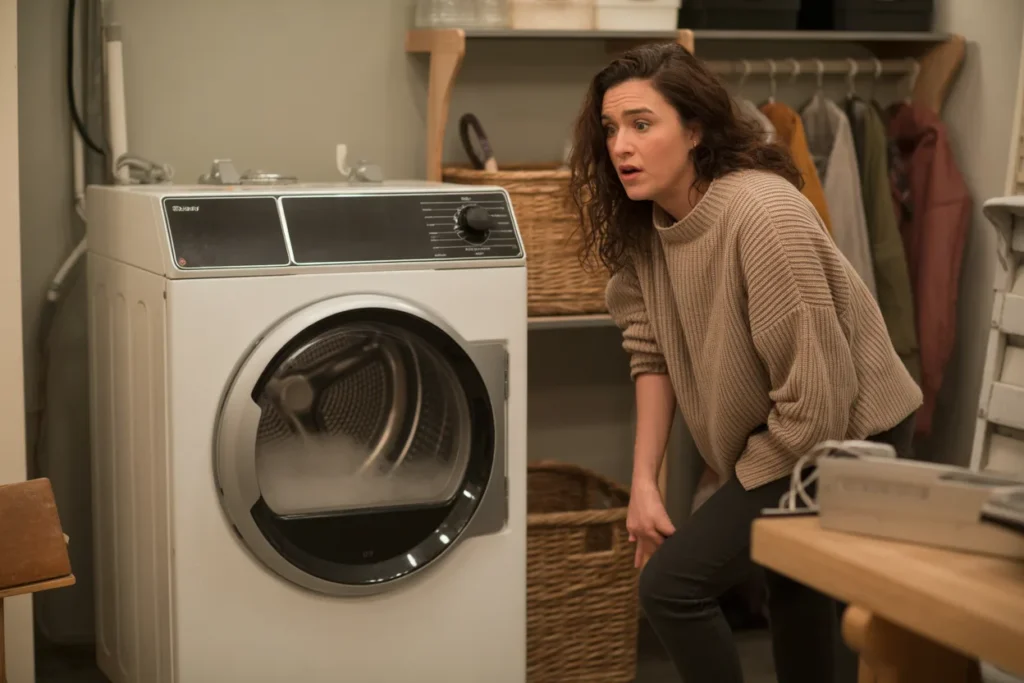
2. Mold and condensation risk increases

When moist air lingers inside, it can settle on walls, windows, and ceilings, leaving condensation or water streaks. 

This creates the perfect environment for mold and mildew to grow, especially in hidden areas like behind cabinets or inside wall cavities. You might notice a musty smell, damp spots, or a sudden spike in indoor humidity. 

Many homeowners don’t realize the dryer itself can be a hidden moisture source, and ignoring it can lead to serious problems that are expensive to fix later.

3. Dryer performance becomes terrible

Without a vent, your dryer struggles to push the hot, moist air out. This means clothes take much longer to dry, and you may find yourself running extra cycles just to get them fully dry.

Also, heat builds up inside the room, making your laundry space uncomfortably warm. 

4. Lint spreads into your home

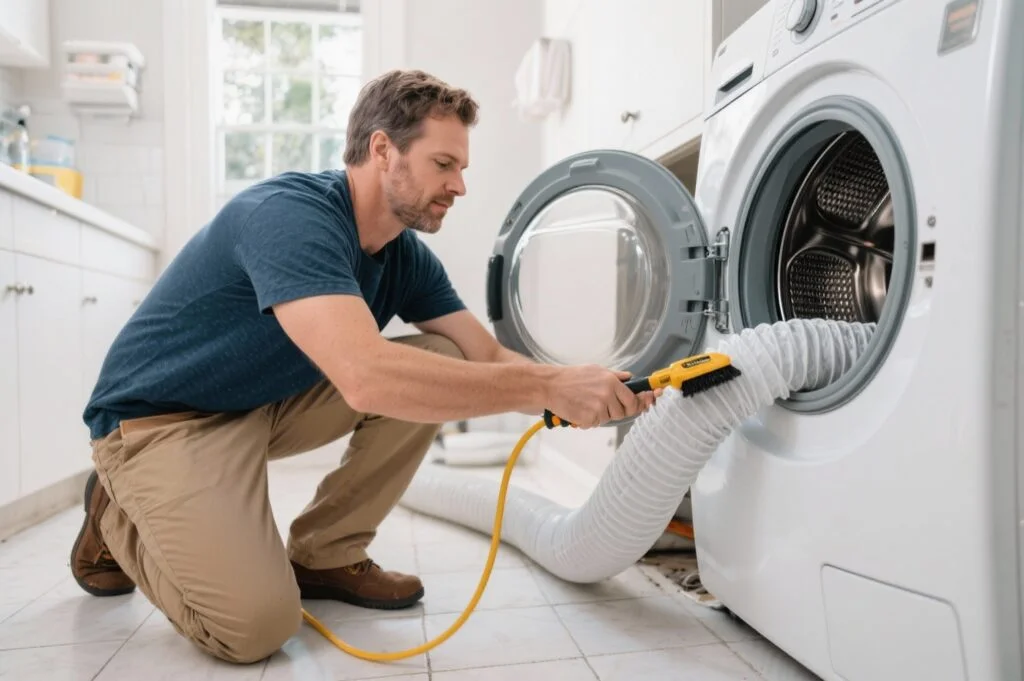
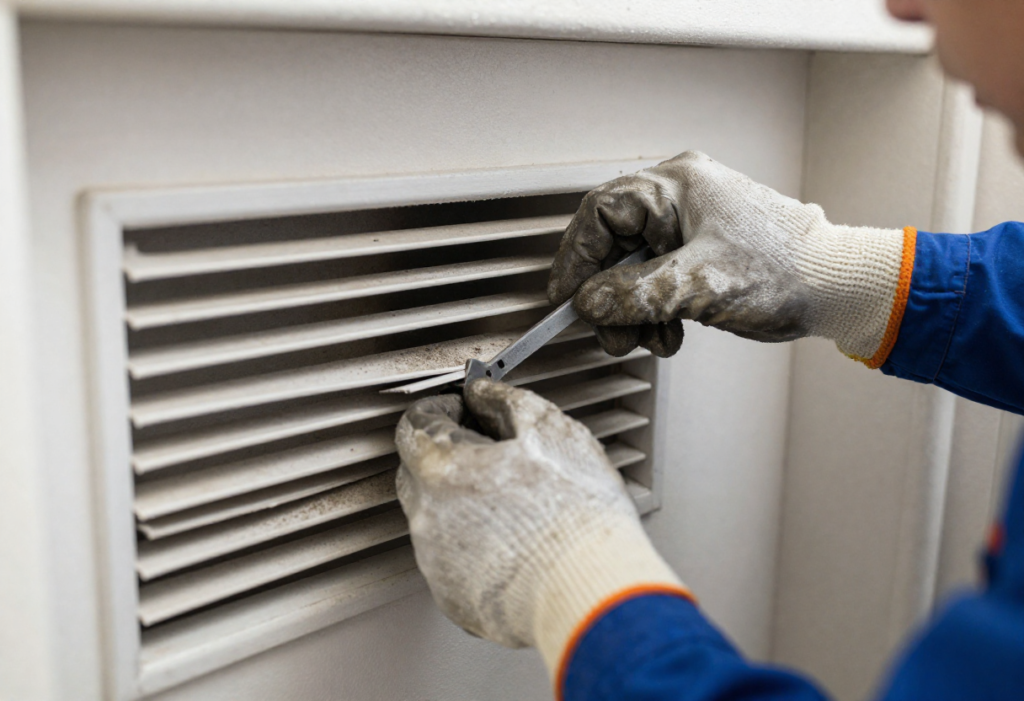
The vent isn’t just for moisture, it’s also a lint removal system. And when a dryer isn’t vented properly, fine lint doesn’t leave the house. 

Instead, it settles on shelves, floors, and furniture, and can even get sucked into your HVAC system. 

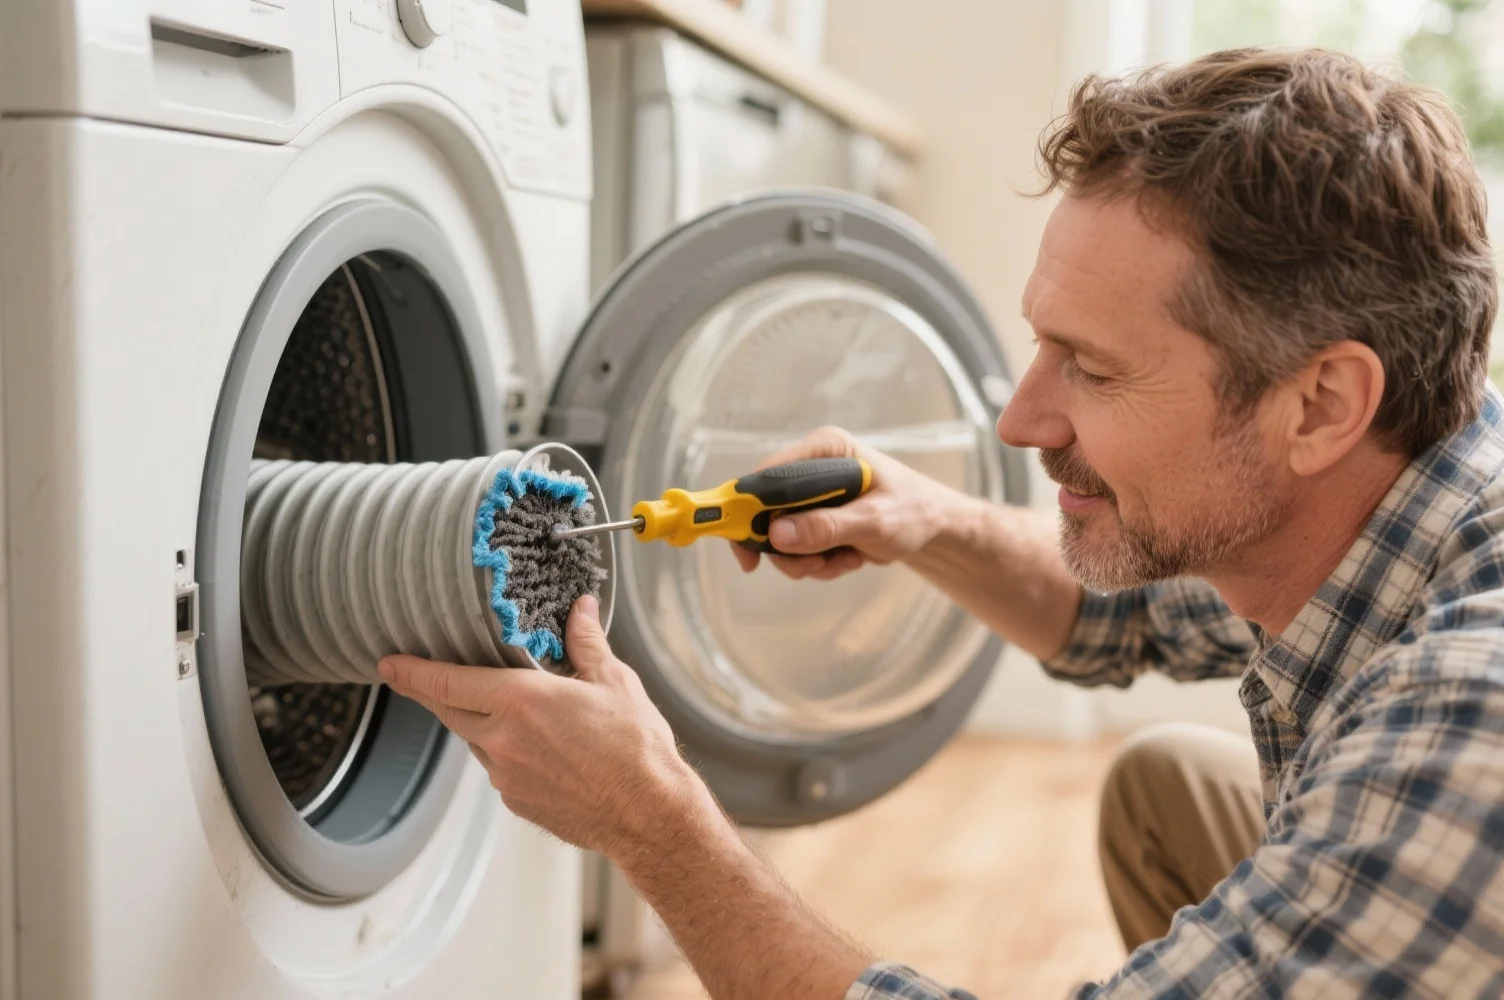
This is also true for dirty dryer vents, which is why I suggest homeowners get dryer vent cleaning regularly. 

Over time, this reduces indoor air quality, increases dust buildup, and can trigger allergies or respiratory irritation. Also, lint is flammable, which makes proper venting even more important. 

5. Fire risk can increase

If you don’t use a dryer vent, lint can accumulate in hidden spots all across your home. And since dryer heat has nowhere to go, all that lint becomes a real fire hazard. 

In fact, with nearly 3,000 residential dryer fires per year (as per the U.S. Fire Administration), dryer fires are more common than many homeowners think. 

Here are all the risks of using a dryer without a vent, in short:

ProblemWhat Happens
Moisture buildupDamp laundry room, nearby rooms, and walls
Mold & condensationMusty smells, visible mold, window condensation
Poor drying performanceLonger cycles, wasted energy, heat buildup
Lint spreadDust on surfaces and in HVAC, allergy risk
Fire hazardLint accumulation and heat increase risk

Can you use a dryer without a vent for a short time?

This is one of the most common questions homeowners ask, especially during renovations or temporary setups. 

Technically speaking, yes, a dryer will still turn on without a vent. 

But even a short-term run can dump gallons of moisture into your home, cause condensation on walls and windows, and quickly spike indoor humidity. 

In fact, in small spaces like basements, laundry closets, or condos, these effects can become noticeable in just a few days, not weeks or months. 

This is why I never recommend using a dryer without a vent, not even temporarily. 

What about indoor dryer vent kits?

You might have seen indoor vent kits advertised at Walmart, and other stores. These kits attach to the dryer hose, filter some lint, and release air into the room. 

They sound convenient, but here’s the reality: While they catch a little lint, they don’t remove moisture. 

Meaning that hot, humid air still stays inside your home. That can lead to damp walls, musty smells, and higher humidity, especially in small laundry rooms or basements.

When can you run dryer without vent?

The only time it’s safe to run a dryer without an outside vent is if it’s a true ventless model.

As we saw, ventless dryers work completely differently. Instead of blowing hot, wet air outside, they pull air through the drum, remove moisture internally, and either collect water in a tank or send it down a drain. 

This same air is reused inside the machine, so no moisture escapes into your home. 

Final words

By now, I am sure you’ve got clear answers to when do electric dryers need a vent and when they can work without a vent. 

Most electric dryers require a vent to the outside. The only exception is a true ventless dryer, built to remove moisture internally. 

So, if your dryer was made to be vented, it must be vented. That’s because skipping proper venting can lead to hidden moisture problems, mold growth, poor indoor air quality, and slower drying times.

Got more questions or want to get your dryer vent cleaned?

You can get in touch with us!

At Clean Air Technologies, we are seasoned New Jersey dryer vent cleaning professionals with 3+ decades of hands-on expertise. And we’ve got all your dryer vent cleaning needs covered on a budget. 

Frequently asked questions 

Do electric dryers need a vent?

Most electric dryers do need a vent because they are designed to push hot, wet air outside. These are called vented electric dryers. 

If you install one without a proper vent, moisture and lint stay inside your home and drying times get much longer. 

The only time an electric dryer does not need a vent is when it is a true ventless model, such as a condenser dryer or heat-pump dryer that removes moisture internally.

What is the difference between a vented and a ventless electric dryer?

A vented electric dryer sends hot, damp air through a duct and outside your home. 

A ventless electric dryer works very differently. It pulls moisture out of the air inside the machine and stores it in a tank or sends it to a drain. This means no exterior vent is needed. 

Can you use a dryer without a vent hose briefly?

Technically, the dryer will still turn on, but it is not a good idea. Even short-term use can release a lot of moisture into your laundry room. 

Are indoor dryer vent kits a safe replacement for a real vent?

Indoor dryer vent kits only catch some lint. They do not remove the moisture from the air. 

All of that humid air is released back into your home. This can quickly raise indoor humidity and increase the risk of mold and odors, especially in small laundry rooms or basements. 

Can I vent my electric dryer into a garage, attic, or crawl space?

No. 

Dryer exhaust must go outside the building. 

Venting into a garage, attic, or crawl space still traps moisture and lint inside the structure. Over time, this can lead to wet insulation, mold growth, and hidden damage to wood and drywall. 

How can I tell if my electric dryer is vented or ventless?

The easiest way is to look at the back of the dryer. If you see a round, four-inch exhaust outlet, it is a vented dryer and must be connected to a duct. 

You can also check the model description. If it does not clearly say “ventless,” “condenser,” or “heat pump,” it is almost always a standard vented dryer that requires a vent.

Do ventless electric dryers have any downsides?

Yes, and homeowners should be aware of them before choosing one. 

Ventless dryers usually cost more upfront and often take longer to dry clothes. Many models also require regular cleaning of filters and emptying a water tank, unless they are connected to a drain. 

They work very well when venting is impossible, but for large families or heavy laundry use, the longer drying times and added maintenance can be a real drawback.

Can You Put A Filter On Return Air Vent? Pros And Cons Explained

Can I put a filter on return air vent? 

This is one question a lot of New Jersey homeowners ask me. More so when they’re dealing with dust, pet hair, allergies, and other air quality issues. 

Now, if you’re looking for an answer to this online, you’ve probably come across mixed opinions.

After all, while some HVAC experts say return vent filters are good, others say they’ll damage your HVAC system.

So what’s the truth?

For starters, you can put a filter on a return air vent. But it’s not always a good idea.  

It all depends on how your HVAC system is designed, how many return vents you have, and what type of filter you use.

In this guide, I will break it all down. You’ll know: 

  • When return vent filters make sense
  • When they cause problems
  • Pros and cons of placing filters on return vents
  • What I suggest homeowners in NJ

And a lot more. 

So, let’s get started. 

Key takeaways: 

  • You can put a filter on a return vent, but it’s not always a good idea.
  • One properly sized central filter is usually enough for most homes.
  • Return vent filters help with dust, pet hair, and hard-to-reach main filters.
  • Too many filters or high-MERV filters can reduce airflow and damage your HVAC.
  • Always prioritize airflow over heavy filtration for system health.
  • Regular filter changes are critical as a dirty filter can harm your HVAC system.
  • Older homes or undersized ducts need professionally installed filters.

For starters, what is a return air vent ?

Floor return air vent installed near wall baseboard without a filter

Your HVAC system doesn’t just blow air into your home, it also pulls air back in. And that’s the job of the return air vent. 

While supply vents push warm or cool air into your rooms, return vents quietly do the opposite. They pull that air back to the system so it can be filtered, reheated, or cooled again.

In fact, return vents are more important than you might realize. That’s because they keep air moving smoothly through the system, help maintain consistent temperatures from room to room, and protect sensitive HVAC components from dust and debris buildup.

Now, most HVAC systems are designed with one main air filter, usually at the furnace or inside a return duct. 

In this blog, we are talking about whether or not you can put an extra filter outside the return vent. 

Clean-Air-Technologies's Logo
Angies Super Service
Accredited Business
Aeroseal

Schedule Your Free Estimate Today

Contact us to improve your indoor air
quality with our expert cleaning services in NJ.

Can you put a filter on return air vent?

Yes, you can put a filter on a return air vent. 

In fact, some return vent covers are made to hold filters, so it’s easy to assume. 

But here’s the tricky part.

You see, just because something fits doesn’t mean it’s right for your HVAC system. 

This is especially true for return vents that are designed to pull back air freely into the unit. So, if you add a filter in the wrong spot, or a filter that’s too thick, you can slow down that airflow without even realizing it.  

This restriction might not cause problems right away. But over time it can lead to issues like poor heating or cooling, higher energy bills, or extra strain on your system.

Simply put, installing a return vent filter is possible. However, whether you should do it depends on how your system is designed, how many returns you have, and what type of filter you’re using.

What are the pros of putting a filter on return air vent? 

Wall-mounted return air vent in a living room near seating area

When you use filters on return vents the right way, they can definitely offer some benefits. 

Sure, they’re not a one-size-fits-all solution. But in the right setup, they can make a noticeable difference. 

These filters work by catching larger particles before air travels deep into your HVAC system.\

So, if you’ve been dealing with dust, pet hair, or hard-to-reach filter locations, return vent filters can be a practical upgrade. 

Overall, here are the benefits of using an air return vent with filter: 

1. Helps capture dust and pet hair early

One of the biggest advantages of return vent filters is that they catch dust, lint, and pet hair right where the air enters the system. 

This means less debris traveling through your ductwork and settling on HVAC components. 

If your home has shedding pets, older carpeting, or noticeable dust buildup, this can be especially helpful. 

While these filters won’t eliminate dust completely, they can reduce how much dust ends up inside the HVAC system. All you’ve got to do is schedule an air filter replacement every month or so. 

2. It is easy to install 

In many New Jersey homes, the main HVAC filter isn’t easy to reach. It might be tucked into a basement ceiling, a crawl space, or an attic air handler. 

Now, when filters are hard to access, they often don’t get changed as often as they should.

Return air vents, on the other hand, are usually in walls or floors and easy to replace. This convenience alone can be a big advantage, because old/dirty air filters do more harm than good.

3. It is useful when there’s no central filter 

Some older HVAC systems simply weren’t built with a dedicated central filter slot. And in these systems, homeowners might not have a clear place to install a standard filter. 

For these setups, return vent filters come in handy as a practical solution.

While it might not be as good as a central filter, it’s better than letting unfiltered air move freely through your HVAC system. 

4. Helps filter air evenly in homes with large return vents  

Homes with multiple large return vents may tolerate low-resistance filters, but only if airflow has been tested and approved by a professional. When properly designed and balanced, this setup can help filter air more evenly throughout the home without restricting airflow.

However, you’ve to ensure that the airflow is properly balanced across all areas of your home.

In short, here are all the pros of putting a filter on return air vent: 

ProsTakeaway
Capture Dust & Pet HairStops dust, lint, and pet hair before it enters ducts; reduces buildup if changed regularly.
Easier AccessReturn vents are often easier to reach than attic or basement filters, making timely changes more likely.
No Central FilterWorks as a practical solution in older systems without a main filter.
Multi-Return HomesCan help if multiple large returns exist and low-resistance filters are used; needs professional guidance.

Bonus: Not sure when to schedule an air filter replacement?

You can read my blog on how often to change air filters and get expert-backed timelines on when to replace air filters based on your HVAC system and filter type.  

What are the cons of putting a filter on return air vent? 

Close-up of a wall return air vent grille without a filter installed

While return vent filters can help in some situations, they also come with real risks. More so if your HVAC system wasn’t designed for them. 

The biggest issue is airflow. 

Your HVAC system needs a steady, unrestricted flow of air to work properly. And when filters are added in the wrong places, the system can struggle to get airflow. 

These problems often build slowly, which makes them easy to overlook until expensive repairs show up.

Overall, here are the disadvantages of using an air return vent with filter: 

1. Reduced airflow

I am often asked by homeowners: Do vent filters block air flow? 

And the answer is yes, they can. 

You see, every filter creates some resistance to air flow, even clean ones. And when you add more than one return vent filter, your HVAC system has to work harder just to pull air in. 

This reduced airflow can cause serious issues over time. Air conditioners might freeze up, furnaces can overheat, and you can end up with higher energy bills.

In many New Jersey homes, restricted airflow is made worse by dust and debris inside the ductwork, which is why professional air duct cleaning in New Jersey is often recommended before adding extra filters or increasing filtration resistance.

Plus, poor airflow also puts extra strain on parts like the blower motor, which can shorten the life of the equipment.

2. You might do double filtering 

This is one of the most common problems I see with filters on return vents.

Many homeowners add a filter to the return vent without realizing there’s already a filter at the furnace or air handler. 

This means the system is filtering the same air twice. And while it sounds like extra protection, it usually does more harm than good. 

How?

Double filtering increases resistance and restricts airflow unless the HVAC system has been tested and approved for it. 

3. Harder maintenance 

When you have multiple return filters, maintenance quickly becomes more complicated. That’s because instead of changing one filter, you now have several to keep track of. 

It is easy to forget replacing one of the filters, especially if it’s in a low-traffic area. And this can lead to clogged return vent filters and block airflow without you noticing. 

4. Wrong filter type can cause damage

When it comes to placing a filter on return air vent, filter type matters more than you might realize. 

How?

Well, if you install high-MERV filters, especially those rated MERV 11 to 13, it can severely restrict airflow when placed at return vents. 

In fact, this is a common problem I notice in older New Jersey homes with smaller or modified ductwork. 

And this happens because even though these filters are great at trapping tiny particles, they often aren’t compatible with return vent locations.

In short, here are all the cons of putting a filter on return air vent: 

Cons Takeaway
Reduced AirflowExtra resistance can cause frozen AC, overheating furnace, higher bills, and equipment wear.
Double FilteringAdding a filter when one exists at furnace can reduce airflow and strain system.
MaintenanceMore filters = more to remember; dirty filters block airflow and hurt performance.
Wrong Filter TypeHigh-MERV filters may block air in smaller/older ducts and stress the system.

When to use filters on return vents and when not to? 

White wall-mounted return air vent grille inside a home

Return air vent filters aren’t automatically good or bad. They really depend on how your HVAC system is set up and how well it can handle extra resistance. 

For instance, in some homes return vent filters do solve air quality-related problems. But in others, they can quietly create new problems. 

So, your goal should always be to get clean air without hurting airflow. 

All in all, here’s when I suggest using return vent filters, and when not to.

You can use an air filter in return vent if:

A. Your system has no central filter

Some older HVAC systems weren’t built with a main filter at the furnace or air handler. In these systems, return vent filters are a practical way to keep dust and debris from circulating through the system.

B. You use low-resistance filters (MERV 4-8)

Low-MERV air filters rated from MERV 4-8 are designed to catch larger particles without blocking airflow. 

And when you use them at return vents, these lighter filters help protect the system while still allowing air to move freely, which is critical for proper HVAC performance.

C. You have multiple large return vents

Homes with several large return vents can sometimes handle filters better because airflow is spread out. 

Here, the return vents are properly sized, and low-resistance filters work well without putting too much strain on the system.

D. You commit to regular filter changes

Return vent filters only help if they’re kept clean. So, if you are consistent about checking and changing filters every 30-60 days, your HVAC is far less likely to run into airflow problems or system strain.

E. Airflow has been tested or approved by a professional

When an HVAC professional confirms that your system can handle return vent filters, the risk drops significantly. That’s because proper airflow testing ensures the system won’t be starved for air or overworked.

In short, here’s when you can use a filter on return air vent: 

When to UseTakeaway
No Central FilterOlder systems without main filters benefit from return vent filters.
Low-Resistance Filters (MERV 4-8)These catch dust without restricting airflow.
Multiple Large Return VentsCan spread airflow if system is balanced and filters are low-resistance.
Regular ChangesFilters only help if cleaned/changed every 30–60 days.
Airflow ApprovedProfessional confirmation ensures system can handle added filters.

You should not use an air filter in return vent if:

A. Your system already has a properly sized central filter

If your HVAC system already uses a well-sized central filter, adding return vent filters usually creates unnecessary restriction. 

One good filter in the right place is almost always better than several filters working against airflow.

B. You’re using high-MERV filters

High-MERV filters trap smaller particles but also block more air. And when you install them at return vents, they often restrict airflow too much, especially in residential systems that weren’t designed to handle that level of resistance.

C. Your home has older or undersized ductwork

A lot of old homes have duct systems that are smaller or less efficient. Adding return vent filters in these setups can quickly lead to airflow problems, uneven temperatures, and extra strain on HVAC components.

D. You notice weak airflow or temperature issues

If some rooms don’t heat or cool well, or airflow already feels weak, return vent filters can make things worse. These symptoms often mean the system needs more airflow and not more restriction.

E. Filters are being forgotten or neglected

A dirty return vent filter can quietly choke airflow. So, if filters aren’t checked and changed consistently, they can cause more damage than protection.

In short, here’s when you shouldn’t use a filter on return air vent: 

When Not to UseTakeaway
Central Filter ExistsExtra filters usually create unnecessary resistance.
High-MERV FiltersCan block airflow too much for residential systems.
Older / Small DuctworkRisk of weak airflow and uneven temperatures.
Weak Airflow or Temp IssuesFilters can worsen existing airflow problems.
Filters NeglectedDirty filters can choke system more than they help.

Here’s how I suggest you use air filters on return vents

If you ask me, most homeowners don’t need filters on every return vent. From my experience, the safest and most effective setup is just one good central filter, the one at your furnace or air handler. 

Make sure it’s properly sized for your system and that you change it regularly. 

That’s all it really takes to keep your HVAC running smoothly and the air in your home clean.

And what about return vent filters? 

Well, I only recommend them in special cases, like if your system doesn’t have a central filter or a professional has approved it. 

Otherwise, stick with the main filter as it is simpler, safer, and works better.

You might also want to read: Why Is Your AC Blowing Out Smoke And How To Fix It?

Clean-Air-Technologies's Logo
Angies Super Service
Accredited Business
Aeroseal

Schedule Your Free Estimate Today

Contact us to improve your indoor air
quality with our expert cleaning services in NJ.

Final words 

So, can you put a filter on return air vent?

Yes, but only in the right situation.

For most homes, one properly placed filter is safer and more effective than multiple filters scattered throughout the system. 

Return vent filters can help in certain cases, but they can also create airflow problems if you use them incorrectly.

Got more questions or want to schedule air filter replacement?

You can get in touch with us!

At Clean Air Technologies, we offer both one-time and recurring air filter replacement plans. We bring the highest-quality MERV-rated air filters to keep your indoor air clean. 

Frequently asked questions 

Is it bad to put a filter on every return air vent?

It can be, yes. 

When you put filters on every return vent, you increase resistance in the system. This means your HVAC unit has to work harder to pull air in. 

Over time, this can lead to weak airflow, frozen AC coils, overheating furnaces, and higher energy bills. 

Should I use a return vent filter if my system already has one?

In most cases, no. 

If your HVAC system already has a central filter at the furnace or air handler, adding return vent filters creates double filtering.

That extra restriction can reduce airflow and strain the system. I recommend sticking with one main filter that’s properly sized and changed regularly instead of adding multiple filters throughout the home.

What MERV rating is best for return air vent filters?

If you do use return vent filters, lower is better. 

A MERV rating between 4 and 8 is usually the safest range. 

Higher MERV filters can block too much airflow, especially in older New Jersey homes with smaller return ducts. 

Do return air vent filters help with dust and pet hair?

Yes, they can help catch dust, pet hair, and lint before it enters the ductwork. This is especially useful in homes with shedding pets or visible dust buildup. 

However, the benefit only matters if the filters are changed regularly. A dirty return vent filter can actually cause more problems than it solves by restricting airflow.

How often should return air vent filters be changed?

Return vent filters should typically be changed every 30 to 60 days, sometimes sooner in homes with pets, allergies, or heavy dust. 

Are return air vent filters good for older homes?

It depends. 

Many older New Jersey homes have undersized or modified ductwork, which makes airflow more sensitive. 

Meaning adding return vent filters in these homes can sometimes cause airflow issues. 

It is always a good idea to have your airflow checked by a professional. 

What’s better: A return vent filter or a central HVAC filter?

For most homes, a single central HVAC filter is the better choice. It’s easier to maintain, designed into the system, and less likely to restrict airflow. 

Return vent filters are best used only in special situations, like systems without a central filter.

Why Is My Dryer Not Getting Hot? Common Reasons & Troubleshooting Tips

You open your dryer and find your clothes still cold and damp, even though it’s been running for hours now. 

You run it for 3-4 extra cycles but still there’s no help. 

And you wonder: Why is my dryer not getting hot? 

This is one of the most frustrating problems homeowners face. The dryer runs, but it doesn’t heat up.

The good news? 

It might not be as serious as you think. 

In fact, fixing it could be as simple as checking a few things at home. 

In this blog, I will walk you through some of the most common reasons for your dryer not heating up. Also, I will share some easy DIY fixes to troubleshoot your dryer. 

So, let’s get started. 

Key takeaways

  • If your dryer runs but doesn’t heat, you should check for power supply issues or clogged vents.
  • Clean your dryer vent regularly to avoid heating problems.
  • A blown thermal fuse can stop your dryer from heating but still let it spin.
  • Gas dryers might not heat due to a faulty igniter or gas flow issues.
  • Always check your washer as overly wet clothes can make it seem like the dryer isn’t heating.
  • If DIY fixes don’t work, it’s safe to call a professional.

First things first, is your dryer actually not heating?

Person checking a dryer that is running but not heating, inspecting controls and settings

Before you troubleshoot your dryer for heating problems, do make sure it’s really a heating issue. 

You see, sometimes the problem isn’t due to lack of heating. And a few simple checks can help you figure that out.

How? 

Answer the following questions: 

Are your clothes completely cold when they come out, or are they just still a little damp? 

If they’re just damp, it might not be a heating issue at all.

Did the problem happen all of a sudden, or has it been getting worse over time? 

A gradual change could point to something like a clogged vent or a part starting to fail.

Check the settings. Is your dryer on a heated cycle, like ‘Regular’ or ‘Heavy Duty’? 

If it’s accidentally set to ‘Air Fluff’ or ‘No Heat’, that could be the reason. 

A lot of times the dryer is producing heat, but poor airflow complicates the drying process. This is also the reason why sometimes your dryer smells like burning

Clean-Air-Technologies's Logo
Angies Super Service
Accredited Business
Aeroseal

Schedule Your Free Estimate Today

Contact us to improve your indoor air
quality with our expert cleaning services in NJ.

Here are the top reasons for your dryer not heating up

Homeowner opening a dryer to check the lint trap and airflow when the dryer is not heating properly

1. Power supply issues (this is the most common reason) 

One of the most common reasons your dryer might not be heating is a power issue. 

You might think your dryer is getting the right power when, in fact, it might only be getting half the power it needs. 

That’s because most standard electric dryers require two 120-volt lines (which is a total of 240 volts) to work properly. Here, one line powers the motor, making the drum spin, while the other powers the heating element, which is responsible for drying your clothes.

Now, if one of the electrical lines trip or if there’s an issue with the plug or connection, the dryer will still spin but won’t heat up. 

Here’s what you should check to confirm if it is a power issue: 

  • First, go to your breaker panel and reset both dryer breakers.
  • Next, inspect the plug and outlet for any loose or burned connections.
  • If you’re unsure, call an electrician to test the voltage.

2. Dryer vent is clogged 

A clogged vent is one of the most common reasons your dryer stops heating properly. 

This happens because, over time, lint and debris build up in the vent, blocking airflow. And it prevents the dryer’s heating system from releasing the heat.

It might make the dryer overheat and shut off the heat as a safety precaution.

Here are some signs of a clogged vent:

  • Clothes take 2-3 cycles to dry.
  • The dryer feels really hot on the outside.
  • A burning or musty smell starts to appear.
  • You can see lint around the outside vent.
  • The dryer shuts off mid-cycle.

Even if your vent is only partially clogged, it can still cause problems. And heating issues apart, clogged vents are a major fire risk too, causing thousands of home fires every year. 

Thankfully, fixing this is simple, all you’ve got to do is clean out your dryer vent regularly, and you can avoid this problem. 

3. Thermal fuse has blown 

The thermal fuse is a safety feature in your dryer that cuts off power to the heating element if the dryer gets too hot. 

It is a small but essential part designed to prevent fires by stopping heat if something goes wrong. 

However, if the fuse blows, your dryer won’t produce any heat. 

Here are some reasons why the thermal fuse blows: 

  • Clogged vents that cause overheating.
  • Poor airflow.
  • Your dryer has been running too hot for too long.

Once the fuse blows, it can’t be reset. You’ll need to replace it.

But don’t skip checking the airflow first. If you replace the fuse without fixing the underlying airflow issue, it’s likely to blow again.

4. Heating element failure 

If the power supply and airflow are both good, but your dryer still doesn’t heat, the heating element itself might be the problem. 

Heating elements can wear out over time, crack, or even break internally. And when that happens, your dryer will still run, but it won’t generate any heat to dry your clothes.

Here are some signs of heating element failure:

  • The dryer runs like normal, but your clothes stay cold.
  • There’s usually no burning smell, unlike when a fuse blows or something overheats.

If this is the issue, you’ll need to open up the dryer, check the heating element, and test it with a multimeter. 

And if the heating element is broken, replacing it is the only fix.

5. Igniter and gas flow problems (in gas dryers)

Gas dryers have a different set of components that make them heat up, and these can fail in a number of ways. 

For instance, if your gas dryer isn’t heating, the problem could be with the igniter, gas valve coils, or even the gas supply itself.   

Here are some common gas dryer issues:

  • A faulty igniter: If it doesn’t glow, the gas can’t ignite.
  • Broken gas valve coils: If these are faulty, gas won’t flow to the burner.
  • A shut-off gas supply: If the gas supply is turned off or interrupted, your dryer can’t heat.
  • A clogged burner assembly: If the burner isn’t functioning properly, heat won’t be generated.

Note: Gas dryers involve handling gas lines, which can be dangerous to DIY if you’re not trained. I suggest you call a professional for gas dryer issues as it’s safer and will prevent bigger problems down the road.    

6. Thermostat and temperature sensor failure 

Dryers rely on a variety of thermostats and temperature sensors to keep things at the right heat level. And if one of these parts fails, it could cause all sorts of issues. 

You might find the dryer not getting hot enough. Worse, it doesn’t turn on the heat at all, the heat shuts off too early, or the dryer overheats and triggers safety shutdowns.

Here’s why thermostat and temperature sensors  fail:

  • Over time, they can wear out from constant use. 
  • Lint buildup can cause them to malfunction.
  • If the dryer overheats regularly, it can damage these components.

If a thermostat or sensor fails, your dryer might not heat properly, or it could overheat and stop working altogether.

7. Control board or timer issues 

On newer dryer models, the control board or timer plays a big role in regulating the heating process. 

So, when this component fails, the dryer might seem to be running just fine, but the heat never turns on. 

This problem is less common but can still happen, especially after power surges or electrical issues.

Here’s what’s happening here: 

  • The control board decides when to send power to the heating element.
  • If the board malfunctions, the heating element won’t get any power, even if everything else seems normal.

Here’s what you can do:

  • This issue is harder to fix on your own because it involves the electrical components inside the dryer.
  • If you suspect a control board or timer issue, it is best to call a professional.

In short, here’s why your dryer is not getting hot: 

IssueWhat HappensWhat to Check/Do
Power Supply Issues (Electric Dryers)Dryer runs but does not heat.Reset both dryer breakers and inspect plug/outlet for issues.
Clogged Dryer VentClothes take multiple cycles to dry, dryer feels hot, burning smell.Clean vent and inspect for blockages. Call a pro for a deep cleaning.
Blown Thermal FuseDryer runs but does not heat.Check airflow, clean vents, and replace fuse if necessary.
Heating Element Failure (Electric Dryers)Dryer runs, clothes stay cold.Check heating element with a multimeter. Replace if broken.
Gas Dryer IssuesDryer tumbles but doesn’t heat.Check igniter, gas valve coils, and ensure gas supply is on.
Thermostats & Temperature SensorsHeat doesn’t turn on, shuts off too early, or dryer overheats.Check and replace faulty thermostats or sensors. Clean lint buildup.
Control Board/Timer Issues (Modern Dryers)Dryer runs but does not heat.Call a pro to inspect and replace control board or timer if needed.

Washer problems might also look like dryer problems (but they’re different)

Before you try to fix the dryer for not heating properly, I suggest you check if the washer is doing its part. 

You see, if your clothes come out of the washer dripping wet or soaking heavy with water, the dryer has to work a lot harder. 

The heating might be just fine, but when clothes are too wet, the dryer can’t dry them effectively.

It might seem like the dryer is not heating properly when in reality the clothes are just overloaded with water.

Here’s what I suggest you check:

  • Washer spin cycle: Make sure the spin cycle is running properly and extracting enough water from your clothes. If it’s not spinning fast enough, your clothes will be too wet for the dryer to handle efficiently.
  • Drain performance: Check that your washer is draining properly. If the water isn’t draining out completely, your clothes will stay soaked.
  • Load size: Avoid overloading the washer. A big or heavy load can prevent the spin cycle from working well, leaving your clothes extra damp.

If the washer isn’t doing its job, your dryer will struggle to dry your clothes, no matter how much heat it’s producing.

In short, here are some washer problems that keep your clothes wet: 

IssueWhat HappensWhat to Check/Do
Washer Spin Cycle ProblemsClothes come out soaking wet, too heavy with water.Check if the spin cycle is running properly and spinning fast enough.
Drain PerformanceClothes are still soaking wet after washing.Ensure the washer is draining properly. If not, check the drain pump or hose.
Overloaded WasherClothes are too damp for the dryer to handle.Avoid overloading the washer. Ensure the load size is appropriate.

Dryer not warming up: How to troubleshoot?

Homeowner standing in front of a dryer that is running but not heating, trying to diagnose the problem

Before you call a professional, there are some easy ways to troubleshoot your dryer that you can try. After all, fixing your dryer heating is often simpler than you think. 

Overall, here are a few ways you can try to troubleshoot: 

1. Check settings

First, make sure your dryer is set to a heated cycle. 

Sometimes, you or your family members might accidentally set it to ‘Air Fluff’ or ‘No Heat.’ Switch to a timed or automatic heat cycle, and see if that makes a difference.

2. Check power

If the settings are correct, check your power supply. 

Go to your breaker panel and reset both dryer breakers. Also, take a look at the dryer plug and outlet for any signs of loose or burnt connections.

3. Clean lint trap

Clean the lint trap after every load. 

Lint buildup not only makes drying slower, but it can also cause your dryer to overheat or stop heating. So, always do it before you start a new load.

4. Inspect vent hose

Check the vent hose for any kinks or crushing. 

It is important that the hose runs smoothly to allow proper airflow. Also, make sure it’s not too long or filled with lint as both can restrict airflow and cause heating problems.

5. Check outside vent

Finally, go outside and check the vent where the air exits. 

See if there is strong airflow and if the vent flap opens fully when the dryer’s running. If not, you might have a blockage or airflow issue that needs to be cleared.

In short, here’s how to troubleshoot if dryer is not heating up: 

StepWhat to DoWhy It Helps
Step 1: Check SettingsEnsure your dryer is on a heated cycle, not ‘Air Fluff’ or ‘No Heat.’Incorrect settings can prevent the dryer from producing heat.
Step 2: Check PowerReset both dryer breakers and inspect the dryer plug and outlet for any issues.Power supply issues can cause the dryer to run without heating.
Step 3: Clean Lint TrapClean the lint trap after every load.Lint buildup can cause slow drying and overheating.
Step 4: Inspect Vent HoseLook for kinks, crushing, or lint buildup in the vent hose. Make sure it’s not too long.Blocked or restricted airflow can prevent proper heating.
Step 5: Check Outside VentEnsure strong airflow and that the vent flap opens fully when the dryer is running.Blockages outside can restrict airflow, causing heating issues.

When should you call a professional? 

While DIY fixes can often do the trick, there are certain situations where it’s best to stop and call a pro. 

For instance, if you smell gas, that’s a major red flag and a serious safety concern. So, you shouldn’t try to fix it yourself.

Similarly, if you suspect electrical issues, like problems with voltage or wiring, it’s best to have an electrician check things out.

Also, if internal parts like the heating element or control board need testing or replacement, leave it to the experts. 

The same thing goes for vent cleaning where professional dryer vent services ensure your dryer never stops working because of clogged vent lines or lint buildup. 

A trained technician can diagnose the problem safely, fix it correctly, and help prevent future issues.

Clean-Air-Technologies's Logo
Angies Super Service
Accredited Business
Aeroseal

Schedule Your Free Estimate Today

Contact us to improve your indoor air
quality with our expert cleaning services in NJ.

Final words 

By now, I am sure you know why is your dryer not getting hot even though it is running. 

You see, it is clearly a sign that something’s wrong, and it might get worse if you don’t fix it soon. 

So, the earlier you catch the issue, the less damage there will be, and the safer your home will be. 

If you’re unsure about what’s going on, it’s always a good idea to have a professional take a look. 

Got more questions or want to schedule a dryer vent cleaning service? 

You can get in touch with us!

At Clean Air Technologies, we are professional dryer vent and air duct cleaning specialists with 3+ decades of hands-on experience in New Jersey. And we’ve got all your dryer vent cleaning needs covered on a budget. 

FAQs about dryer not heating up

Why does my dryer run but not get hot?

When a dryer runs but doesn’t heat, it’s usually caused by a power supply issue, a clogged dryer vent, a blown thermal fuse, or a faulty heating component. 

In many homes, restricted airflow from lint buildup causes the dryer to shut off heat as a safety measure. 

Can a clogged dryer vent cause my dryer to stop heating?

Yes, and this is one of the most common causes. 

When lint blocks the dryer vent, heat can’t escape properly. This might cause the dryer to overheat and automatically shut off heat to prevent a fire. 

It often seems like the dryer is broken when it’s actually a venting issue. So, cleaning the dryer vent often restores heat, shortens drying times, and improves safety at the same time.

Why is my electric dryer not heating but still spinning?

Electric dryers need 240 volts to produce heat. If one breaker trips or a wiring connection fails, the dryer may still spin but won’t heat. 

Why is my gas dryer not heating up?

Gas dryers rely on an igniter and gas supply to create heat. If the igniter fails, gas flow is disrupted, or the gas valve isn’t working properly, the dryer will tumble but won’t heat. 

Now, since gas systems can be dangerous, this is not a DIY repair. If your gas dryer isn’t heating, it’s best to stop using it and contact a professional for safe diagnosis and repair.

When should I call a professional for a dryer not heating?

You should call a professional if basic checks don’t solve the issue, if you suspect electrical or gas problems, or if the dryer overheats or shuts off unexpectedly. 

Gas dryer issues, control board failures, and internal electrical testing should never be handled without proper training. A professional diagnosis can prevent repeat breakdowns and reduce fire risk in your home.

Dryer Smells Like Burning: What It Means And How To Fix It?

Your dryer smelling like something’s burning can make your heart jump a little. And honestly, that reaction is completely normal. 

In fact, a burning smell coming from the laundry room is something you never want to brush off.

You see, dryers work really hard. They blow out a lot of hot air, collect tons of lint, and rely on a bunch of moving parts to get your clothes dry. 

Now, when any of those things get blocked, worn out, or overheated, you might notice that weird burning odor. Sometimes it’s something small and easy to fix, and sometimes it’s a sign you need to stop the dryer and call in dryer vent experts.

The good news? 

Most dryer-burning smells are preventable and pretty simple to catch early. 

In this blog, I will tell you exactly why your dryer smells like burning, how to troubleshoot safely, and how you can keep it from happening again. 

So, let’s get started. 

Key takeaways 

  • A burning smell from your dryer is never normal and should be checked right away.
  • Lint buildup is the most common cause of burning odors.
  • Always unplug the dryer if you smell burning, especially if it’s strong or sharp.
  • Clean the lint trap every load and the vent at least once a year.
  • Overheating parts, clogged vents, or electrical issues need professional repair.
     
  • Avoid drying items with oil, chemicals, or rubber backing.
  • If the burning smell is too strong, stop the dryer and call a technician to stay safe.

Dryer smells like burning: What’s the cause? 

Woman noticing smoke coming from a dryer, indicating a burning smell and potential dryer safety issue

A burning smell from your dryer can feel scary, but most of the time it comes down to a handful of common issues. 

Dryers deal with a lot of heat, air, and lint. This is especially true for the winter season in New Jersey when you have a lot of laundry, including heavy woolen clothes. 

And even if a small part gets blocked, overheats, or wears out, you will notice a smoky or burnt smell.

But most of these problems are fixable, and even preventable, once you know what to look for.

Here are the most common reasons why you get that burning smell from dryer: 

1. Lint buildup in the filter, drum, or vent

Lint is sneaky. So much so that even if you clean the lint trap every time, tiny pieces of lint still slip past the screen. 

Over time, that lint collects inside the dryer’s housing, the vent duct, or the exhaust hose. 

And since lint is extremely flammable, it only takes a little bit of trapped heat to make it start to smoke. This is often the burning smell you notice first. 

Think of it like dust burning on a hot surface. If you ever smell a warm, toasty, dusty odor, lint buildup is usually the culprit.

2. Clogged or restricted vent/duct/exhaust hose

Your dryer needs to push hot and moist air out through the vent. And a lot of times, this airflow gets blocked due to lint, a kinked hose, or even an outside vent cover stuck closed. 

When this happens, heat can’t escape. And with trapped heat, the inside of the dryer gets hotter and hotter until something starts to smell like it’s burning.

A clogged vent can also make the dryer work twice as hard, which is why professional dryer vent cleaning in NJ is often the safest way to remove deep lint buildup and restore proper airflow. Common warning signs include longer drying times, warm or damp clothes, or even the outside of the dryer feeling hotter than normal. 

Clean-Air-Technologies's Logo
Angies Super Service
Accredited Business
Aeroseal

Schedule Your Free Estimate Today

Contact us to improve your indoor air
quality with our expert cleaning services in NJ.

3. Worn or overworked mechanical parts 

Dryers have moving parts that spin, roll, and keep the drum turning smoothly. And these parts do wear down with time, especially if the dryer is older or often overloaded. 

When belts or rollers get worn out, they can rub, slip, or grind, creating friction and heat. This heat can smell like burning rubber or hot metal. 

If the dryer starts making weird sounds along with the smell (squeaking, grinding, thumping), that’s your clue that something mechanical needs attention. 

It doesn’t always mean your dryer is dying, but it does mean a repair is needed sooner rather than later.

4. Heating element, thermostat, or electrical Issues

This is the more serious category. 

If you’ve got a broken dryer heating element, failed thermostat, or there’s an electrical problem, you might smell something sharp, chemical-like, or like melting plastic. 

And let me tell you this is not a smell to ignore. That’s because electrical components can overheat quickly and become a fire hazard. 

So, if the burning smell is strong, acrid, or you see any smoke at all, turn the dryer off immediately and unplug it. 

This is the moment you should call a professional as electrical components are not safe to DIY unless you’re trained to handle them.

5. Flammable or heat-sensitive clothing 

Sometimes the dryer itself isn’t the problem, it’s what’s inside. 

Clothes with oil stains, chemical residue, or food grease can heat up and start to smell like they’re burning. 

Also, items with plastic or rubber parts (like bath mats with rubber backing, sneakers, or kids’ toys accidentally thrown in) can melt or give off a strong burnt smell. 

Even certain fabrics that aren’t meant for high heat, like your leather jackets, can give off a weird odor. 

I suggest you always check labels and avoid drying things that might melt, burn, or react badly to heat.

TL;DR, here’s why your dryer smells like burning

CauseWhat It MeansWhat You Should Do
Lint buildupLint is overheating inside the dryer or ventClean the lint trap, vent, and duct
Clogged ventHot air can’t escape, causing heat to build upClear the vent hose and outside vent
Worn partsBelts, rollers, or motor are overheating from frictionStop using the dryer and call a tech
Electrical issueHeating element or wiring is overheatingUnplug immediately and get it inspected
Wrong items in dryerOil, chemicals, plastic, or rubber overheatingRemove items and avoid drying them again

What to do if the dryer smells like burning?

Woman cleaning lint buildup inside a clothes dryer drum to prevent a burning smell and overheating

When your dryer gives off a burning smell, the most important thing is to stay calm but act quickly. 

A burning odor doesn’t always mean something serious, but it can be a warning sign that something isn’t right. And since dryers get very hot, you don’t want to take chances.

So, before running another load, I suggest you pause, do a few quick checks, and make sure everything is safe. 

Here are a few things you can do when your clothes dryer smells like burning: 

1. Stop the dryer and unplug it

The very first thing to do is shut the dryer down completely. 

Don’t let it finish the cycle. Just turn it off and unplug it from the wall. 

If you have a gas dryer, go ahead and turn off the gas valve too. 

This stops heat from building up and prevents any electrical or gas-related risks. 

You see, even if the smell seems mild, unplugging removes any chance of something getting worse while you’re checking things out. 

2. Do not run another cycle and let the dryer cool down

You might want to restart the dryer to see if the smell comes back, but don’t do that yet. Give the dryer time to cool off completely. 

A hot dryer can make lint, dust, or worn parts smell worse, and you won’t get an accurate idea of what’s going on. 

Cooling it down first helps you figure out whether the smell was caused by heat buildup or something more serious. 

Plus, if something inside was overheating, restarting the dryer could make the situation unsafe. So, a few minutes of patience can prevent a lot of trouble.

3. Clean the lint trap thoroughly, even if you already cleaned it

Pull out the lint screen and clean the lint in dryer like you normally do. Also, go a step further and use your fingers or a small vacuum attachment to reach down into the lint trap housing. 

You’ll find a surprising amount of lint hiding in that deeper area, and that hidden lint is what often overheats and starts to smell. Even a thin layer can cause a burning dusty odor. 

In fact, if you’ve washed items that shed a lot (like towels or fleece), even more lint might be trapped. That’s exactly why this step alone fixes the problem for many people.

4. Inspect and clean the vent hose and exhaust duct 

Next, look at the vent hose behind the dryer. And if you can safely pull the dryer forward, detach the hose and check inside. 

Lint can build up in big clumps back there, and that trapped lint heats up quickly. I suggest you use a vacuum or your hand to remove anything you see. 

Also, check the long duct that leads outside. If it’s blocked or looks dusty, I suggest you clean out the dryer vent

A clogged vent is one of the top causes of burning smells and long drying times. And clearing it out helps your dryer breathe and keeps heat from getting trapped.

5. Feel the outside of the dryer (only if it is safe to touch)

Touch the top and sides of the dryer. They should feel warm, but not hot. If the outside feels extremely hot — or you smell something sharp, electrical, or like melting plastic — that’s a sign of overheating or a mechanical or electrical issue. In that case, don’t keep troubleshooting on your own. It’s safer to stop and call a technician. A dryer running hotter than it should is one of the clearest signs that something inside isn’t working the way it’s supposed to.

6. Avoid drying anything oily or chemical-stained

Were you drying a lot that had clothes with cooking oil, lotion, paint, cleaning chemicals, or other flammable substances?

If yes, those residues can overheat in there and make your dryer smell like burning. 

Worse, in some cases, they can even start smoking. 

So, remove those items and wash them again with extra detergent, or air-dry them instead. 

Also, check for items with rubber backing, plastic parts, or things that aren’t meant for high heat. These materials can melt or scorch, which creates strong burnt odors.

Note: If you see smoke or smell strong electrical burning, call a professional immediately 

If the burning smell is harsh, sharp, or chemical-like, or if you see even a tiny bit of smoke, don’t troubleshoot further and unplug the dryer right away. 

These signs often point to electrical problems or overheating parts, which need a trained technician. So, it’s better to stop everything and get help than to risk a fire. 

A professional can check wiring, heating elements, and internal components safely. 

TL;DR, here’s what to do if you get burning smell from dryer:

StepWhy It MattersWhat to Look For
Unplug the dryerStops heat and prevents electrical dangerBurning smell, unusual heat
Let it coolHelps identify the real cause safelyHot dryer, warm smell
Clean lint trapHidden lint often causes burning odorDusty, toasty smell
Check vent hoseLint buildup in vents traps heatClumps of lint, blocked airflow
Feel dryer exteriorExtreme heat signals a problemVery hot sides or top
Avoid risky itemsOils and plastics can burn or meltRubber-backed rugs, oily clothes
Call a pro if smell persistsSome issues are dangerous to DIYBurning plastic or electrical smell

You might also want to read: How Much Does It Cost To Get Your Dryer Vents Cleaned?

What safety measures can you DIY and when should you call in a professional?

New Jersey residents often ask me if they can fix a burning smell on their own. 

Now, a lot of dryer issues are simple and safe enough for homeowners to check. For instance, you can do things like cleaning out lint or clearing the vent. 

But there are also times when the problem goes beyond basic cleaning and needs a trained professional to avoid bigger risks. 

Here’s how to tell:

Safety measures you can DIY:

  • Empty the lint trap after every load
  • Vacuum the lint trap housing and visible drum area every few months
  • Detach and clean the vent hose and check the external vent for blockages
  • Make sure you’re not drying overly heavy loads or items not meant for dryers

When you should call a professional:

  • Smell persists after cleaning lint and vent, or smells like burning plastic/insulation
  • Dryer feels extremely hot, makes odd noises, or doesn’t run smoothly
  • You suspect electrical issues, faulty heating element, or mechanical failures

TL;DR, here’s when to DIY and when to call a professional:

SituationDIY Safe?What to Do
Cleaning lint trapYesRemove lint after each load
Clearing vent hoseYesDisconnect hose and vacuum it
Dryer feels extremely hotNoCall a technician
Burning plastic/electrical smellNoUnplug immediately and get help
Clothes take too long to dryYes (first check vents)Clean vent and duct
Loud or unusual noisesNoMechanical parts may be failing
Electrical problems suspectedAbsolutely notProfessional repair only

How to fix burning smell from dryer in the long run?

Homeowner concerned about a dryer smelling like burning, signaling a possible mechanical or electrical issue

The best way to avoid that burning smell in the future is to keep your dryer clean and give it a little regular attention. 

Dryers don’t need a ton of maintenance, but the few things they do need make a huge difference in how safely and efficiently they run. 

Here’s how you can maintain your dryer and prevent burning smell in the future: 

1. Clean the lint screen after every load

This tiny habit makes a big difference.

How?

The lint screen catches most of the fluff that comes off your clothes. But if it’s full, lint ends up in places you don’t want it, like inside the dryer or in the vent. 

A quick swipe after every load helps your dryer breathe better, run more efficiently, and stay much safer. It only takes a few seconds, but it prevents a lot of issues later.

2. Clean the vent and duct at least once a year

Even if you’re cleaning the lint trap, lint still travels into the vent and duct. Over time, it piles up and blocks airflow, causing that burning smell. 

So, I can’t overstate the benefits of annual dryer vent cleaning (or twice a year for busy households). 

3. Inspect the exhaust vent outside

Take a quick look at the vent on the outside of your home every so often and make sure the flap opens easily when the dryer runs. There shouldn’t be anything blocking it, no lint, leaves, or even birds trying to build a nest. 

If the vent can’t open properly, heat and lint get trapped inside the dryer, which is one of the reasons why you get that burning smell.

4. Avoid drying flammable or heat-sensitive items

Some things simply aren’t meant for the dryer. Items with rubber backing, plastic parts, or oily/chemical residues can overheat or melt, creating strong burning smells. 

Also, clothes with cooking oil, paint, or cleaning products on them should be washed thoroughly or air-dried. 

5. Don’t overload the dryer

Stuffing the dryer full might seem convenient, but it makes the machine work way harder.

Overloaded dryers don’t get good airflow, so everything inside heats up more than it should.

This puts extra stress on the motor, belts, and rollers. And that extra strain can lead to burning smells. 

So, i’s better to run two smaller loads than one giant one.

6. Schedule maintenance every few years

As dryers age, parts like belts, bearings, and rollers naturally wear down. 

A technician can spot these issues early before they cause overheating or burning odors. 

So, a quick check-up every few years can keep everything running safely and help you avoid surprise breakdowns. 

TL;DR, here’s how to prevent burning smell from dryer in the long run 

TipWhy It HelpsHow Often
Clean lint screenPrevents lint from overheatingEvery load
Clean vent & ductKeeps airflow strong and safe1-2 times per year
Check outdoor ventEnsures heat can escapeEvery few months
Avoid risky itemsPrevents melting/burningAs needed
Don’t overload dryerReduces strain on motor and beltsEvery load
Professional tune-upCatches worn parts earlyEvery few years
Clean-Air-Technologies's Logo
Angies Super Service
Accredited Business
Aeroseal

Schedule Your Free Estimate Today

Contact us to improve your indoor air
quality with our expert cleaning services in NJ.

Conclusion 

By now, I am sure you know why exactly your dryer smells like burning. 

You see, a burning smell from your dryer doesn’t always mean disaster. Sometimes it’s lint, sometimes airflow issues, or maybe just a heavy load. 

But it can also be a warning, especially if the smell is strong or smells like melting plastic.

So, if you ever feel unsure, it’s best to call in a qualified technician.

Got more questions or looking to schedule a dryer vent cleaning service?

You can get in touch with us!

At Clean Air Technologies, we are seasoned HVAC cleaning and maintenance professionals with over three decades of experience servicing New Jersey homes. And we’ve got all your dryer vent cleaning needs covered on a budget.  

FAQs about burning smell from dryer

Is it normal for a dryer to smell a little warm?

A warm smell is normal, especially right after a load of laundry. 

But a burning smell, like rubber, plastic, or something smoky, is not normal. 

If you notice anything other than a light warm laundry scent, stop the dryer and check for lint buildup or airflow issues.

Can a dryer actually catch fire from lint?

Yes, it can. 

Lint is extremely flammable, and when it builds up around heat sources, it can ignite. That’s why cleaning the lint trap and vent is so important. 

Most dryer fires start with lint. But it’s totally preventable with simple maintenance.

How do I know if my dryer vent is clogged?

A clogged vent often shows itself through signs like longer drying times, damp clothes, a hot dryer exterior, or a vent flap outside that barely opens. If your clothes take a lot longer than usual to dry, it’s usually a vent issue.

Why does my dryer smell like burning plastic?

A burning plastic smell usually points to something more serious, like an overheating part, a worn belt, or an electrical issue. It can also happen if something plastic accidentally got into the dryer. 

If the smell is strong or sharp, stop the dryer and unplug it.

How often should I clean my dryer vent?

Most homes should clean their vent once a year. If you use your dryer daily, have a large family, or notice lint buildup outside, cleaning it twice a year is even better.

Can oily clothes cause a burning smell in the dryer?

Yes! 

Clothes with cooking oil, body oils, or chemical stains can heat up and smell like they’re burning.

Some oils can even ignite at high temperatures. So, always wash these items thoroughly before drying or air-dry them to be safe.

When should I call a professional instead of fixing it myself?

If the burning smell persists, if the dryer feels overly hot, makes strange noises, or smells like melting plastic or electrical insulation, it’s time to call a technician.

Anything electrical or mechanical is safer in a professional’s hands.

How To Clean Out Your Dryer Vent In New Jersey (DIY Guide For Beginners)

Are you noticing your dryer acting up of late? 

Your towels come out damp even after a full 60-minute cycle, or maybe the laundry room feels hotter than usual.

Worse, there could be a slight burning lint smell when the dryer runs.

These could all make you wonder if something isn’t right.

For starters, let me tell you these are all signs of a clogged dryer vent. And more than just an efficiency problem, this is one of the most common safety issues in New Jersey homes.

Now, the silver lining is, you can safely clean your dryer vents yourself; all you’ve got to do is follow the right steps. 

In this blog, I will tell you everything about how to clean out your dryer vent. You’ll know:

  • What tools you need
  • All the steps to clean your dryer vents 
  • Common mistakes homeowners in NJ make, and how to avoid them
  • When DIY cleaning isn’t enough and it’s time to consider professional dryer vent cleaning
  • And extra insights from my own dryer duct cleaning experience

So, let’s get started. 

Key takeaways 

  • Cleaning your dryer vent reduces fire risk and helps clothes dry faster.
  • You only need simple tools like a brush kit, vacuum, screwdriver, and gloves.
  • New Jersey homes often have longer vent runs, and this makes lint build up faster.
  • Dryer vents should have no screens or screws sticking inside when you clean.
  • Replace worn-out transition ducts with UL 2158A-listed ones.
  • Call a professional if there is heavy lint, birds’ nests, mold, crushed ducts, or water in the vent.
  • Most homes in New Jersey need a full dryer vent cleaning at least once a year.

How to clean out your dryer vent? 

Homeowner using a brush tool to clean lint from a metal dryer vent connection during DIY dryer vent maintenance.

Cleaning your dryer vent might sound intimidating. But let me tell you it’s actually a pretty simple DIY job once you know the steps. 

All you’ve got to do is grab a dryer vent brush kit, work the brush inside the duct, pull out all the lint, and you’re done. 

I have explained in detail how you can do all of these by yourself using simple tools. Let’s have a look. 

Clean-Air-Technologies's Logo
Angies Super Service
Accredited Business
Aeroseal

Schedule Your Free Estimate Today

Contact us to improve your indoor air
quality with our expert cleaning services in NJ.

Get the required tools for dryer vent cleaning

The best part about DIY dryer vent cleaning is that you don’t need any fancy equipment. In fact, most New Jersey homeowners already have over 80 percent of the required tools at home.

Here are all the tools you’ll need:

ToolPurpose
Screwdriver / nut driverTo remove clamps and loosen connections
Dryer vent brush kit (with rods)This is the main tool that cleans the entire duct
Vacuum cleaner or shop-vacTo remove loose lint around openings
FlashlightIt helps you see inside the duct
Gloves & dust maskFor both safety and comfort
Painter’s tapeIt helps catch lint at the wall opening
Trash bags or cardboardThey help keep the mess contained
Optional but helpful tools: 
  • Leaf blower 
  • UL 2158A–listed transition duct (to replace damaged flex)
  • Foil HVAC tape (and not duct tape)
  • Small drill (if your brush kit allows drill-driven rotation)

Use this pre-cleaning safety checklist

Before you roll up your sleeves, you need to follow a pre-cleaning safety checklist to make sure you set yourself up for a safe and stress-free cleaning. 

You see, dryer vent cleaning isn’t dangerous, but it does involve some moving parts, which makes safety checks essential.

Here’s a pre-cleaning checklist to ensure safe DIY cleaning:

1. Turn off the dryer

Start by cutting the power. Here’s how:

  • Electric dryer: Simply unplug it from the wall.
  • Gas dryer: Unplug it and turn the gas valve to the OFF position. You’ll usually find the small gas shut-off valve right behind the unit.

This ensures there’s no power or gas running while you’re working.

2. Pull the dryer out carefully

Dryers are heavy and often connected by a fragile flex duct. Pull the dryer out just enough to reach the back comfortably, about one or two feet is usually enough.

3. Locate the exterior vent

Step outside and find where your dryer vents out.

Dryer vents are usually along a basement wall, near a foundation, or on an exterior side wall.

Knowing where they exit helps you visualize the entire vent path. You’ll know how long it is and which direction to brush later.

4. Clear any obstructions outside

Before you begin brushing or vacuuming, make sure the outside vent area is clear. I suggest you remove:

  • Leaves
  • Bird nests
  • Snow or ice
  • Dirt or debris around the flap

A clear outlet makes your cleaning easier and helps you spot airflow changes later.

Now that everything’s set, you’re ready to get the dryer vent cleaned up. 

Here’s the pre-cleaning safety checklist in short:

StepWhat to Do
Turn off dryerUnplug electric dryer. Turn the gas dryer OFF at the valve.
Pull dryer outMove 1-2 feet from the wall to reach back safely.
Find exterior ventCheck outside where the vent comes out.
Clear outside obstructionsRemove leaves, nests, snow, dirt around vent

Follow this step-by-step dryer vent cleaning guide

Homeowner testing dryer airflow using a handheld airflow meter during DIY dryer vent cleaning.

This is your simple step-by-step process to get your vent completely clean and running like new.

Follow these carefully, and you’ll do an excellent DIY cleaning job, better than a lot of beginner DIYers. 

Step 1: Disconnect the dryer

  1. Loosen the clamp that holds the transition duct (the flexible hose) to the dryer.
  2. Gently remove the duct from both the dryer and the wall opening.
  3. Vacuum around the back of the dryer to pick up any loose lint or dust bunnies.
  4. If you can, reach inside the lint trap housing with a narrow vacuum hose. This spot hides a surprising amount of lint.

Step 2: Prepare the area

Dryer vent cleaning can get messy if you’re not ready for it as lint travels everywhere.

Here are a few simple setup steps to make cleanup easier:

  • Tape a trash bag or piece of cardboard under the wall opening to catch loose lint.
  • Lay down an old towel or sheet on the floor.
  • Put on your dust mask and gloves, especially if you’re sensitive to dust.
  • Keep pets and kids out of the room (trust me, lint looks like a toy to both).

Step 3: Brush the inside of the vent from indoors

It is now time to put your dryer vent brush kit to work.

Here’s how to do it:

  • Attach the brush head to the first rod.
  • Insert it gently into the wall vent opening.
  • Rotate the brush clockwise as you push it in (counterclockwise can unscrew the rods).
  • Add another rod each time you need more length.
  • Pull the brush back out every few feet and vacuum up the lint it brings with it.
  • Keep brushing until you feel the brush reach the end of the duct.

Take your time, slow and steady cleaning does a much better job than fast brushing.

Step 4: Clean the exterior vent

Now head outside to where the duct exits your home and: 

  • Remove the vent hood cover if you can (usually a few screws or clips).
  • Pull out any lint buildup or debris behind the flap.
  • Use your brush to clean the last section of duct near the exit.
  • Vacuum the area around the hood.
  • Check that the flap moves freely. It should open fully when the dryer runs.
  • If there’s a screen, remove it permanently as screens trap lint and are not allowed by New Jersey state codes.

If you find bird nests, wet lint, or heavy blockages, that’s a sign that you should call a professional. 

Step 5: Do an air assist cleaning (optional)

This step isn’t mandatory, but it gives you that extra-deep clean.

So, how to do this step?  

After you’ve brushed everything out:

  • Use a leaf blower from the inside out to push out any fine lint particles.
  • Or run the dryer on the ‘Air Only’ setting for 5-10 minutes while brushing the last few feet.

Important: Never run the dryer with heat during this process as lint in the duct and it could pose fire risks. 

Step 6: Clean the dryer’s internal passage

The vent isn’t the only place lint hides, as your dryer itself collects quite a bit inside.

So, do check and clean:

  • The lint trap slot (where the screen slides in).
  • The circular vent port at the back of the dryer.
  • Any small lint clumps you can see or reach around openings.

A small vacuum hose or soft brush works perfectly here. 

This step alone can noticeably improve drying times if lint has built up inside.

Step 7: Replace the transition duct (only if needed)

Now’s the perfect time to inspect your transition hose which is the flexible piece connecting the dryer to the wall.

Replace it if it’s:

  • Crushed or kinked
  • Torn or loose
  • Old or discolored
  • Made of plastic or vinyl (these are fire hazards)

And as you replace, I suggest you use only UL 2158A-listed metal ducts, such as:

  • Semi-rigid aluminum
  • Flexible aluminum rated for dryers

Avoid anything that feels soft, thin, or looks like a slinky toy. Those aren’t safe.

Step 8: Reconnect and test the system

We are almost there. This is the last step where you’ll put it all back together and make sure everything works perfectly. 

Here’s how you’ll do it:

  1. Reconnect the transition duct securely to both the dryer and the wall outlet.
  2. Keep the duct short and straight, no sharp turns or crushing.
  3. Tighten the clamps or secure with foil HVAC tape (and don’t use duct tape).
  4. Plug the dryer back in (and restore gas if applicable).
  5. Run the dryer on ‘Air Only’ and go outside to check airflow.

You should feel a strong and steady stream of air coming from the vent flap. And iif it’s weak, double-check for a kink or leftover lint inside.

Once airflow feels good, push the dryer gently back into place. Leave a few inches of space between the wall and machine to avoid crushing the duct.

And that’s it, you’re done.

Your dryer should now run faster, use less energy, and most importantly operate more safely.

Here are all the DIY dryer vent cleaning steps in short: 

StepWhat to Do
1. Disconnect dryerLoosen and remove duct from dryer & wall. Vacuum lint at back.
2. Prepare areaTape trash bag/cardboard under wall. Put down the towel/sheet. Wear a mask & gloves. Keep kids/pets away.
3. Brush vent from insideAttach the brush head to rods, insert gently, rotate clockwise. Add rods as needed. Pull out lint every few feet.
4. Clean exterior ventRemove the vent cover. Pull out the lint behind the flap. Brush last section. Vacuum area. Ensure the flap opens freely. Remove any screen.
5. Optional air assistUse a leaf blower or dryer on ‘Air Only’ to push fine lint out. Never use heat.
6. Clean dryer internal partsLint trap slot, vent port at back, and any visible lint clumps.
7. Replace transition duct (if needed)Replace crushed, torn, old, or plastic ducts with UL 2158A-listed metal ones.
8. Reconnect & testReattach duct, keep straight, tighten clamps or foil tape. Run the dryer on ‘Air Only’ to check airflow. Move the dryer back carefully.

Some common mistakes to avoid while cleaning your dryer vent

Homeowner cleaning lint from a flexible dryer vent hose using a brush during DIY dryer vent maintenance.

Even the most well-meaning DIYers make a few slip-ups when it comes to dryer vents.

That’s because although it’s not hard to clean a vent, you’re not a professional cleaner and you might make some small mistakes unintentionally. 

But then, these mistakes undo your hard work and sometimes even create a safety hazard.

Here are the most common mistakes I see DIYers in New Jersey make, and how you can avoid them. 

Mistake #1. Using plastic or vinyl flex duct

Those flimsy white or silver plastic tubes you see at big-box stores, they’re not meant for dryers. Not even if the label says dryer vent.

Plastic and vinyl ducts can melt or catch fire under high dryer heat, and they trap lint in their ridges.

I suggest you use a UL 2158A-listed aluminum transition duct as it’s heat-safe, smooth inside, and code-compliant in New Jersey.

Mistake #2. Screwing duct joints together

It might seem logical to screw ducts together to keep them secure, but that’s a big mistake.

Why?

That’s because the tips of the screws stick into the airflow path and lint loves to catch on them. Over time, that lint builds up, forming a clog that’s hard to clean and dangerous to ignore.

So, always use foil HVAC tape or tight-fitting clamps to seal connections.

Mistake #3. Installing bird screens over the exterior vent

New Jersey has its fair share of starlings, sparrows, and other little nest-builders, and I get it. 

But adding a screen over your dryer vent is against NJ codes and creates a major airflow restriction.

Even a small mesh screen can trap lint, block airflow, and cause moisture buildup inside the duct.

I suggest you instead use a dryer-specific vent hood with a built-in backdraft damper flap. This flap lets air out when the dryer runs and closes when it’s off, keeping birds out without blocking lint.

Mistake #4. Using a bathroom fan vent as a dryer vent

It might seem convenient to connect your dryer to an existing vent, but bathroom fan ducts are not designed for dryer airflow or heat. They’re too small, too long, and often made of thin plastic.

This can quickly lead to:

  • Lint blockages
  • Heat buildup
  • Moisture problems
  • Mold or mildew growth

So, as a rule of thumb, dryer vent should always have a dedicated dryer only fan, with its own 4-inch metal duct leading directly outdoors.

Mistake #5. Venting into an attic, crawlspace, or garage

This is a hidden hazard that I see a lot in older Jersey homes.

Some homeowners vent their dryer into a crawlspace or attic thinking, at least it’s out of the house.

Unfortunately, that’s a recipe for mold, rot, and poor air quality.

When you blow warm, moist air into an enclosed space, it condenses on wood, insulation, and drywall, creating the perfect breeding ground for mold and wood decay.

This is why you should always vent the dryer outdoors. Even if your layout doesn’t make that easy, a professional can reroute the duct safely.

Mistake #6. Running the dryer with heat during cleaning

Running your dryer while brushing might seem like a shortcut to help blow lint out, but it’s a fire hazard. 

Why? 

The combination of heat and airborne lint can ignite easily.

If you want to use the dryer to check airflow, run it on the ‘Air Only’ or ‘No Heat’ setting.

TL;DR, here are the common mistakes to avoid during DIY dryer vent cleaning: 

MistakeWhy It’s BadWhat to Do Instead
Using plastic or vinyl flex ductMelts, traps lint, fire hazardUse UL 2158A aluminum duct
Screwing duct jointsScrews trap lint, cause clogsUse foil HVAC tape or tight clamps
Adding bird screensBlocks airflow, traps lintUse vent hood with built-in flap
Using bathroom fan ventDuct too small, heat/moisture problemsUse dedicated dryer vent
Venting to attic/crawlspaceMoisture causes mold & rotAlways vent outdoors
Running dryer with heat while cleaningLint + heat = fire riskUse ‘Air Only’ or no heat

You might also want to read: How Often Should You Clean Your Dryer Vent?

When should you hire a dryer vent cleaning professional? 

Homeowner vacuuming lint from a ceiling dryer vent grille during DIY dryer vent cleaning.

DIY dryer vent cleaning is great for light to moderate buildup. And it saves some money too.

But there are times when calling in a professional isn’t just smart. That’s because the cost of professional dryer vent cleaning starts as low as $89, and it ensures fool-proof safety.

Here’s how you know when it’s time to hire a professional: 

1. There is Musty or burning smell

If you ever smell something like burning lint, plastic, or a damp musty odor, stop using your dryer immediately.

This could mean lint has made its way into the heating element or moisture is trapped in the duct.

A professional can inspect the inside of the dryer cabinet and deep-clean areas you can’t safely access.

2. There are bird nests or animal blockage

New Jersey homeowners deal with bird nests and animal blockage all the time, especially in spring.

Starlings and sparrows love building nests in dryer vent hoods because they’re warm, sheltered, and high off the ground.

Removing nests on your own can be tricky and messy. Professionals have flexible cameras, special vacuums, and long rods designed to safely remove nesting material without damaging your duct.

3. There is water dripping from the duct

If you see or hear water inside your dryer vent, that’s a red flag. It usually means the duct isn’t sloped correctly, allowing condensation to pool inside.

And if you leave this unchecked, that water can cause:

  • Mold and mildew growth
  • Rusted ducts
  • Reduced dryer efficiency

A professional can re-slope or reroute the vent so moisture drains properly.

4. There are very long duct runs

If your dryer vent snakes through ceilings, attics, or multiple walls, that’s beyond the reach of most homeowner brush kits.

Long ducts need high-powered rotary tools or air compressor whips to clean effectively.

Trying to do it yourself often just pushes lint around instead of removing it.

5. There is plastic duct inside walls

If you find flexible plastic or vinyl ductwork inside your walls or ceiling, that’s a serious fire hazard.

Only rigid metal ducting is allowed inside concealed spaces.

A licensed vent technician can replace it with proper material and bring your system up to current code.

6. There is no airflow at all

If you turn on your dryer and feel little to no air outside, something’s seriously clogged or collapsed inside the duct.

This could be a crushed section, a disconnected joint, or a heavy lint blockage that basic brushes can’t reach.

A professional can inspect the duct with cameras and remove deep blockages safely.

7. You live in a condo or townhouse with shared walls

If your laundry unit is in a condo or townhouse, your vent might connect through shared walls or ceilings.

These systems are more complex and sometimes shared with neighboring units. Meaning there is access and extra safety considerations.

Professional cleaners use rotary snakes, high-suction vacuums, and inspection cameras to clean these systems thoroughly without damaging common walls.

In short, here’s when to call in a professional:

ProblemWhy Call a Professional
Burning or musty smellLint may be in heating element or moisture in duct
Bird nests or animal blockageHard to remove safely; pro has proper tools
Water in ductCan cause mold, rust, poor airflow
Very long duct runsBeyond reach of home brush kits
Plastic duct inside wallsFire hazard, not code compliant
No airflow at allCrushed, blocked, or disconnected duct
Condo/townhouse with shared wallsComplex system, requires professional tools
Clean-Air-Technologies's Logo
Angies Super Service
Accredited Business
Aeroseal

Schedule Your Free Estimate Today

Contact us to improve your indoor air
quality with our expert cleaning services in NJ.

Final thoughts

By now, I am sure you know how to clean out your dryer vent yourself using the most basic tools and handyman skills. 

You see, dryer vent cleaning is one of the simplest home maintenance tasks that can genuinely improve your safety, comfort, and appliance efficiency.

And with the right tools and guidance, you can handle a basic DIY cleaning. 

But remember, DIY cleaning is for maintenance and not problem-solving. So, do call in a professional if:

  • Your dryer is still slow
  • You smell something burning
  • Your duct is long, complex, or inaccessible
  • You see birds, water, or mold

Need a professional dryer vent cleaning in New Jersey?

You can get in touch with us!

At Clean Air Technologies, we’ve been helping New Jersey homeowners stay safe and efficient with NADCA-certified dryer vent cleaning for over 30 years now. 

So, if you need help, or want a proper inspection, just reach out. We’ll get your dryer running safely and efficiently again.

FAQs about DIY dryer vent cleaning

How often should I clean my dryer vent?

At least once a year is the general rule of thumb.

But, if you have pets, a large household, or do laundry several times a week, plan on cleaning it every 6 to 9 months. Pet hair, lint, and even tiny clothing fibers all add up faster than you’d expect.

Can I clean my dryer vent from the outside only?

You can, but it’s a bit like washing your car by spraying only the front bumper.

Cleaning from the outside only usually clears the last few feet of the vent, but all the hidden lint deeper inside (especially near the dryer connection and elbows) stays put.

The most effective cleaning method is always inside out, using a brush kit that can reach through the entire duct run.

Why is my dryer still slow even after I cleaned the vent?

If your dryer is still sluggish after you’ve cleaned the vent, don’t worry, there are a few common things that cause it, including:

  • The vent is too long: Some older New Jersey homes have duct runs that snake through basements or walls, way past the 35-foot limit. Airflow drops dramatically over that distance.
  • The duct is crushed behind the dryer: This happens constantly. When you push your dryer back against the wall, the transition duct can get pinched, blocking airflow.
  • There’s a hidden elbow or clog you missed: Elbows, especially those behind walls or ceilings, trap lint easily.
  • The dryer’s blower wheel is dirty: If the internal fan inside the dryer is clogged with lint, even a perfectly clean vent won’t help.
  • The exterior hood is damaged: A broken or stuck flap outside can choke off air.
  • The dryer itself needs service: Sometimes the problem isn’t the vent, it’s the heating element or moisture sensor inside the machine.

Is it safe to use a leaf blower to clean my dryer vent?

Yes, but with a few important rules.

A leaf blower can be a great bonus tool when used from the inside out, after you’ve brushed most of the lint loose. The airflow can help push fine lint dust all the way outside.

Here’s how to do it safely:

  1. Disconnect the dryer from the wall duct.
  2. Insert the blower nozzle carefully into the duct (don’t jam it in).
  3. Seal around it loosely with a towel to keep lint from flying back.
  4. Turn the blower on for just a few seconds at a time.

And remember, never blow air from outside in. That can pack lint deeper into the duct instead of clearing it.

Can I replace the duct with a longer flex tube?

No. A longer flex tube might seem convenient,  but it’s actually a major safety hazard.

Here’s why:

  • Flex ducts sag and trap lint over time.
  • Long runs slow down airflow, making drying times longer.
  • Plastic or vinyl flex tubes aren’t heat-safe and can literally melt or ignite.

If you need extra length, use rigid metal ducting. It’s smooth inside, resists lint buildup, and meets New Jersey building codes.

Can dryer vents cause mold?

Yes, and it’s more common than most people realize.

Here’s how it happens:

When lint buildup blocks airflow, warm, moist air from your dryer can’t escape properly. That moisture condenses inside the vent, creating the perfect environment for mold and mildew to grow.

You might notice:

  • A musty smell near the dryer
  • Damp lint clumps inside the duct
  • Water dripping from the vent hood

In New Jersey, this problem is especially common in basements and cold-weather months, when warm indoor air meets cold metal ducts and creates condensation.

Why does New Jersey see so many dryer vent problems?

New Jersey’s housing stock is older than most, and that means many homes were built long before modern dryer vent codes were established. Combine that with our humid climate, tight laundry spaces, and wild bird population, and you’ve got a recipe for vent issues.

Here’s what makes NJ unique:

  • Older duct systems: Many homes still use outdated vent materials or overly long runs.
  • Long vent paths: Dryers in basements or interior closets often have 20-40 feet of ducting to reach the outside wall.
  • Damp basements: Humidity makes lint stick to duct walls faster.
  • Bird problems: Starlings and sparrows love nesting in exterior dryer hoods, especially in spring.
  • Shared walls in condos/townhomes: Makes access and maintenance trickier.

7 Amazing Dryer Vent Cleaning Benefits For New Jersey Homes

Our dryers get a lot of use, especially when those chilly New Jersey winters hit.

But have you ever thought about what’s happening behind the scenes in the dryer vent? 

You might not give much thought to it until something goes wrong, like your clothes taking longer to dry or you smell something burning. 

Moreover, since these signs seem normal, a lot of people ignore them too. 

But here’s the thing: These are signs of clogged or dirty dryer vent. And from fire hazards to higher energy bills and dryer breakdowns, they can lead to serious issues, sometimes even putting your home at risk. 

Now, surprising as it might sound, you can prevent most of these problems by simply cleaning your dryer vent regularly.

After all, not only does dryer vent cleaning keep your home safer but can also save you time, money, and hassle.

In this blog, I’ll walk you through 7 such dryer vent cleaning benefits, along with a extra advantages for New Jersey residents. 

So, let’s get started. 

Key takeaways 

  • Clean dryer vents reduce the risk of fire and extend the life of your dryer.
  • Regular cleaning improves energy efficiency and saves you money on bills.
  • A clean vent helps prevent mold, moisture, and unhealthy air circulation.
  • It speeds up drying times, reducing wear and tear on your dryer.
  • Dryer vent cleaning can increase your home’s resale value and appeal.
  • New Jersey residents should clean vents more often due to colder winters and humidity.
  • Clean vents ensure your home complies with safety codes and inspection requirements.

Benefits of dryer vent cleaning in NJ

1. It prevents fire hazards

Technician using a vacuum hose to clean a ceiling air vent, ensuring proper hygiene and air circulation.

Did you know that clogged dryer vents are one of the leading causes of house fires in the country?

Yes, that’s true. And it’s something most people don’t realize until it’s too late. 

You see, lint, dust, and debris can easily build up inside your dryer vent over time. This blocks airflow and creates the perfect conditions for a fire to start.

How does this happen? 

Well, when air can’t flow freely through your vent, the dryer has to work harder to dry your clothes. The heat build-up in this process can ignite the lint and debris trapped inside. 

What’s most scary is that these fires can spread quickly, putting your home at serious risk.

Talking about New Jersey, we rely on dryers even more, especially during the long and cold winter spell. Here, the risk of fire goes up when the dryer is being used frequently, especially if the vent is dirty or clogged. 

Now, dryer vent cleaning at least once every year helps clear out any lint buildup and ensures that your dryer is working safely and not just efficiently.

Clean-Air-Technologies's Logo
Angies Super Service
Accredited Business
Aeroseal

Schedule Your Free Estimate Today

Contact us to improve your indoor air
quality with our expert cleaning services in NJ.

2. It helps you save on energy bills

If you’ve noticed your energy bills creeping up, your dryer might be the reason. And this is not just because it’s working harder during those colder months. 

Let me explain how. 

When your dryer vent is clogged or dirty, your dryer has to work overtime to push hot air through the vent, drying your clothes.

This extra effort translates directly into higher energy consumption. Meaning you’re paying more for your dryer to do the same job, simply because the air can’t flow freely through the vent.

New Jersey winters only make this problem worse as the harder your dryer works the more energy it uses. 

But here’s the good news: When your vent is clear, your dryer doesn’t need to use as much energy to dry clothes. This helps you save money month after month.

3. It increases the service life of your dryer

A person in yellow gloves cleaning a ceiling vent with visible dust buildup inside the vent fan

We all want our appliances to last as long as possible, and dryers are no exception. 

However, when your dryer vent is clogged with lint, dust, and debris, it has to work harder and longer to get the job done. This extra strain causes more wear and tear and makes your dryer break down sooner than expected.

This is especially true for the Garden State New where between drying damp clothes or the constant load of wet towels, your dryer is running non-stop. 

In such cases, cleaning your dryer vent regularly can help your dryer run smoothly and prevent premature breakdowns. That means fewer repairs and more years of extended service life for your appliance.

4. It reduces drying times

An older washing machine in a laundry room with floral wallpaper and a window letting in natural light

Let’s face it, the last thing you need is for your clothes to take forever to dry. 

But when your dryer vent is clogged, it increases drying time significantly, sometimes even hours. 

So, instead of finishing a load of laundry in an hour, you’re stuck waiting and waiting for your clothes to dry.

This becomes especially frustrating during winters when you have a ton of laundry to get through, and you don’t want to deal with waiting hours for everything to dry. 

A clean dryer vent, on the other hand, speeds up the drying process. 

Here, the airflow is unobstructed and your dryer does its job more efficiently. This reduces drying times, sometimes by half or more. 

5. It prevents musty odors and mildew build-up

A person cleaning or installing a dryer vent by attaching the flexible hose to a ceiling vent, ensuring proper airflow for better dryer performance and safety.

Ever opened the dryer door to a damp or musty smell wafting out? 

That unpleasant odor is often a sign of moisture getting trapped in your dryer vent. 

You see, when the airflow to the dryer vent is restricted, moisture from your clothes doesn’t escape properly. It, instead, builds up inside the vent, leading to mold, mildew, and a stale smell.

This issue is especially common in NJ during summers where humidity levels can get pretty high. 

The last thing you want is for your clean laundry to smell like it’s been sitting in a damp basement.

Now, cleaning your dryer vent clears out any blockages, allowing air to flow freely and moisture to escape. As a result, you’ll notice that your laundry smells fresher, and your dryer works more effectively. 

Plus, you prevent any mold or mildew growth in your vents, just like the benefits of air duct cleaning, avoiding more serious issues down the road.

6. It protects your home and family

A woman standing next to a washing machine in a sunlit laundry room, enjoying the warm light while possibly preparing to do laundry or checking on her clothes.

While fire safety is a huge concern, it’s not the only risk that a clogged dryer vent poses to your family. That’s because a dirty dryer vent can also cause carbon monoxide poisoning.

Yes, that’s true.

If you have a gas-powered dryer, a blocked vent can cause carbon monoxide to back up into your home, creating a serious health risk. 

Worse, since gas dryers produce this odorless, colorless gas, the danger can go unnoticed until it’s too late.

Periodic dryer vent cleaning ensures that carbon monoxide is properly vented out of the home. This keeps you and your family safe from potential poisoning.

7. It increases your home’s value 

If you’re planning on selling your home in New Jersey anytime soon, a clean dryer vent can actually improve your home’s appeal. 

How?

Well, buyers often look for signs of a well-maintained home, and one of the first places they’ll check is the dryer vent. 

A clogged or dirty vent could raise concerns about hidden issues or long-term maintenance costs. And this can affect the sale price or length of time your home stays on the market.

On the other hand, a clean and efficient dryer vent gives buyers peace of mind that your home is in good shape. It shows you’ve taken the time to care for the details, and it could make your home stand out. 

Plus, if an inspector notices a clean vent, it could mean fewer concerns during the inspection process, speeding up the sale.

BenefitDescription
Prevents FiresReduces fire risk by clearing lint and debris buildup from vents.
Improves EfficiencyAllows your dryer to run more efficiently, cutting down drying times.
Increases Dryer LifespanLess strain on the dryer means fewer repairs and a longer-lasting appliance.
Reduces Energy BillsClean vents help your dryer use less energy, lowering your utility costs.
Prevents Mold & MoisturePrevents mold growth by ensuring proper airflow and reducing humidity buildup.
Improves Indoor Air QualityPrevents lint, dust, and other pollutants from circulating in your home.
Boosts Home ValueClean vents make your home more appealing to buyers, helping with inspections.
Clean-Air-Technologies's Logo
Angies Super Service
Accredited Business
Aeroseal

Schedule Your Free Estimate Today

Contact us to improve your indoor air
quality with our expert cleaning services in NJ.

Conclusion

There you have it, all the dryer vent cleaning benefits that can make your home safer, more efficient, and even more valuable.

Whether you want to reduce fire risk, speed up drying times, or keep your dryer running for years, a dryer vent cleaning helps with all. 

So, if you’ve been putting off dryer vent cleaning, now’s the time to schedule one.

Need seasoned professionals to make sure your dryer vent is in top shape?

Get in touch with us!

At Clean Air Technologies, we specialize in dryer vent cleaning plus all your HVAC needs in New Jersey. Our team is equipped with the right tools, knowledge, and experience to ensure your dryer is working as it should.

You might also want to read: 9 HVAC Tips For Summer In New Jersey

FAQs about dryer vent cleaning benefits

How often should I get my dryer vent cleaned?

Ideally, you should have your dryer vent cleaned every 1 to 2 years, depending on how often you use your dryer. 

If you have a large family, dry a lot of laundry, or notice longer drying times, you might want to clean it annually.

How much does a professional dryer vent cleaning cost?

A dryer vent cleaning can cost you anywhere between $100 and $150. However, in New Jersey, you can find services starting for as low as $89. 

Can a clogged dryer vent cause a fire?

Yes, a clogged dryer vent is one of the leading causes of dryer fires. That’s because lint and debris build up over time, and, when exposed to the heat from your dryer, they can ignite.

Cleaning your vent regularly reduces this fire risk significantly.

How can I tell if my dryer vent needs cleaning?

If you notice that your clothes are taking longer to dry than usual, your dryer is hotter to the touch, or you smell a burning odor while drying, these are all signs that your dryer vent may be clogged. A decrease in airflow is a clear signal that it’s time for a cleaning.

Does dryer vent cleaning improve energy efficiency?

Yes! 

A clean dryer vent allows your dryer to run more efficiently, which means it doesn’t have to work as hard to dry clothes. 

This can lead to shorter drying times and lower energy bills, saving you money in the long run.

Can I clean my dryer vent myself?

While it is possible to clean your dryer vent yourself using a vent cleaning brush or vacuum, it’s best to hire a professional for thorough cleaning. Professionals have the right tools, knowledge, and experience to ensure the vent is fully cleared, which can prevent potential hazards like fire or carbon monoxide buildup.

How does dryer vent cleaning prevent mold?

When your dryer vent is clogged, moisture from damp clothes can’t escape properly, creating an environment where mold and mildew can thrive. By keeping your vent clean, you allow proper airflow, reducing the risk of mold growth inside the vent and your home.

Can dryer vent cleaning improve my home’s resale value?

Yes, a clean and well-maintained dryer vent can boost your home’s appeal to potential buyers.

Clean vents reduce the risk of fire and other issues that could show up during an inspection, ensuring a smoother and faster sale.

How To Clean Air Vents In Your Home? (Easy DIY Guide)

Most homeowners don’t think twice about their air vents. At least not until they start seeing dust buildup, smelling something funky, or noticing uneven airflow.

This is especially true for New Jersey where your typical air vents collect a lot of dust, pet hair, pollen, and even mold spores. 

And when that happens, it’s not just your air quality that takes a hit. That’s because dirty vents can trigger allergies, increase energy bills, and reduce your HVAC system’s lifespan. 

But there’s a silver lining too.

You see, cleaning your vents doesn’t have to be complicated. In fact, with a few basic tools and a little elbow grease, you can get the job done in less than an hour.

In this blog, I’ll walk you through exactly how to clean air vents the right way. You’ll learn:

  • Simple steps to clean air vents  
  • When to schedule air vent cleaning 
  • Why is air vent cleaning so important
  • When to DIY it and when to call in the pros

So, let’s get started. 

Key takeaways 

  • Dirty air vents can cause poor air quality, odors, and higher energy bills.
  • You can clean vents at home using basic tools like a vacuum and screwdriver.
  • Always turn off your HVAC system before starting the cleaning process.
  • Soak, scrub, and dry the vent covers for best results.
  • Vacuum inside the vents to remove dust, dirt, and allergens.
  • Wipe surrounding areas to prevent re-contamination.
  • Clean air vents every 3-6 months, or monthly if you have pets or allergies.
  • Regular cleaning improves airflow, reduces allergens, and extends HVAC life.
  • Call a professional if there’s mold, pests, or deep buildup in your ducts.

How to clean air vents the right way? 

Man using vacuum cleaner with brush attachment to remove dust from ceiling air vent in New Jersey home

Cleaning air vents might sound complicated at first. But it is much easier than you might think, especially when you have the right tools on hand. 

You won’t need anything fancy, just everyday household items like a vacuum with a brush attachment, a screwdriver, and some warm soapy water. 

The process is straightforward too: Turn off your HVAC system, take off the vent covers, clean both the covers and inside the ducts, then put everything back in place. 

That sounds easy, doesn’t it? 

I’ve explained how to clean the vents from start to finish in detail. Let’s have a look. 

First off, get the right tools for cleaning 

The best part about cleaning air vents at home is you don’t need any special equipment or expensive tools. In fact, you might already have most of the necessary tools lying around your house.

Overall, here are all the tools you’ll need: 

Basic cleaning supplies like: 

  • Vacuum cleaner (with hose and brush attachment)
  • Screwdriver (to remove vent covers)
  • Bucket of warm, soapy water (mild dish soap works great)
  • Microfiber cloths or old rags
  • Paper towels (optional)
  • Soft-bristled brush or old toothbrush

Other optional cleaning essentials like:  

  • White vinegar (for disinfecting vent covers)
  • Degreaser (for kitchen vents that get greasy)
  • Dryer vent brush or long flexible brush (for deeper reaches)
  • Face mask and gloves (especially if you’re dust-sensitive or dealing with mold)

In short, here are all the tools you’ll need to clean air vents: 

Basic ToolsOptional Add-ons
Vacuum with brush attachmentWhite vinegar (for disinfecting)
ScrewdriverDegreaser (for greasy vents)
Warm soapy water (mild soap)Dryer vent brush or long flexible brush
Microfiber cloths or old ragsFace mask and gloves (for allergies/mold)
Paper towels (optional)Rubber band & cloth (DIY brush attachment)
Soft-bristled brush/toothbrush

Pro tip: if you don’t have a vacuum brush attachment, simply wrap a cloth around the hose and secure it with a rubber band. This will help trap dust without scratching anything.

Clean-Air-Technologies's Logo
Angies Super Service
Accredited Business
Aeroseal

Schedule Your Free Estimate Today

Contact us to improve your indoor air
quality with our expert cleaning services in NJ.

Then, follow the right steps to clean air vents

Person wearing gloves using a vacuum hose to deep clean a ceiling air vent at home

Now that you’ve got your tools ready, let me walk through exactly how to clean air vents without making a mess or damaging anything. 

Whether you’re cleaning floor vents in your living room or ceiling vents in the bathroom, these steps apply to every type of HVAC vent in your home. 

I will keep it simple, safe, and effective. Just follow along, and by the end, your vents will be breathing better (and so will you).

Step 1: Turn off your HVAC system 

Before you do anything, make sure your heating or cooling system is turned off.

Why? 

Well, because if the system kicks on while you’re cleaning, it can blow dust all over the place. Or worse, suck loose debris deeper into the ducts. 

You definitely don’t want that. 

So, just head over to your thermostat and switch the system off completely. And if you want to be extra safe, you can also flip the breaker for your HVAC system, especially if you’re cleaning multiple vents at once.

Now you’re ready to get started. 

Step 2: Remove the vent covers

Once your system is off, go ahead and remove the vent covers. These are the grilles or registers you see on your floors, ceilings, or walls.

Most vent covers are secured with just a couple of screws, so grab your screwdriver and carefully loosen them. And if they’re not screwed in, they will simply lift out with a little tug.

Be gentle here, especially with older covers, as they can crack or bend easily. 

Once removed, set the screws aside in a small container so you don’t lose them. You’ll need them when it’s time to put everything back.

Step 3: Soak and scrub the covers 

Now that the covers are off, it’s time to give them a good cleaning. You’d be surprised how much dust, grease, and even pet hair can build up on them over time.

Fill a bucket or sink with warm water and a few drops of mild dish soap. If the covers are grimy (like kitchen vents), you can add a splash of white vinegar or a bit of degreaser.

Let them soak for 10-15 minutes, then scrub them gently with a soft brush or old toothbrush. Then, rinse thoroughly and set them aside to dry completely.

Step 4: Vacuum inside the vent  

While your vent covers are drying, it’s time to tackle the inside of the vents themselves.

You can use your vacuum cleaner with a hose and brush attachment to carefully remove dust, dirt, and debris from inside the vent openings. 

Gently reach as far as you can into the duct without forcing the hose or damaging the ductwork. And if you notice any stubborn buildup, use a soft brush to loosen it before vacuuming again.

This step helps prevent dust from blowing back into your home when you turn your HVAC system back on.

Step 5: Wipe down the vent edges and nearby areas 

Next, take a damp microfiber cloth or rag and wipe around the edges of the vent opening as well as the surrounding wall, floor, or ceiling area.

This helps catch any lingering dust or dirt that the vacuum might have missed and prevents it from settling back once you reinstall the covers.

Note: If you spot any stubborn grime, a gentle all-purpose cleaner can do the trick. Just avoid soaking the area too much to protect your walls and floors.

Step 6: Reattach the vent covers

Once your vent covers are completely dry, it’s time to put them back.

Carefully align the covers with the vent openings and secure them with the screws you set aside earlier. If your covers just snap in place, press gently but firmly to avoid bending or cracking.

Make sure everything is snug but not over-tightened. This prevents damage and keeps the vents looking neat.

Step 7: Turn system back on 

Now that everything is clean and back in place, it’s time to switch your HVAC system back on.

You should immediately notice fresher, cleaner air circulating through your home. Plus, your system will run more efficiently without dust and debris clogging up the vents.

In short, here are all the steps to clean air vents: 

StepWhat to Do
1. Turn off HVAC systemPrevents dust from spreading or debris being sucked in.
2. Remove vent coversUse a screwdriver or lift gently to avoid damage.
3. Soak & scrub vent coversClean with warm soapy water and soft brush; add vinegar for grime.
4. Vacuum inside ventsUse a brush attachment to remove dust and debris from duct openings.
5. Wipe surrounding areaClean the wall/floor around the vents with a damp cloth.
6. Reattach dry coversOnce dry, secure vent covers back in place.
7. Turn system back onEnjoy cleaner air and more efficient airflow.

How often should you clean air vents in New Jersey?

Man using a long vacuum hose to clean inside a ceiling air vent for better airflow

So far, you know how to clean air vents and maintain a good indoor air quality. 

But how often should you clean them in NJ? 

This is something that depends on your home, location, and overall lifestyle. 

Here’s when you need to dust, deep clean, and pay extra attention.

Light dusting every few weeks

Dust tends to build up quickly on vent covers. So, a simple dusting every few weeks helps keep surface dirt from accumulating and blowing into your rooms.

Deep cleaning every 3 to 6 months 

A thorough cleaning of your vents every 3 to 6 months helps remove deeper dust, debris, and allergens, just like the ideal air duct cleaning frequency. This keeps your air fresh and your HVAC system running smoothly.  

Pet owners and allergy prone homeowners should clean every month

If you have pets or suffer from allergies, you should clean air vents and change air filters every month. This extra care reduces allergens and helps everyone breathe easier.

In short, here’s how often to clean air vents in New Jersey: 

SituationCleaning Frequency
General maintenanceEvery 3-6 months
Dusting the vent coversEvery few weeks
Homes with pets or allergy sufferersEvery month
Deep duct cleaning Every 3-5 years

Why is it so important to clean the vents? 

You might be thinking, it’s just a little dust, what’s the big deal?

Well, a lot more goes on inside your vents than most people realize. 

Over time, dust, dirt, pet hair, pollen, and even mold spores can build up inside your air vents. And once your HVAC system turns on, all of that gets blown right back into the air you breathe.

Still not convinced? 

Here’s why it is essential to clean your HVAC air vents: 

1. Better air quality

When your vents are clogged with dust and debris, your HVAC system ends up circulating dirty air throughout your home. 

This leads to more sneezing, coughing, and flare-ups for anyone with asthma or allergies, especially during allergy season in New Jersey.

2. More efficient airflow

Dusty vents and registers make it harder for air to pass through. And that forces your system to work harder, which means longer run times, higher energy bills, and uneven temperatures in your rooms. 

Cleaning the vents regularly gives your system room to breathe and run efficiently.

3. Fewer odors and less mold

Musty smells coming from your vents? 

This could be moisture buildup. And where there’s moisture, mold can follow. 

Regular vent cleaning helps prevent those nasty odors and keeps moisture-prone areas like bathrooms and laundry rooms healthier.

4. Longer-lasting HVAC system

When your vents are clogged, your system has to work double time just to push air through.

This extra strain can wear out parts faster and shorten your HVAC system’s lifespan. So, a little cleaning now can save you big money down the road.

5. Fire safety (especially for dryer vents)

Lint and debris buildup in dryer vents is one of the most common causes of house fires. And while this guide focuses on HVAC air vents, it’s a good idea to clean out your dryer vent every 6-12 months

Bottom line: Clean vents don’t just look better, they help your home feel better. And if you’ve got kids, pets, or allergies in the mix, it’s even more important to stay ahead of the dust.

Clean-Air-Technologies's Logo
Angies Super Service
Accredited Business
Aeroseal

Schedule Your Free Estimate Today

Contact us to improve your indoor air
quality with our expert cleaning services in NJ.

Final thoughts

By now, you know how to clean air vent at home using basic tools and handyman skills.

As you can see, cleaning your air vents isn’t as hard as it sounds. Also, doing it regularly can make your home feel noticeably fresher, cleaner, and healthier.

With just a few basic tools and a little time, you can reduce dust, improve airflow, and help your HVAC system run more efficiently.

Not sure where to start? 

We can help!

At Clean Air Technologies, we’ve been keeping New Jersey homes fresh and healthy for over 28 years. And our HVAC technicians can help you keep your air vents clean affordably for months.

FAQs about how to clean vents in home

Close-up of vacuum nozzle cleaning dust buildup from a ceiling air vent grill

Do I need to clean both the vent covers and the inside of the vents?

Yes! 

Wiping just the covers helps a little. But it’s the inside of the vent where dust, dirt, and allergens collect. 

Cleaning both the covers and the inside of the vent ensures better airflow and a fresher home.

How can I tell if my vents are dirty enough to need cleaning?

Some signs include:

  • Dust buildup around or inside the vent grilles
  • Reduced airflow from your vents
  • More dust than usual settling on your furniture
  • Musty or stale odors when your HVAC system is running

If you’re seeing or smelling any of these, it’s time for a cleaning. 

What’s the difference between cleaning air vents and duct cleaning?

Cleaning air vents involves removing dust and dirt from the visible parts, like the grilles and the first few feet of duct behind them.

Air duct cleaning, on the other hand, is a professional service that goes deep into your HVAC system to remove debris, mold, and allergens from the entire ductwork.

You can read my blog on the difference between ducting and venting to understand how vents and ducts differ. 

Can dirty vents really affect my health?

Yes, especially if you have allergies, asthma, or other respiratory sensitivities. 

Dirty vents can circulate dust, pollen, pet dander, and even mold spores throughout your home.

Regular vent cleaning reduces airborne irritants and improves the overall quality of the air you breathe.

Is it safe to clean vents myself, or should I always hire a pro?

Cleaning vent covers and the first section of ductwork is totally safe and doable as a DIY project. Just be gentle and use the right tools.

However, if you suspect mold, pest problems, or large buildups deep in your ducts, it’s best to call in professionals for a thorough job.

What type of vents can I clean using this guide?

This guide works for most common household vents, including:

  • Floor vents
  • Wall vents
  • Ceiling vents
  • Return air grilles

You can use the same steps whether your HVAC system is heating or cooling your home.

Kitchen and bathroom exhaust vents might need degreasing, but the overall process is similar.

How Often Should You Clean Your Dryer Vent In NJ?

You throw in a load of laundry, hit start on the dryer, and go about your day. But lately, the clothes aren’t drying quite as fast. 

You might feel that the laundry room is hotter than usual. Or worse, there’s a faint burning smell that wasn’t there before.

For starters, let me tell you these signs aren’t something to brush off.

Why? 

Well, these are signs that your dryer vent might be clogged. And when left unchecked, it can quickly turn from a minor inconvenience to a serious fire hazard.

Now, you might wonder how often should you clean your dryer vent exactly? 

That’s exactly what I’ll walk you through in this blog. You’ll Know: 

  • How often to clean dryer vent professionally
  • Factors that affect cleaning frequency
  • How to spot warning signs
  • How to know estimate when your own system is due

So, let’s get started. 

Key takeaways

  • Dryer vents in New Jersey homes should be professionally cleaned at least once a year.
  • Homes with frequent dryer use, pets, or long vent runs might need cleaning every 6 months.
  • New Jersey’s cold winters lead to heavier dryer usage, which accelerates lint buildup.
  • Older homes and complex duct layouts (like attic or crawlspace vents) make blockages more likely.
  • Signs your dryer vent needs cleaning include longer drying times, overheating, or a burning smell.
  • HOA or condo associations in NJ may require cleanings every 1-2 years for fire safety compliance.
  • Regular cleanings reduce fire risks, improve efficiency, and extend the life of your dryer.

Why is dryer vent cleaning so important in NJ?

Dryer vent cleaning is important everywhere. But in New Jersey, it’s especially critical due to our climate, housing styles, and laundry habits.

Here are a few reasons why dryer vents need more frequent cleaning in the Garden State: 

  • Cold weather: Long fall and winter seasons mean more dryer use, leading to faster lint buildup, sometimes twice as fast as in summer.
  • Older homes: Many NJ houses have long and outdated vents running through attics, basements, or crawlspaces. They’ve multiple bends and sometimes unsafe materials, making lint buildup more likely.
  • Multi-family housing and HOAs: Condos and HOA communities often require vent cleaning every 1-2 years to prevent blockages and fire hazards.
  • Fire risk: Nearly 3,000 dryer fires happen nationwide yearly, with clogged vents the top cause. New Jersey’s older homes and gas dryers increase that risk, making regular cleaning a critical safety measure.
Clean-Air-Technologies's Logo
Angies Super Service
Accredited Business
Aeroseal

Schedule Your Free Estimate Today

Contact us to improve your indoor air
quality with our expert cleaning services in NJ.

How often should you clean your dryer vent in New Jersey?

Technician in blue uniform and gloves performing professional dryer vent cleaning inside a New Jersey home to prevent fire hazards and improve dryer efficiency.

If you’re a homeowner in New Jersey, your dryer vent should be professionally cleaned at least once a year.

But as with most things in home maintenance, the actual timeline will depend on a lot of things. 

You see, there are a lot of factors that decide how often should you clean a dryer vent. This includes how much you use the dryer, what kind of home you live in, and whether there are any risk factors like pets, long duct runs, or older equipment.

Here’s a simple breakdown: 

Home Type / UsageCleaning FrequencyReason 
Single-family home (1-2 people, low usage)Every 12-18 monthsLower laundry loads, minimal buildup
Average NJ household (3-5 people)Every 12 monthsStandard usage, builds up faster over winter months
Large family / high-use home (daily drying)Every 6-9 monthsConstant drying leads to faster lint accumulation
Home with petsEvery 6-9 monthsPet hair adds to lint and clogs more quickly
Condo / HOA with shared ductingEvery 1-2 years Often required by association rules for fire safety
Homes with long / vertical duct runsEvery 6-12 monthsHarder for lint to exit, higher chance of internal clogging

Let’s have a closer look.

1. Single family homes

If you’re a family of two and only do a few loads of laundry each week, you can probably get away with cleaning your dryer vent every 12-18 months. 

Why? 

That’s because with limited use, lint buildup happens more slowly and the dryer isn’t working overtime. 

But even with low usage, a once-a-year checkup is smart, especially in New Jersey where colder weather calls for more frequent dryer use.

2. Typical NJ family homes with 3-5 people 

Most families in New Jersey fall into this category. And if you’re running the dryer several times a week for clothes, towels, and bedding, try to clean the vent at least once a year. 

You see, homes in this category have quicker lint build up. More so when the whole family’s laundry needs start to pile up. 

Plus, when winter hits, you’ll likely use the dryer more frequently.

So, a regular annual cleaning helps avoid airflow issues and fire risks.

3. Large families or high-usage homes 

If your dryer is working almost every day, you’ll want to clean your vent every 6 to 9 months.

Why? 

Bigger households usually mean more laundry. Think more towels, school clothes, uniforms, and bedding.

This also means more lint buildup that accumulates quickly inside the vent system. 

In busy homes like this, neglecting the vent can lead to longer drying times, worn-out dryers, or even overheating issues. 

4. Homes with pets 

Pet owners know how quickly fur ends up on clothes, towels, and bedding. 

Unfortunately, that fur also ends up in your dryer, and eventually, your dryer vent. This makes the system clog up much faster than in pet-free homes. 

So, if you’ve got dogs or cats, it’s a good idea to schedule a vent cleaning every 6 to 9 months. This will keep the system running smoothly and reduce allergens blowing back into your laundry room or home.

5. Condos or HOAs with shared ducting

For those of you who live in a condo or townhome in New Jersey, chances are your homeowners association (HOA) has vent cleaning guidelines in place. 

And many such guidelines require residents to clean vents every 1 to 2 years to stay compliant and avoid fire risks in shared buildings. 

After all, even if you don’t do a lot of laundry, your setup might include shared ductwork, which can complicate airflow and safety. 

6. Homes with long or vertical duct runs

If your dryer vent travels a long distance, like from the basement through an attic or multiple bends, lint has a much harder time making its way out. This increases the risk of clogging and makes cleaning more difficult. 

So, in homes with long or vertical duct runs, you should plan for professional cleaning every 6 to 12 months. It’s especially important in older New Jersey homes where the ducting might not meet current code or be easily accessible.

Factors that decide how often to clean dryer vent

Technician wearing gloves inspecting a dryer in a New Jersey home during winter, emphasizing the need for frequent dryer vent cleaning due to colder climate and increased dryer usage.

While general timelines are helpful, the reality is that dryer vent cleaning isn’t one-size-fits-all. 

This is especially true for New Jersey where local conditions, lifestyle habits, and even how your home is built can all affect how often your dryer vent needs professional cleaning.

Overall, here are the main factors that determine how frequently you should clean your dryer vent:

1. How often you use the dryer

The more loads you do each week, the faster lint builds up. 

So, if you’re drying clothes 4-7 days a week (which is common in NJ households), your system is working constantly. And that means it’ll need more frequent cleaning. 

That’s exactly why I suggest homes with large families or high laundry turnover go for cleanings every 6-9 months.

2. Pets in your home 

Got a dog or cat (or both)? 

Then you’ve got fur in your lint trap and your dryer vent too. 

You see, pet hair clings to fabrics, and no matter how clean your home is, it’ll find its way into the system. This leads to quicker clogs and poor airflow. 

In this case, I suggest you schedule cleaning every 6–9 months to keep your dryer working efficiently.

3. Length and layout of the vent

This is a big one in New Jersey homes. If your vent runs through a basement, crawlspace, or out through the roof, it’s more prone to blockage. 

This is mainly because longer ducts and multiple turns make it harder for lint to exit, which speeds up buildup. 

Meaning if your vent line is more than 10 feet or includes sharp bends, you’ll likely need cleaning every 6-12 months.

4. Age of your home

Older homes, especially those built before the 1990s, often weren’t designed with ideal vent paths in mind. 

Here, you might have outdated materials like flexible plastic ducts, or venting that snakes around joists and beams. 

These outdated systems restrict airflow and collect lint more easily, meaning more frequent cleanings are necessary to stay safe.

5. Type of dryer (gas or electric)

Although both gas and electric dryers produce lint, gas dryers have the added concern of carbon monoxide. That’s because if the vent is blocked, that gas can back up into the home.

That’s why it’s even more critical for gas dryer owners in NJ to stay on top cleanings and schedule a professional clean-up once every year/. 

6. Shared or multi-unit venting

You’ll likely experience faster lint buildup if your home shares a dryer vent with neighboring units, as in some condos or multi-family properties. Also, you’ve got less control over what’s happening in the system. 

Ideally, these vents should be cleaned every 12-18 months minimum. It’s best to coordinate through your HOA or building management to ensure compliance.

7. Humidity and seasonal factors

New Jersey summers can be hot and humid, which causes dryers to work harder and longer to pull moisture from clothes. At the same time, people tend to do more laundry in winters.

Both ends of the weather result in heavier dryer usage, which means more lint. And, thus, more frequent vent cleaning is needed year-round.

In short, here are the factors that affect how often should you clean your dryer vent in NJ

FactorImpact on Cleaning FrequencyRecommended Cleaning Schedule
Dryer UsageMore loads means faster lint buildupEvery 6-9 months for high-use homes
Pets in the HomePet hair adds to clogs and reduces airflowEvery 6-9 months
Vent Length & LayoutLonger ducts or multiple bends trap more lintEvery 6-12 months
Age of HomeOlder homes may have outdated duct setupsEvery 6-12 months
Dryer Type (Gas vs. Electric)Gas dryers pose risk if vents are blockedAt least once every 12 months
Shared/Multi-Unit VentingShared systems build up faster, less controlEvery 12-18 months (check with HOA)
NJ Seasonal HumidityHumid summers & cold winters means heavier useMore frequent cleanings year-round

You might also want to read: How Much Does Dryer Vent Cleaning Cost In New Jersey?

8 Signs that your dryer vent needs cleaning

Technician wearing blue gloves and uniform cleaning inside a dryer in a New Jersey home, demonstrating routine maintenance to prevent fire risks and ensure efficient dryer operation.

Even if you’re not tracking the exact timeline, your dryer will tell you when it’s time for a vent cleaning. You just have to know what to look for. 

Talking about New Jersey homes where seasonal changes and older duct systems are common, these signs can sneak up fast.

If you notice any of the signs below, it’s probably time to call in a professional.

1. Dryer is hot to touch 

If your dryer feels unusually hot during or after a cycle, especially on the top or sides, it’s a sign that heat isn’t venting properly. This not only stresses your dryer but creates a serious fire hazard.

2. Clothes take longer to dry

One of the first things people notice is drying time going from 40 minutes to over an hour. That’s not your dryer getting old, it’s your vent choking on lint. 

It is simple: The less airflow, the harder it is for moisture to escape.

3. Musty or burning smells

If your laundry smells damp or moldy, or worse, you smell something burning, don’t wait. Musty smells can mean lint is getting damp and stagnant, while burning smells mean lint is overheating inside the duct. 

4. Excess lint around the lint trap or dryer door

Are you seeing lint outside the lint trap or collecting around the dryer door? 

This means lint is escaping into places it shouldn’t be, including the vent line. It can quickly turn into a major blockage.

5. Dryer shuts off mid-cycle

Many modern dryers have overheat protection and will shut down if temperatures get too high. So, if your dryer machine is stopping randomly, it might be protecting itself from a potential fire caused by poor ventilation.

6. Little or no airflow from dryer vent hood

Go outside while the dryer is running and check the vent flap. 

Is it barely opening or not moving at all? 

This usually means airflow is restricted, either from lint buildup or a full blockage, and it needs immediate cleaning.

7. More lint than usual in the trap

If your lint screen is filling up faster than normal, that’s a warning sign. 

Your vent might already be partially blocked, causing lint to back up. Think of it as your system saying it needs attention. 

8. Visible debris around the vent opening

Look outside where your dryer vents. If you see lint, dust, or even bird nesting material collecting around the vent exit, it’s a sure sign the system is clogged or becoming restricted.

In short, here are the signs that your dryer vent needs cleaning

SignWhat It MeansWhy It Matters
1. Dryer is hot to touchHeat isn’t venting properlyOverheating can stress the dryer and increase fire risk
2. Clothes take longer to dryBlocked vent restricts airflowDryer works harder and uses more energy
3. Musty or burning smellsMoist lint or overheating inside ventIndicates possible mold growth or fire hazard
4. Excess lint around lint trap or doorLint escaping normal pathA major sign of internal buildup or partial blockage
5. Dryer shuts off mid-cycleOverheat safety feature kicking inYour dryer is preventing potential fire
6. Little/no airflow from outside vent hoodBlocked airflow due to lint or debrisImmediate attention needed to restore safe ventilation
7. Lint trap fills faster than usualLint backing up due to vent clogEarly warning that your vent needs cleaning
8. Debris around exterior vent openingExternal signs of blockageCan include lint, dust, or bird nests are all fire risks
Clean-Air-Technologies's Logo
Angies Super Service
Accredited Business
Aeroseal

Schedule Your Free Estimate Today

Contact us to improve your indoor air
quality with our expert cleaning services in NJ.

Conclusion  

By now, you know how often should you clean your dryer vent in New Jersey, along with the factors that affect your cleanup schedule.

You see, regular dryer vent cleaning is essential to keep your home safe, your dryer running efficiently, and your energy bills in check.

So, whether you’re a low-usage single-family home or live in a busy household with pets, stick to the right cleaning schedule and you can prevent dangerous lint buildup. 

Got more questions or need professional dryer vent cleaning in NJ?

You can get in touch with us!

At Clean Air Technologies, we are seasoned dryer vent cleaning experts with three decades of expertise. And we’ve got all your dryer cleaning and maintenance needs covered on a budget. 

You might also want to read: How To Get Rid Of Mold In Air Ducts?

FAQs about how often to get dryer vent cleaned

Technician in yellow uniform inspecting a dryer vent in a New Jersey laundry room, demonstrating the importance of checking for lint buildup to ensure fire safety and efficient drying.

How often should I clean my dryer vent in New Jersey?

Most NJ homes should have their dryer vents cleaned every 6 to 12 months, but the exact timing depends on your household size, usage, presence of pets, and duct layout.

What are the risks of not cleaning my dryer vent regularly?

Neglected dryer vents can cause lint buildup, which is a leading cause of house fires, reduce drying efficiency, and increase energy bills.

Can I clean my dryer vent myself?

Yes, for short and accessible vents, DIY cleaning is possible using brushes and vacuums. But for long, complex, or damaged ducts, hiring a professional is safer and more effective.

Does New Jersey’s climate affect dryer vent cleaning frequency?

Yes. NJ’s humid summers and cold winters can cause lint and moisture buildup faster, increasing the need for regular vent cleaning.

How do I know if my dryer vent needs cleaning?

Signs include longer drying times, overheating dryer, burning smells, or visible lint around the dryer or vent exterior.

How Much Does It Cost To Get Your Vents Cleaned In 2026

Air vent cleaning is one of those home services that’s super important every once in a while. This is especially if you’re dealing with dust, allergies, weird smells, or just want cleaner air in your home. 

But as soon as you start looking into it, you see different price tags all over the place. 

For instance, while some companies quote $99 specials, others throw numbers like $800 or more. 

And this might leave you wondering: How much does it cost to get your vents cleaned exactly? 

In this guide, I will break it all down. You’ll learn:

  • What air vent cleaning usually costs in New Jersey
  • What affects the price
  • What’s worth paying for and what’s just upsell fluff
  • And what real homeowners are actually paying right now

Also, I will help you figure out what a fair price looks like and how you can avoid getting ripped off.

So, let’s get started. 

Key takeaways

  • Most NJ homeowners pay $300-$500 for air vent cleaning.
  • Costs vary by home size, vent count, and HVAC systems.
  • Companies charge by vent, square foot, flat rate, or hourly.
  • Add-ons like mold removal or dryer vent cleaning raise the price.
  • Watch out for $99 bait-and-switch scams with surprise upsells.
  • A legit cleaning (as per NADCA) includes all vents, coils, and blower parts.
  • Good vent cleaning takes 2-4 hours, not 30 minutes.
  • Choose NADCA-certified pros with upfront pricing and solid reviews.

How much does it cost to get your vents cleaned in New Jersey?

HVAC technician in protective gear performing professional vent cleaning in a New Jersey basement.

Let’s start with the typical air vent cleaning cost that you can expect to pay anywhere in New Jersey. 

For most homeowners, this price usually falls between $300 and $500 for a standard-sized home. And it covers a full professional service, including cleaning the supply and return vents, brushing the ducts, and vacuuming everything with standard equipment.

But there’s one catch.

You see, although the above price range is typical for most homes, it might vary depending on your home’s size. Here’s how:

  • Some smaller homes with fewer vents might pay in the range of $250-$300.
  • Larger homes or homes with extra vents could end up paying anywhere from $600 to $1,000.

In fact, some homeowners even tell me they’ve paid as high as $1,200, though that often included add-ons like mold treatment or dryer vent cleaning.

In short, here’s a quick breakdown of air vent cleaning costs in NJ

Home TypeTypical Price Range
Small condo or apartment$250 – $350
Average single-family home$300 – $500
Large home or 2 HVAC zones$600 – $1,000+

In short: While prices can vary a lot, most homeowners should expect to spend around $400.

Clean-Air-Technologies's Logo
Angies Super Service
Accredited Business
Aeroseal

Schedule Your Free Estimate Today

Contact us to improve your indoor air
quality with our expert cleaning services in NJ.

How much does air vent cleaning cost based on the pricing method? 

Man cleaning a dusty window sill in a rustic attic bedroom with morning sunlight shining through the window.

When you ask for a quote on vent cleaning, you’ll notice that not all companies price things the same way. 

For instance, some companies charge you per air vent, some by square footage, and others just give you a flat rate for the whole system.

And while the final cost will still be in the above range, these pricing models will surely confuse you.

Let me break down what each pricing model actually means and what you might expect to pay.

1. Per vent pricing

Pricing by the vent is one of the most common ways companies charge for vent cleaning. 

And this is straightforward: The cleaning company counts how many vents you have and charges you for each one. 

Here, supply vents (where warm or cool air blows out) typically cost you between $25 and $50 each.

However, the return vents (where air goes back into the system) are a bit pricier, usually costing $40 to $75 each. 

But why the difference? 

Well, return vents are often larger and dirtier, and they take more time to clean.

So, how much can you expect to pay in total? 

If you 10 supply vents and 2 return vents, your total vent cleaning cost will be $410. 

Here’s how: (10 x $35) + (2 x $60) = $410

This method is great if you know exactly how many vents you have and want a clear cost.

2. Per square foot pricing

This is yet another pricing method where instead of counting vents, companies charge you based on the total size of your home. 

Here, companies usually ask for your home’s square footage and then give you a quote based on a standard rate. And this is usually between $0.15 to $0.40 per square foot. 

For instance, let’s say your home is 2,000 square feet. In this case, here’s how much you can expect to pay: 

At $0.15 per sq ft, you’ll pay $300
At $0.40 per sq ft, you’ll pay $800

On average, you can expect to pay $550 under this method. 

This model works really well for larger homes or homes with tricky layouts and hard to reach vents. 

Also, if you don’t know how many vents you have or if the ductwork is more complex than usual, this model is ideal. 

3. Flat rate system

Flat rate pricing is super simple: There’s one price that covers the whole job. You don’t need to count vents or measure square footage. 

Now, most companies in New Jersey that offer this model will quote a flat fee between $300 and $700. 

The exact quote, however, will depend on the size of your home, how easy the vents are to access, and whether you have one HVAC system or two.

This is a popular choice for people who want a no-surprises kind of deal.

Pro tip: Be sure to ask what the flat rate includes. That’s because some companies might add extra fees for deep cleaning or sanitizing unless it’s included in the base rate.

4. Hourly charges

This method is a bit less common but still used by some local technicians and small New Jersey-based companies. Here they’ll charge by the hour, usually between $90 and $125 per hour. 

Now, since a typical vent cleaning job takes 2 to 4 hours, your total could range from $180 to $500 depending on how long it takes.

This method works best when you’re hiring someone for a small job or if you’re bundling vent cleaning with other HVAC work. 

However, it’s a good idea to ask for an estimate ahead of time so you’re not caught off guard by the final bill.

Overall, here’s how much air vent cleaning costs based on pricing method

Pricing MethodWhat You’ll Pay
Per vent$25–$75 per vent
Per square foot$0.15–$0.40 per sq ft
Flat rate$300–$700 (whole system)
Hourly$90–$125/hr (2-4 hrs total)

What are the factors that decide your total air vent cleaning price? 

Close-up of gloved hands inspecting attic insulation for mold or dust contamination during home cleaning.

A lot of homeowners have asked me why some people pay less than $300 for vent cleaning while others get quoted way over $900. 

Now, being an HVAC cleaning professional, I can tell you these are not random quotes. That’s because there are a lot of factors that affect the final price of air vent cleaning. 

Here are some key factors that make all the difference:

1. Size of your home

The bigger your home, the more vents you’re likely to have. And this means more work for the cleaning crew. 

For instance, a small apartment might only have 4 to 6 vents, while a big two-story house could have over 20. So, it’s obvious that the bigger house will pay a higher cost. 

2. How many HVAC systems you have

Some homes, especially larger ones, have more than one HVAC system. For instance, there are usually two HVACs in most multi-storied homes, one for each floor. 

And since cleaning two systems doubles the work, you can expect to pay an extra $200-$400. 

3. Pets, allergies, or smokers in the house

Pets shed hair and dander, and if someone in the home smokes indoors, the residue can cling to the inside of your vents.

And this buildup doesn’t just affect air quality, it also makes the cleaning job tougher, and, thus, increases your quote.

4. Mold, mildew, or pests

If a technician discovers mold, mildew, mice, or other pests in your ductwork, that’s a whole different kind of job. That’s because mold removal from air ducts alone can cost from $1,000 to $3,000 or more, depending on how bad it is. 

5. Your home’s layout

The way your HVAC is set up matters a lot when it comes to determining vent cleaning costs.

Why?

Well, if the vents are in tight crawl spaces, attics, or behind furniture, it’s harder and slower for the crew to reach them. This means more labor and the need for special equipment, which can result in a higher bill. 

6. Where you live

Location plays a big role in pricing and vent cleaning in places like Jersey City often costs more than in smaller towns like Sussex. 

This is mainly because city-based companies have higher costs for labor, parking, permits, and transportation. So even if the job is the same, the price can vary based on your zip code.

7. Level of dirt and neglect

If your vents haven’t been cleaned in over a decade, they’re probably packed with dust, debris, and maybe even toys or trash that fell in. 

And since cleaning heavily neglected systems takes a lot more time and elbow grease than regular maintenance, companies often charge more.

In short, here’s what raises or lowers the price

FactorWhat It Does to Cost
Bigger houseIncreases
More vents or systemsIncreases
Mold or pestsBig increase
Hard-to-reach areasSlight increase
Clean or newe homeLowers
Fewer ventsLowers

Some add-on services that increase air vent cleaning cost

When you book an air vent cleaning, the base price usually covers just that. But companies often offer extra services, and these can push the price up fast.

Here’s what’s commonly added and what each one might cost:

1. Dryer vent cleaning

A clogged dryer vent is a fire hazard and can make your dryer less efficient. And here’s how much it costs you:

  • When added along with air vent cleaning: $100-$170
  • When you get it cleaned separately: $100-$250

2. Mold removal 

If a company finds mold in your vents, they’ll usually recommend mold removal plus a sanitizing spray to kill spores. Here’s how much it might cost you:

  • Typical cost of full mold removal: $1,000-$3,000+
  • Fogging treatment only: $75–$250

3. Deodorizing or disinfecting sprays

Some companies offer “fresh air” or “anti-bacterial” treatments to remove smells or allergens. These are optional, and not always necessary unless there’s an odor issue.

  • Typical cost: $50-$150

4. Duct sealing

Sometimes after vent cleaning, technicians also offer to seal up leaky ducts to help improve airflow and reduce energy bills.

  • Cost can range: $250–$1,000+

5. UV light installation or filter upgrades

Some cleaning companies might recommend installing UV lights or upgraded air filters to improve indoor air quality after cleaning. And here’s how much they cost:

  • UV light systems: $300-$700+
  • HEPA filter upgrade: $100-$250

In short, here are all the add-on services and their cost

Add-On ServiceTypical Cost
Dryer vent cleaning$100–$170 
Mold remediation$1,000–$3,000+
Antimicrobial spray$75–$250
Deodorizing/fogging$50–$150
Duct sealing$250–$1,000+
UV light installation$300–$700+
Filter upgrade$100–$250

Air vent cleaning cost: Scams to watch out for

HVAC technician wearing gloves and a face mask cleaning an air vent in a professional setting.

If you’ve ever Googled “vent cleaning near me,” chances are you’ve seen those tempting $99 whole-house specials. 

Sounds like a deal, right?

Not so fast.

Most of the time, those ultra-cheap offers are just a foot in the door. That’s because once the technician shows up, the price suddenly balloons, and now you’re being told your vents are full of mold, dead rodents, or “dangerous levels of dust.” 

And they’ll then try to upsell you hundreds or even thousands of dollars in extra services.

Here’s what a homeowner posted about one such scam on Reddit:

“We had some guys come in with that clean your HVAC for $99 thing. Well 99 turned into 400, which then recommended a cleaning of the mold, and installing a UV light.”

 — Most_Bag494, Reddit /r/Homeowners

Here are some common vent cleaning scams you should watch out for

  • Bait-and-switch pricing: The $99 is just to get in the door. Nothing is really included.
  • Mold discovery scare tactic: They tell you there’s mold, even if there isn’t.
  • Fake before/after photos: They show you stock images to justify extra charges.
  • Vague service descriptions: Basic cleaning could mean a quick vacuum and nothing more.
  • Cash-only payment or no invoice: Big red flag.

Here’s how to protect yourself

  • Ask for the full price up front, including how many vents are covered.
  • Know what mold in air vents and ducts really looks and feels like.
  • Get a written estimate before work starts.
  • Ask if they’re NADCA certified (National Air Duct Cleaners Association).
  • Check reviews on Google or Yelp, especially 1-star ones.
  • Walk away from high-pressure sales tactics.

What does a legit vent cleaning include?

According to NADCA, a proper cleaning should involve:

  • All supply and return ducts
  • Main trunk lines
  • Air handler/furnace components (like blower motor and coils)
  • High-powered vacuum system with HEPA filter
  • Brushes or agitation tools to loosen debris

In short: If a company can’t explain exactly what they’ll do, or avoids your questions, that’s a sign to keep shopping.

Clean-Air-Technologies's Logo
Angies Super Service
Accredited Business
Aeroseal

Schedule Your Free Estimate Today

Contact us to improve your indoor air
quality with our expert cleaning services in NJ.

Final words

By now, you know how much does it cost to get your vents cleaned in New Jersey. You also know how much you can expect to pay based on the pricing method of the cleaning company.

Now, at this point you might wonder: Is vent cleaning actually worth it with all those big-ticket costs?

The honest answer: Yes, but only if you need it, and only if it’s done right.

You see, vent cleaning is not a magic fix, but it’s not useless either. 

Vent cleaning won’t fix every issue in your home. It won’t replace your HVAC system. And it won’t instantly cure your allergies.

But it is absolutely worth it if:

  • You haven’t cleaned your vents in 5+ years,
  • You’ve recently renovated,
  • You have pets, asthma, or a mold/pest history.

Got more questions or want to get your vents cleaned by seasoned professionals?

You can get in touch with us!
At Clean Air Technologies, we are vent and duct cleaning experts with about three decades of experience serving all of New Jersey. And we’ve got all your HVAC cleaning needs covered on a budget. 

Frequently asked questions about air vent cleaning price 

Young woman adjusting the thermostat in a cozy, bright living room with clean air.

What’s the average cost to clean vents in 2026?

The national average is around $500, but pricing depends on the size of your home, the number of vents, and your location. Most homeowners end up paying in the range of $350-$700 for full-home vent cleaning.

Are those “$99 vent cleaning” ads legit?

Usually not.

They’re often bait-and-switch offers. The company quotes $99 to get in the door, then adds on hidden charges for each vent, return, or extra “services.”

Always read reviews and ask for full pricing upfront.

Can I clean my vents myself and save money?

You can clean vent covers and the first few feet of duct with a vacuum and brush.

But deep duct cleaning (especially if there’s mold, pests, or years of dust) needs pro equipment and know-how.

DIY is fine for upkeep, not full system cleaning.

How long does vent cleaning take?

A proper full-home cleaning usually takes 2 to 4 hours, depending on the size of the home and how dirty the system is.

Note: Beware of companies that finish in 30 minutes as they’re likely rushing or skipping key steps.

What certifications should a vent cleaning company have?

You should look for the following: 

How Much Does Dryer Vent Cleaning Cost In 2026?

Ever noticed your dryer taking longer to dry clothes getting hotter than usual?

This might not be your dryer’s fault, but your dryer vent crying out for a clean.

You see, dryer vent cleaning isn’t something most of us think about often. But this is one job that makes a huge difference. 

Proper maintenance like regular dryer vent cleaning in NJ can improve dryer efficiency, lower energy bills, and dramatically reduce fire risks.

So much so that it helps your dryer run better, lowers your energy bill, and even prevents fire hazards in your home.

But how much does dryer vent cleaning cost, you might ask?

The short answer is, it depends. 

Most people in the country pay between $100 and $150. However, the price can go higher if the vent is on the roof or needs extra work. 

Talking about New Jersey, you might find some great flat-rate deals here which can be a huge saver. 

In this guide, I break it all down, including:

  • What you can expect to pay
  • What makes the price go up or down
  • Whether DIY is worth it or not
  • What homeowners out there are actually paying 
  • And how to avoid getting ripped off

So, let’s get started. 

Key takeaways

  • Dryer vent cleaning usually costs $100-$150 nationwide. New Jersey professionals offer flat rates starting around $89 for simple jobs.
  • Vents on the roof or second floor cost more due to safety and equipment needs.
  • Heavy lint buildup or bird nests can add $100-$200 extra.
  • DIY is cheaper for easy, short vents; but professionals are better for long, roof, or clogged vents.
  • Base price covers lint removal, vent cap check, and airflow test; but extras like nest removal or duct repair cost more.
  • Clean your dryer vent annually, or more often if you do heavy laundry or notice slow drying.

How much does dryer vent cleaning cost? (national average)

Technician standing on a ladder cleaning an exterior dryer vent on a house during daylight.

The average cost of dryer vent cleaning is between $100 and $150 across the country. But depending on your setup, it could be less or a lot more.

Here’s a quick breakdown:

Type of JobTypical Cost Range
Basic ground-level vent (easy access)$75 – $130
Second-story or hard-to-reach vent$130 – $200
Roof-mounted vent (needs ladders/safety equipment)$150 – $250+
Severe clogs or bird nest removalAdditional $100 – $200

Let’s have a closer look at these prices. 

1. Basic ground-level vent: $75 – $130

If your dryer vent is on the first floor and easy to reach from outside, you’re likely to spend the least. That’s because this is the most straightforward job that requires no ladders and or working in tight corners. 

Here, most professionals charge a flat rate in the range of $75 – $130 because it’s quick and low-risk.

You’re essentially paying for the technician’s time, tools, and the peace of mind that your dryer is running safely and efficiently again.

2. Second-story or hard-to-reach vent: $130 – $200

Let’s say your vent runs through a wall and exits on the second floor. Or maybe it is behind heavy appliances or tight spaces.

Now, in these cases you can expect to pay a bit more. After all, thorough cleaning might require longer hoses, extra time, or even partial disassembly of parts to reach the vent. 

Still, for under $200, it’s a smart investment to prevent potential fire hazards or dryer damage from poor airflow.

3. Roof-mounted vent (needs ladders and safety equipment): $150 – $250+

When your vent exits through the roof, the job becomes more complicated. Here, the cleaner needs to climb up, bring safety gear, and sometimes even deal with steep angles or slippery shingles. 

This is riskier and more time-consuming, which is why the price jumps here. Also, roof jobs can take longer because the technician has to clean both ends of the duct thoroughly from inside and on the roof.

4. Severe clogs or bird nest removal: Additional $100 – $200

If your vent hasn’t been cleaned in years or if birds, squirrels, or debris have made a home there, you can expect extra charges in the range of $100 – $200. 

Removing a nest, hardened lint, or even dead critters takes special tools and more labor. Also, it might require a second visit or disassembling parts of the vent. 

These situations pose serious fire risks, so although the cost is higher, it’s 100% worth fixing right away.

Regular air vents cleaning helps prevent these dangerous blockages and ensures your dryer is running efficiently.

Important note: Although cleaning companies charge a flat rate for standard jobs, the price usually goes up if:

  • The vent is hard to reach (like on the roof or behind walls)
  • The duct is extra long or has lots of turns
  • There’s a lot of buildup or a nest inside the vent

Did you know?

Some companies offer discounts when you bundle dryer vent cleaning with full duct or HVAC system cleaning. So, for a price range of $300-$800, you get what usually costs upward of $100. 

Clean-Air-Technologies's Logo
Angies Super Service
Accredited Business
Aeroseal

Schedule Your Free Estimate Today

Contact us to improve your indoor air
quality with our expert cleaning services in NJ.

How much does dryer vent cleaning cost in New Jersey?

Professional inspecting and preparing to clean a household dryer in a basement laundry room.

If you live in New Jersey, the average cost of dryer vent cleaning will likely fall in the $100 to $150 range for a standard setup. 

That said, some companies offer flat-rate pricing as low as $89, especially for basic, ground-level vents.

Here’s what I found after researching local businesses and reading homeowner experiences across NJ:

Service TypePrice RangeDetails
Flat-Rate Deals (Basic Setup)$89 – $99– Ground-level vents- Interior & exterior cleaning- Airflow check- Photo proof
Average Jobs (Most Homes)$100 – $150– First-floor or exterior wall vents- Standard lint removal- Common across NJ counties
Higher-End Jobs (Complex Cases)$175 – $250+– Roof vents- Bird nests or clogs- Long duct runs- Seasonal upcharges in winter

1. Flat-rate deals (starting at $89 – $99)

Some companies in South Jersey advertise flat pricing for homes with easy-to-access dryer vents. These services usually include:

  • Interior and exterior vent cleaning
  • Airflow check
  • Lint removal
  • Photo proof (before and after)

2. Average range for most homes is $100 – $150

Most homeowners in NJ report paying in the range of  $100 – $150, especially if your vent is on the first floor or back wall. 

Also, many companies stick to a simple pricing model, which makes comparison-shopping easy.

You’ll often see this range from local service providers in:

  • Bergen County
  • Middlesex
  • Camden
  • Monmouth
  • Ocean County

3. Higher-end jobs (roof vents, nests, or long runs) cost $175 – $250+

If your vent exits through the roof, or if there’s a bird’s nest or severe lint buildup, expect the cost to go up. 

Roof access in NJ winters can also lead to higher seasonal pricing due to slippery conditions and added safety measures.

Quick tip:

Some companies also give discounts for senior citizens, veterans, or when you combine with other services (like HVAC cleaning or dryer duct repair). 

It never hurts to ask!

What’s covered in dryer vent cleaning prices and what’s not?

Close-up comparison of a dryer vent before and after cleaning, showing accumulated lint and a clear passage.

So you’ve got a quote for $120 or $200, but what exactly are you paying for?

This is one question I am often asked as a professional vent cleaner

Here’s what’s typically included in standard dryer vent cleaning, and what might cost more.

Usually included in the base price:

1. Full lint removal

The technician will use special brushes, vacuums, or even a spinning rod attached to a drill to remove lint from the vent line. This includes cleaning the duct from both the dryer side and the outside vent opening.

2. Vent cap check

They’ll inspect the vent hood (where the vent blows air outside) to make sure it opens and closes properly and isn’t blocked by debris or stuck shut.

3. Airflow test

Many professionals will also check how well the air is moving after the cleaning, just to confirm everything is flowing like it should.

4. Before and after photos

Some companies will show you pictures of your vent before and after cleaning. This is especially helpful if you weren’t home during the service.

Not included in the base price (extra charges possible):

1. Bird nest or animal removal

If birds or squirrels have set up camp inside your vent (which happens a lot), it usually costs extra to remove the nest and sanitize the area. This can add between $100 and $200+.

2. Roof access or high-up vents

If the vent exits through the roof or is on a second or third floor, most companies charge more for the added time, ladder work, and safety risks.

3. Dryer duct replacement or repairs

If your duct is damaged, crushed, or disconnected, the technician might recommend replacing it. Replacement is not included in a cleaning job and might cost extra $50 – $150+ depending on materials and labor.

4. Video camera inspection

Some companies offer camera inspections for long or complex ducts. This can add another $50 – $100, but it’s not always necessary unless there’s a suspected blockage.

Pro tip: Always ask what’s included upfront. A good company will tell you:

  • What they clean
  • How long it takes
  • What’s extra
  • And whether they guarantee the work

What determines your total dryer vent cleaning cost?

You might wonder why one person pays $90 and someone else pays $250 for the same cleaning job.

Let me tell you it’s not random since a few key things can seriously affect how much you’ll be charged for dryer vent cleaning.

Here are some of these important factors: 

1. Where your vent is located

Your dryer vent’s location makes a big difference. That’s because a first-floor vent is easy to clean, but if it’s on the roof, it needs ladders and safety gear. 

This extra effort means higher cost since it takes more time and special equipment.

2. How long and twisty the vent is

Short and straight vents are quick to clean. But vents that twist, turn, or run long distances take more work. 

Cleaning these tricky ducts needs more time and skill, which adds to the overall price you pay for the service.

3. Lint buildup or blockages

A little lint is simple to clear. However, if the vent has heavy buildup or something like a bird’s nest, it becomes harder. 

Removing thick clogs or nests can add extra cost, sometimes $100 or more, because it takes special tools and extra time.

4. Type of property

Cleaning vents in houses is usually straightforward. But apartments or condos may have tight spaces or shared vents, which makes the job harder. 

Limited access or complex layouts can increase the difficulty and, thus, the higher cost of cleaning your dryer vent.

5. Local labor costs

The cost of cleaning also depends on where you live. 

For instance, some places have lower prices or flat rates around $89. However, in cities with higher wages and insurance costs, the same job can easily cost $150 or more. 

6. Emergency or same-day service

If you need your vent cleaned urgently, like on the same day or weekend, expect to pay extra.

Rush services often charge fees because they drop other work to fit you in quickly. So, if you’re in a hurry, I suggest you ask your cleaning professional about emergency fees before booking.

DIY dryer vent cleaning: Is it cheaper?

Close-up comparison of a dryer vent before and after cleaning, showing accumulated lint and a clear passage.

The short answer is yes, it’s cheaper. 

But is it always a good idea? 

That depends.

Let’s look at both sides so you can decide what’s right for your dryer.

The DIY option 

You can buy a dryer vent cleaning kit online or at a hardware store for as little as $15 to $40.

These kits usually come with a long flexible brush that attaches to a power drill. All you’ve got to do is run it through your vent and pull out the lint. 

Simple enough for DIY dryer vent cleaning, right?

But there’s more to it. 

Here’s when DIY works fine:

  • The vent is short and straight (like right through the wall)
  • You can reach both ends of the duct easily
  • You’re comfortable using a drill and cleaning tools

Here’s when DIY might not be enough:

  • The vent goes through the roof or a second story
  • The duct is long or has lots of bends
  • There’s a nest or serious blockage inside
  • You haven’t cleaned it in several years

What a professional does differently

Cleaning professionals use high-powered vacuums, spinning brushes, long rods, and sometimes even cameras. They clean both the inside and outside of the vent thoroughly, check the airflow, and spot any issues you might not notice like loose connections, leaks, or damaged vent hood.

So while DIY saves you money upfront, it might miss deeper problems that could cause fires or dryer damage down the road.

Frequently asked questions

Is dryer vent cleaning really necessary every year?

Yes it is, and even if your dryer seems fine. 

You see, lint builds up over time, and once the vent clogs, it can become a fire hazard. So, annual cleaning keeps things safe, efficient, and saves money in the long run.

How often should you clean your dryer vent?

Here’s how often you should do vent cleaning based on how often you do laundry:

Laundry UsageRecommended Cleaning
Light use (1–2 loads/week)Every 12–18 months
Average use (3–5 loads/week)Every 12 months
Heavy use (daily loads)Every 6 months
Pet hair or long linty fabricsEvery 6–9 months

Some signs that it’s time to clean your vent:

  • Clothes take longer than usual to dry
  • Dryer feels hot to the touch after a cycle
  • You smell burning or musty odors near the dryer
  • Lint is building up around the vent opening
  • It’s been over a year since your last cleaning

Why is it important to clean the dryer vent?

Cleaning is important because, it:

  1. Prevents house fires by removing flammable lint buildup.
  2. Saves energy and lowers your utility bills.
  3. Helps clothes dry faster and more evenly.
  4. Extends your dryer’s lifespan by avoiding overheating.
  5. Keeps pests and moisture from invading your home

Can I clean my dryer vent myself?

Yes, you can, especially if the vent is short and easy to reach. 

In fact, DIY kits cost just around $20 – 40. 

But for roof vents, long ducts, or severe buildup, it’s best to call a professional. 

What’s the difference between dryer vent and air duct cleaning?

Dryer vent cleaning removes lint and buildup from the small exhaust pipe behind your dryer. 

Air duct cleaning, on the other hand, involves cleaning the heating and cooling system ducts throughout your whole house. This is a much bigger and more expensive job.

How long does a professional dryer vent cleaning take?

Most standard jobs take 30 to 60 minutes. But roof vents or clogged lines can take longer.

Can a clogged dryer vent damage my dryer?

Yes.

Poor airflow can cause overheating, wear out heating elements, damage sensors, and force your dryer to work harder than it should. 

Will my dryer work better after a vent cleaning?

Definitely. 

You’ll usually notice faster drying times, less heat buildup, and lower energy bills right away.

Clean-Air-Technologies's Logo
Angies Super Service
Accredited Business
Aeroseal

Schedule Your Free Estimate Today

Contact us to improve your indoor air
quality with our expert cleaning services in NJ.

Conclusion

Dryer vent cleaning isn’t the most exciting home task, but it’s one of the smartest. That’s because for $100 to $150, you’re protecting your home from fires, helping your dryer run like new, and saving real money on energy bills.

And if you’re in a place like New Jersey, you might even find reliable pros offering flat rates under $100.

So, no matter whether you go DIY or hire a professional, just don’t ignore it. 

Got more questions or want a full dryer vent cleaning in NJ?

You can get in touch with us! At Clean Air Technologies, we are professional dryer duct cleaners servicing Bergen County, Essex County, Hudson County, and more. And we’ve got all your cleaning requirements covered on a budget.