Clean-Air-Technologies's logo

Central Heat Not Working But AC Is: What’s The Reason And How To Troubleshoot?  

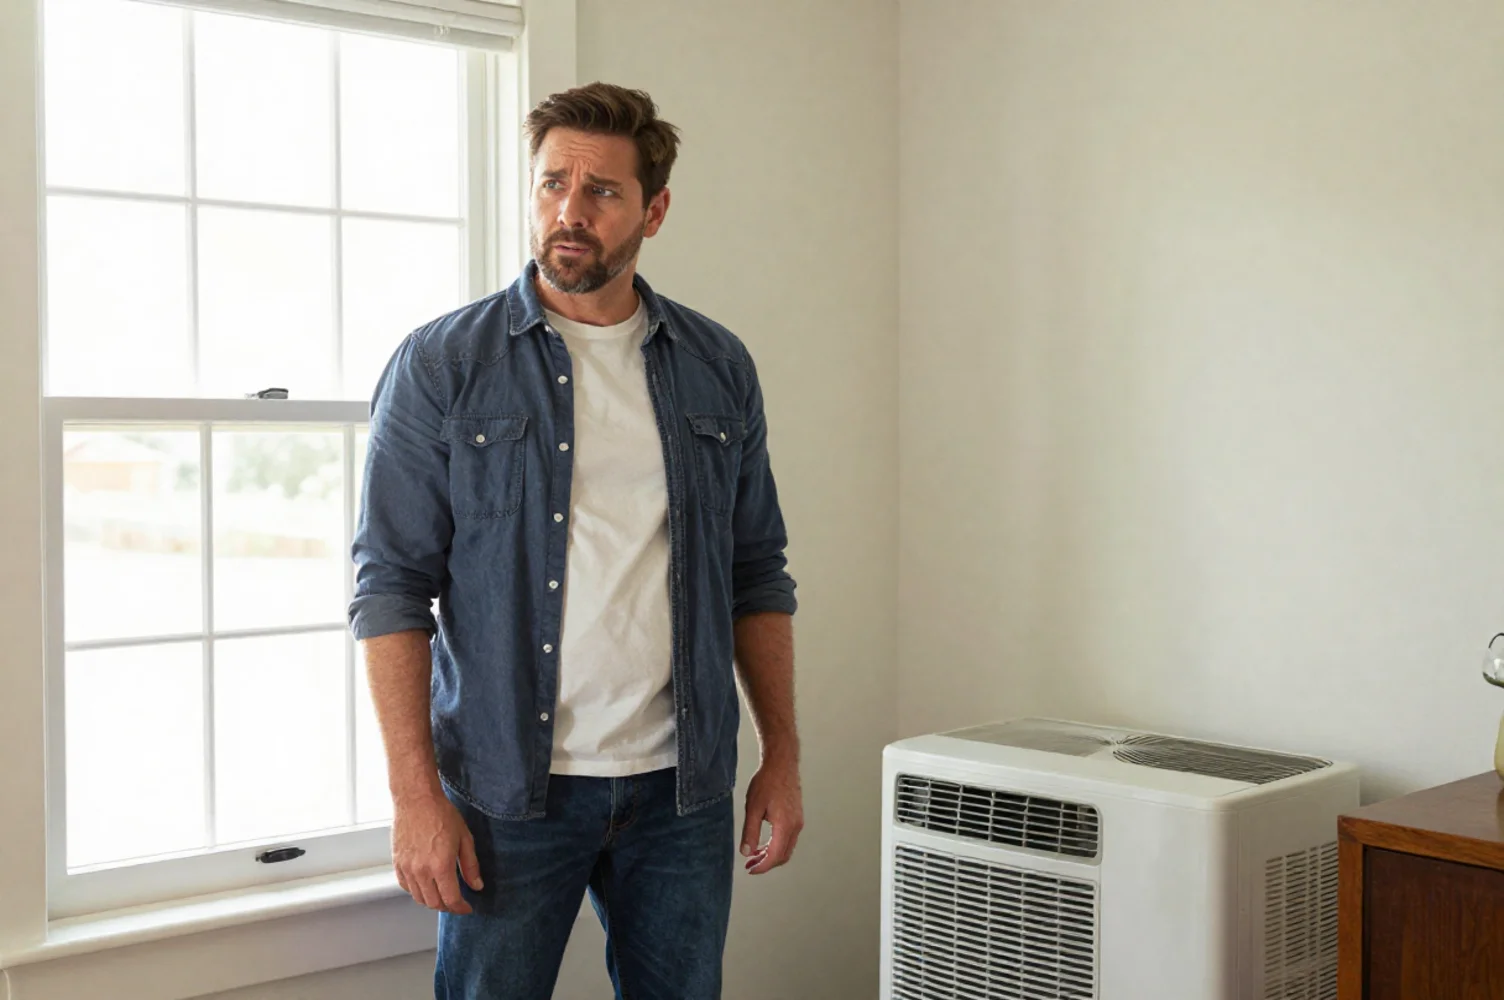
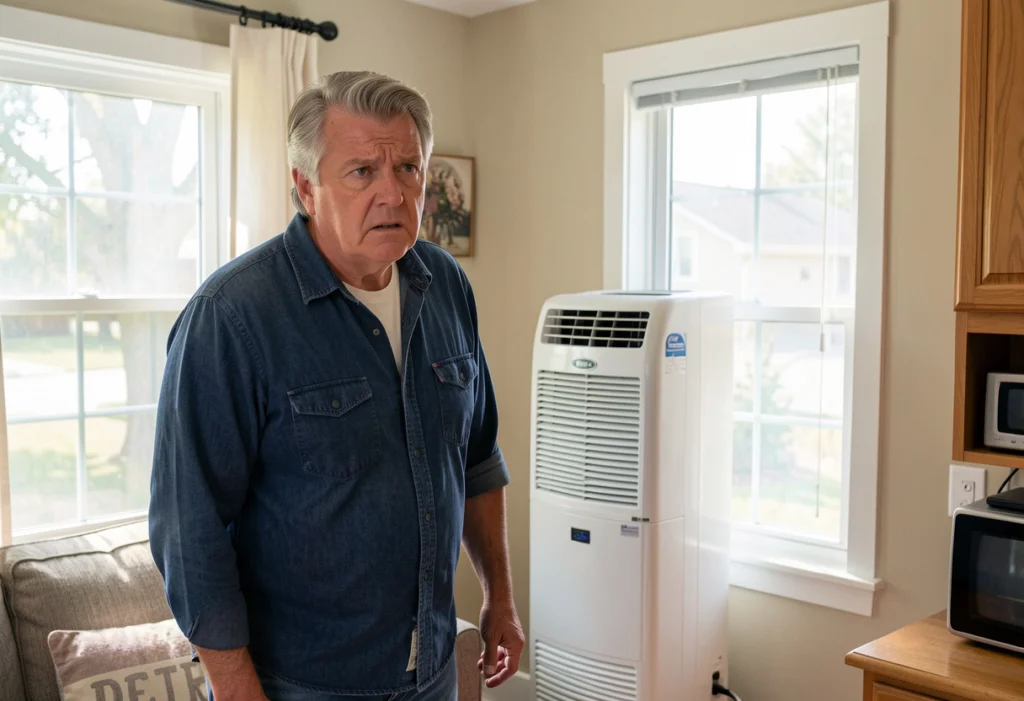
Ever had an air conditioner work perfectly all summer, but the moment you switch the thermostat to heat, nothing happens? 

The system turns on, you hear the fan running, air comes out of the vents, but the house stays cold.  

This is one of the most frustrating HVAC problems homeowners deal with, and it usually shows up at the worst possible time. 

In fact, this is a very common issue in New Jersey where HVAC systems sit idle between seasons and then suddenly get pushed back into action.

And here’s the most confusing part: If your AC works, it feels like the whole system is fine. 

But heating and cooling don’t always use the same parts, which means one can fail while the other keeps working normally.  

In this guide, I will walk you through some of the most common reasons why your heater is not turning on but AC works. Also, I will tell you how you can safely troubleshoot the system. 

So, let’s get started. 

Key takeaways  

  • If your AC works but heat doesn’t, the problem is usually on the heating side only
  • Thermostat issues are the most common and easiest fix
  • A dirty air filter can shut heat off completely
  • Heat pumps can cool fine but fail to heat due to valve or AUX heat issues
  • Safety sensors can stop heat while the fan still runs
  • Start with simple checks before calling a professional
  • If you smell gas or breakers keep tripping, stop and call a technician 

First thing first: What type of HVAC system do you have?

Before you start flipping breakers or adjusting the thermostat, it’s important to figure out what heating system you’re using in your home. 

This matters more than you might realize, because the reason your heat isn’t working depends heavily on the type of system you have.

For instance, most New Jersey homes use one of these:

  • A gas furnace with central air conditioning
  • An electric furnace
  • A heat pump (with or without auxiliary heat)
  • A dual-fuel system that uses a heat pump with gas backup

Now, here’s where things get confusing for homeowners. 

In homes with gas or electric furnaces, the air conditioner and the heater are controlled by different internal components. This means your AC can work perfectly while the heating side completely fails.

If you have a heat pump, the same system handles both heating and cooling, it just runs in reverse. Meaning, even in this system, when something goes wrong, cooling might still work while heat doesn’t.

Clean-Air-Technologies's Logo
Angies Super Service
Accredited Business
Aeroseal

Schedule Your Free Estimate Today

Contact us to improve your indoor air
quality with our expert cleaning services in NJ.

Here are the most common signs of a central heating problem 

In a situation when the heater is not turning on but AC works, the HVAC system seems to be totally okay. You hear it running, air is moving, and nothing appears broken. 

But no matter how long you wait, your home never warms up. 

Now, below are a few signs that you’re dealing with a heating problem.

1. Thermostat is set to heat, but the air is cold

This is one of the most common signs. 

You set the thermostat to heat, raise the temperature, and expect warm air. But what comes out of the vents feels cool or room temperature. 

This usually means the system is responding to the thermostat, but the heating components themselves aren’t turning on or aren’t able to produce heat.

2. System turns on, but no warm air comes out

In this case, the system starts up like normal. You might hear the blower fan and feel air moving through the vents, but it never gets warm. 

This can trick homeowners into thinking the system just needs more time. But in reality the heater isn’t firing at all or is shutting down before it can heat the air.

3. Fan runs continuously, but heat never kicks in

When the fan keeps running without heat, it’s often a sign that the system is stuck in a safety mode. 

This commonly happens when a sensor detects a problem and shuts the heat off to prevent damage or unsafe operation.

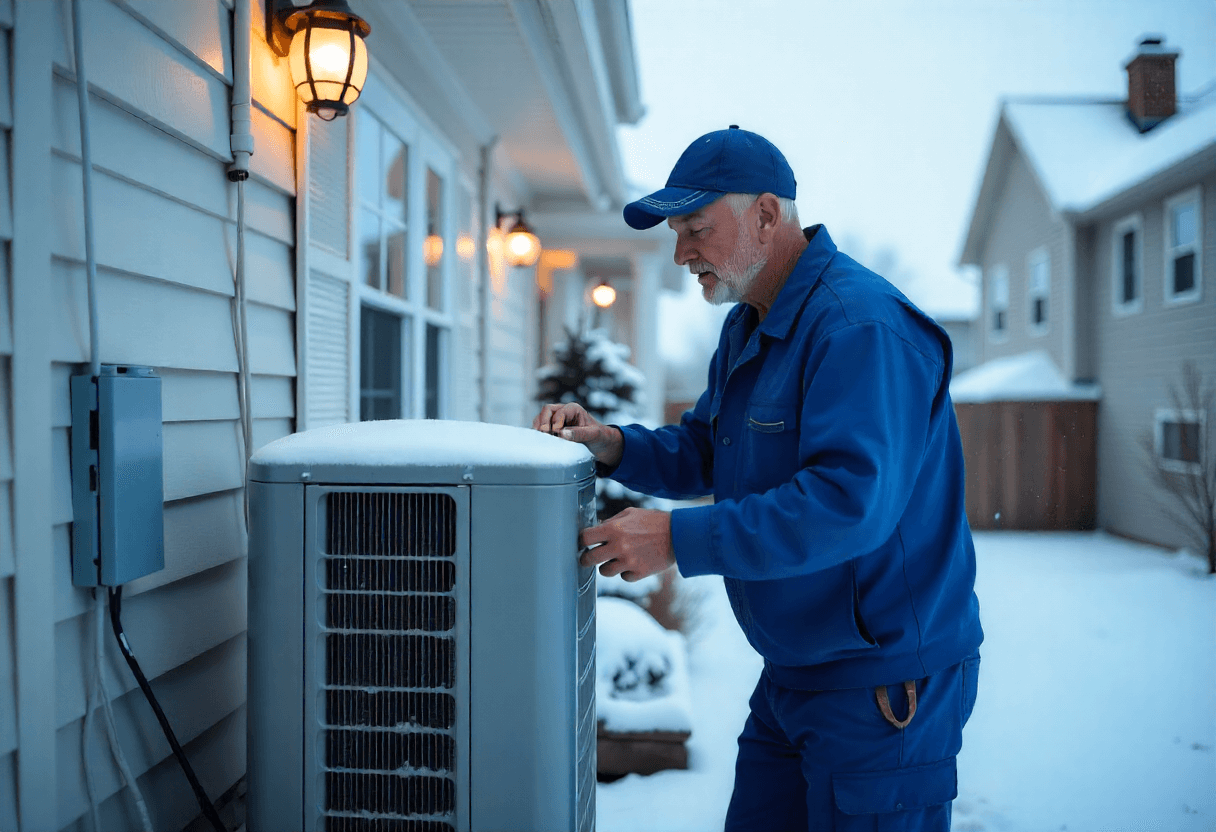
4. Outdoor unit runs in summer, but not in winter

A lot of homeowners notice this after switching seasons. The AC worked great all summer, but once winter arrives, the outdoor unit doesn’t turn on at all. 

Depending on your system type, this can point to a heat pump issue, a reversing valve problem, or auxiliary heat not engaging when it should.

5. Heat worked last season, now it doesn’t

This one is especially frustrating. Everything was fine last winter, but now the heat won’t turn on at all. 

This mainly happens because seasonal changeovers can expose worn parts, dirty sensors, or electrical issues that weren’t obvious before. 

In short, here are some common signs that there is a heating problem:

SignWhat It Means
Cold air in heat modeHeating failure
Fan runs nonstopSafety lockout
No outdoor unit in winterHeat pump or aux heat issue
Worked last seasonDirty sensor or electrical issue

Here are the most common reasons why central heat is not working but AC is

When your AC works but your heat doesn’t, it almost always means the problem is isolated to the heating side of the system. 

The good news? 

Many of these issues are common, seasonal, and fixable, especially if they’re caught early. 

All in all, here are the most common reasons why your central AC works but not heat: 

1. Thermostat problems 

This may sound too simple, but thermostat problems are the number one reason heat won’t turn on. 

Even when the screen looks normal, the thermostat might not be sending the right signal to the heating system.

Also, since thermostats control heating and cooling separately, one side can fail while the other still works perfectly. 

2. Tripped breaker or power issue 

This one catches a lot of homeowners off guard. 

Your heating system and air conditioner don’t always share the same power source. So, it is very possible for the AC to work while the heating side has lost power.

You see, ACs rely heavily on the outdoor unit, while heat often depends on indoor components like the furnace or electric heat strips. This means if one breaker (on the heating side) trips, the other (on the cooling side) can keep running.

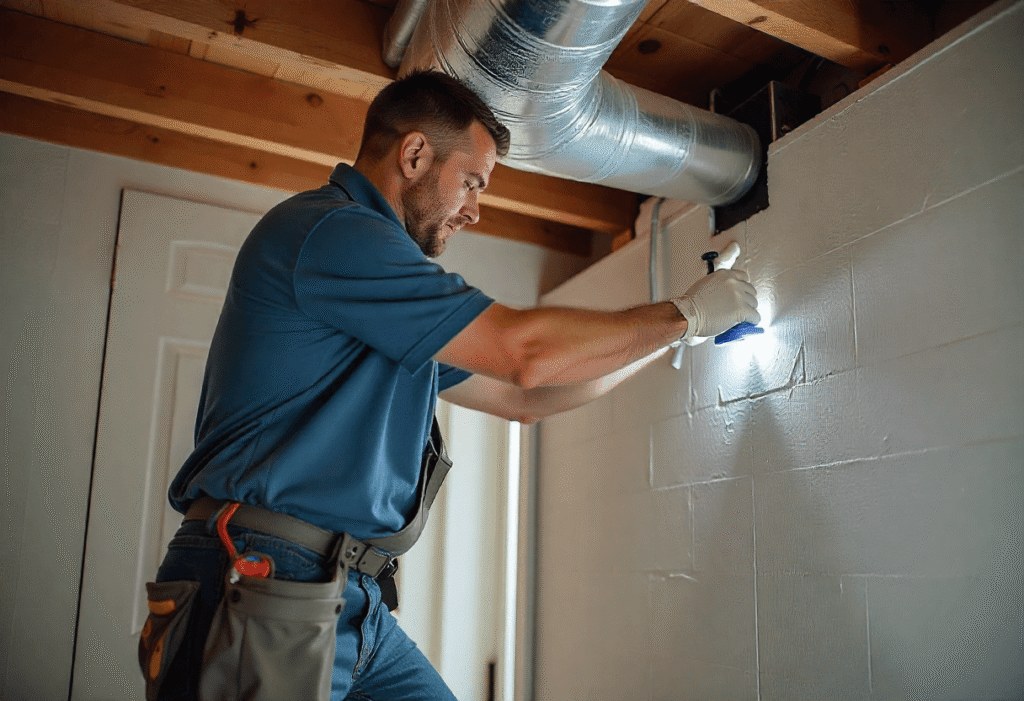
3. Dirty air filter blocking heat operation

A clogged air filter can absolutely shut your heat down. And it happens more often than people think. 

That’s because when airflow is restricted, the HVAC system overheats, and built-in safety switches shut the heat off to protect the equipment.

4. Furnace ignition or pilot light problems (in gas furnaces)

If you have a gas furnace, ignition issues are a major suspect. 

You see, modern furnaces are designed to shut themselves down at the first sign of anything unsafe, which often leaves homes with a running fan but no heat.

And possible causes of this include a pilot light that’s gone out, a cracked or failed igniter, a gas valve that isn’t opening, or a dirty flame sensor. 

5. Dirty flame sensor 

A dirty flame sensor is one of the most common reasons a furnace won’t stay on. Here, the furnace might ignite normally, the flame starts, and then everything shuts off after a few seconds.

What’s happening behind the scenes is simple: The furnace doesn’t see the flame, even though it’s there. And for safety reasons, it shuts the gas off to prevent a dangerous situation.

6. Heat pump reversing valve failure (in homes with heat pump)

If your home uses a heat pump, the reversing valve plays a critical role. It is the component that switches the system between cooling and heating modes.

Now, when the reversing valve fails, the system can get stuck in cooling mode. That’s exactly why the AC works perfectly in summer, but when you switch to heat, cold air blows out, or nothing happens at all.

7. Auxiliary or emergency heat problems

In colder New Jersey winters, heat pumps rely on auxiliary or emergency heat to keep homes warm. 

If this backup heat isn’t working, the system might run constantly but never actually heat the space.

Common reasons for this include burned-out heat strips, failed relays, or a thermostat that isn’t calling for auxiliary heat when it should. This becomes especially noticeable during freezing temperatures, when the heat pump alone can’t keep up.

When aux heat fails, homeowners often think the entire system is broken, when in reality the backup heat just isn’t engaging.

8. Safety switches and sensors shutting the heat down

Heating systems are packed with safety controls designed to prevent fires, gas leaks, and overheating. These include high-limit switches, rollout switches, and pressure switches.

If any of these sensors detect a problem, the system will shut the heat off immediately, while still allowing the fan to run. This is why it can feel like the system is working when it really isn’t.

Air conditioning doesn’t rely on these same safety switches, which is why AC can continue working normally even when heat is locked out.

9. Control board or wiring issues

If everything else is working fine, the issue might come down to electrical or communication problems. 

After all, loose thermostat wires, failed relays, corroded connections, or a damaged control board can all prevent the heating system from turning on.

These problems often show up after seasonal changeovers, when systems sit unused for months and then suddenly need to work again. 

In short, here are the reasons why heat doesn’t turn on even if AC works:

ProblemHow CommonDIY-Troubleshoot Possible?
Thermostat issueVery commonYes
Tripped breakerCommonYes
Dirty air filterVery commonYes
Flame sensorVery commonNo
Ignition problemCommonNo
Reversing valveLess commonNo
Aux heat failureCommon in cold weatherNo
Safety switch triggeredCommonNo
Control board issueLess commonNo

Heater not blowing hot air in house: Here’s how to troubleshoot

If the heater is running but the air coming out isn’t warm, you might assume the system is broken. 

But in reality, many heating problems are caused by small issues that are easily overlooked. 

And before you decide to call a professional, you can safely check and troubleshoot these problems. 

These checks won’t damage your system and often solve the problem without any tools or technical experience.

Let’s see how.

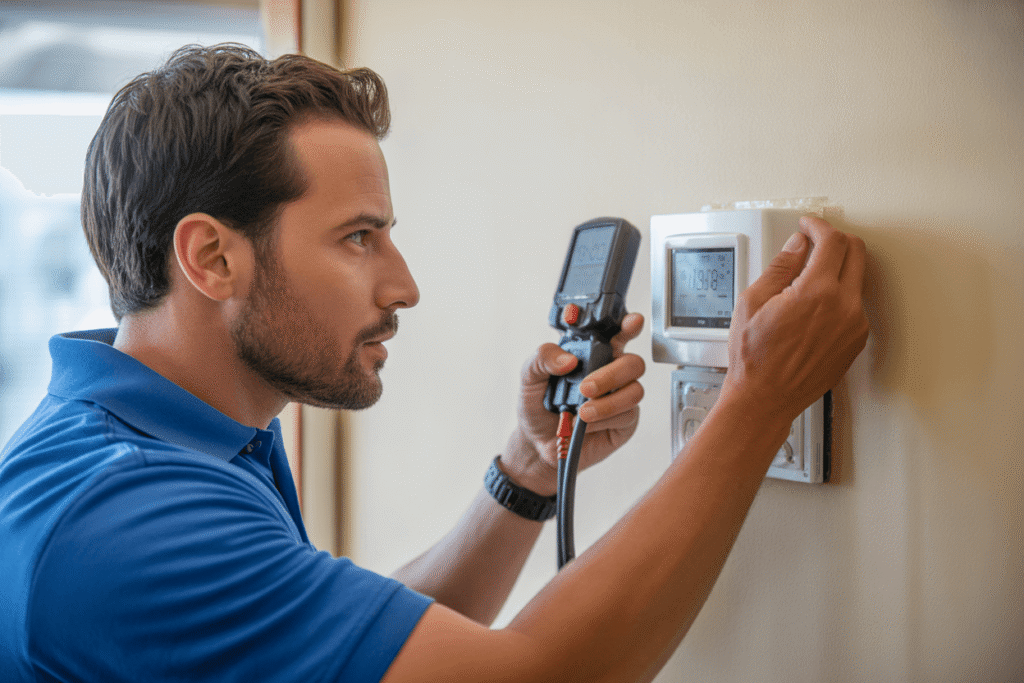
Step 1: Check thermostat settings and batteries

Start with the thermostat, because it controls everything. Make sure it’s set to HEAT and not AUTO or COOL. 

Then, raise the temperature a few degrees above the current room temperature and wait a minute to see if the system responds. 

If your thermostat uses batteries, replace them even if the screen still works. That’s because weak batteries can prevent the heat signal from being sent properly. 

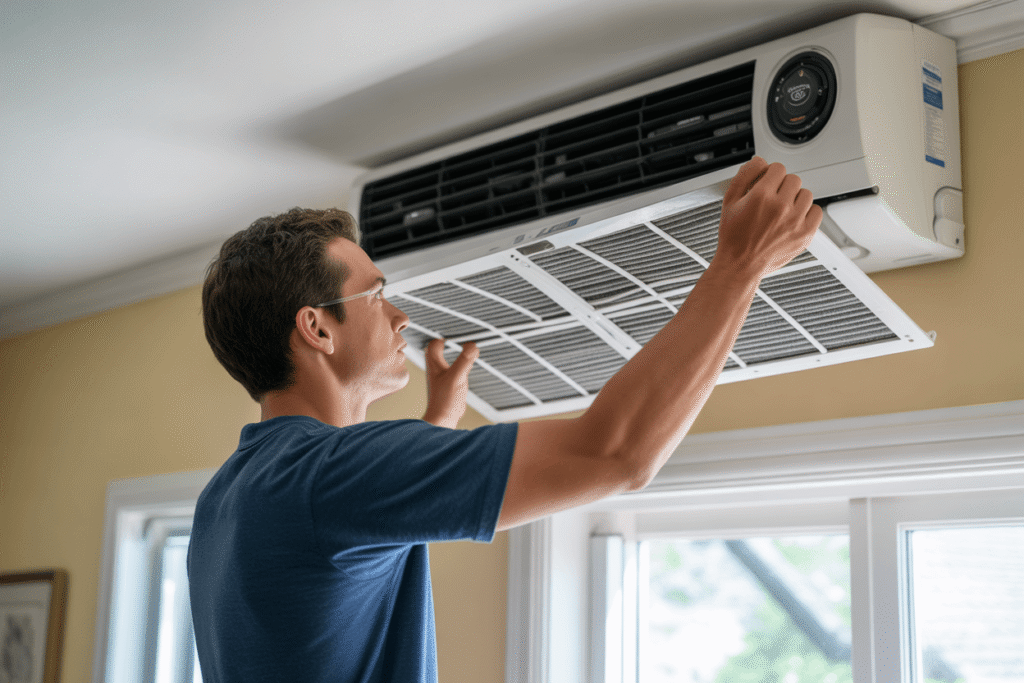
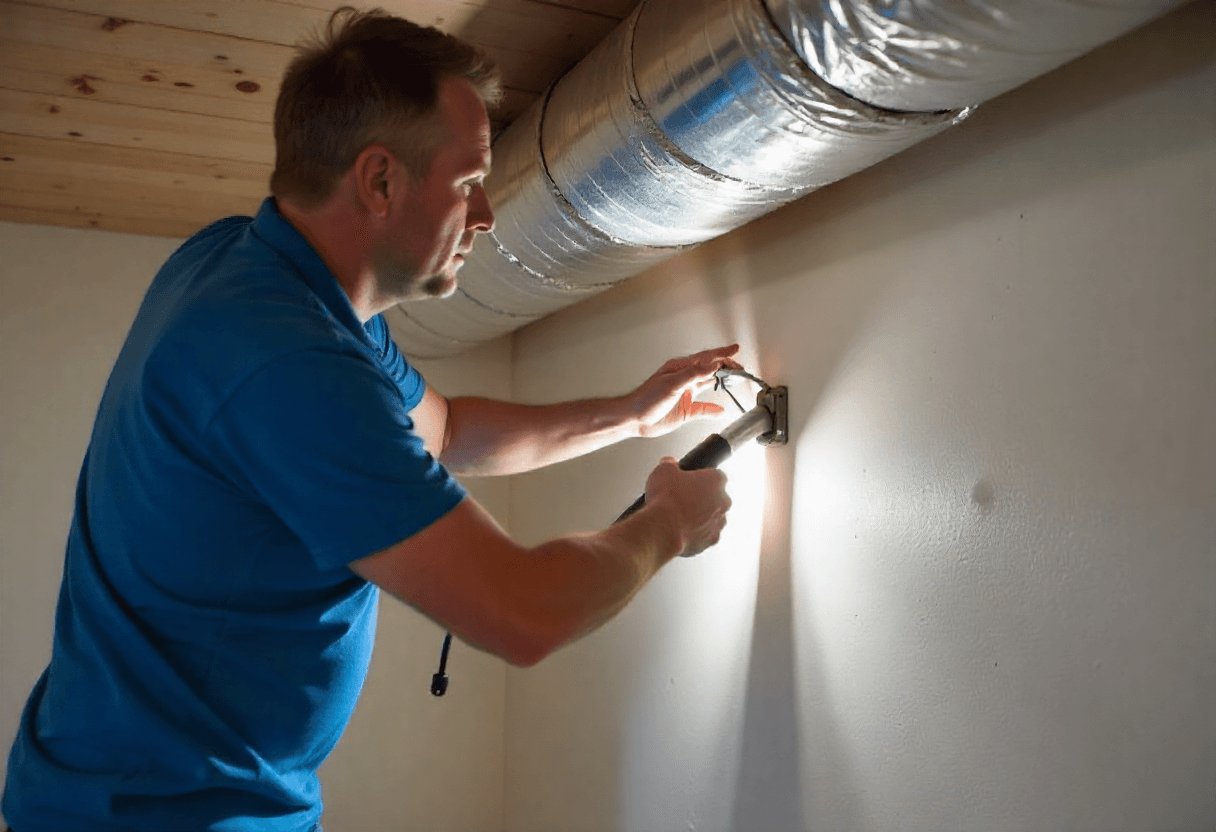
Step 2: Replace or clean the air filter

A dirty air filter can quietly shut your heat down. That’s because when airflow is restricted, the system can overheat and trigger safety switches that stop heat production. 

I suggest you pull the filter out and check it against a light. If you can’t see through it, it’s time for an air filter replacement

This is one of the most common and easily fixable causes of heating problems, especially if the filter hasn’t been changed in a while.

Step 3: Reset HVAC breakers

Next, check your electrical panel. Your heating system often has its own breaker, separate from the air conditioner. 

Look for breakers labeled furnace, heat, air handler, or HVAC. 

Even if a breaker doesn’t look fully tripped, flip it off and back on. But if the breaker trips again after resetting, don’t keep flipping it, as that’s a sign of a larger electrical issue that needs professional attention.

Step 4: Make sure the gas valve is on 

If you have a gas furnace, confirm that the gas valve is in the ON position. 

This valve is usually located near the furnace and can sometimes get turned off during maintenance or accidentally bumped. 

Step 5: Check for error codes on the furnace

Many modern furnaces have a small viewing window with a blinking light that displays error codes. 

These flashes can indicate what the system is struggling with, such as ignition issues or airflow problems. 

While you might not be able to fix the issue yourself, noting the error code can be very helpful if you end up calling a professional.

Step 6: Confirm that the vents are open and unobstructed

Finally, walk through your home and make sure all supply vents and return vents are open and not blocked by furniture, rugs, or curtains. 

Closed or blocked vents can disrupt airflow and cause the system to overheat or shut the heat off entirely. Good airflow is essential for proper heating.

In short, here’s what you should do if heater isn’t working: 

StepWhy It Matters
Check thermostatControls the whole system
Change air filterPrevents overheating
Reset breakersRestores power to heat
Check gas valveRequired for gas heat
Look for error codesHelps identify the issue
Open ventsKeeps airflow normal

Here’s when you should not troubleshoot yourself and call in a professional: 

  • You smell gas
  • Breakers keep tripping
  • Furnace ignites then shuts off
  • Heat pump blows cold air in heat mode
  • System worked last winter but not now
  • Error codes won’t clear

You might also want to read: How Much Does HVAC System Replacement Cost?

Clean-Air-Technologies's Logo
Angies Super Service
Accredited Business
Aeroseal

Schedule Your Free Estimate Today

Contact us to improve your indoor air
quality with our expert cleaning services in NJ.

Final words

By now, I am sure you know why your central heat isn’t working but your AC still is. Also, you know to what extent you can troubleshoot by yourself and when you should call in a professional.

You see, if your heater isn’t working, it doesn’t automatically mean you’re facing a major or expensive repair. 

In many cases, the cause is something simple, like a seasonal issue, a tripped breaker, a dirty sensor, or a small electrical problem.

Got more questions or need to schedule air filter replacement?

You can get in touch with us!

At Clean Air Technologies, we offer both one-time and recurring air filter replacement plans. We install high-quality MERV filters so that you keep breathing fresh air and your HVAC system stays in top shape. 

Frequently asked questions 

Why does my AC work but my heat doesn’t?

This usually happens because your heating and cooling systems use different components.

Your AC relies on the outdoor unit, while heat depends on parts like the furnace, heat pump, or auxiliary heat. 

If a sensor, breaker, or heating component fails, the AC can still work normally while heat completely stops. It’s common after seasonal changeovers from summer to winter.

Can a bad thermostat cause heat to stop working?

Yes, absolutely. A thermostat can fail on the heating side while still working for cooling. 

Dead batteries, incorrect settings, wiring issues, or a faulty thermostat can all prevent heat from turning on. 

Can a dirty air filter stop my heat from working?

Yes, and this happens more often than people realize. A clogged air filter restricts airflow, causing the heating system to overheat. 

When that happens, built-in safety switches shut the heat off to prevent damage. 

The fan might still run, which makes it confusing. Changing your air filter regularly can prevent this issue entirely.

Why does my furnace turn on but then shut off quickly?

This is often caused by a dirty flame sensor, overheating, or a safety switch being triggered. The furnace might ignite briefly, then shut down as a precaution. 

Even though it feels serious, the fix is sometimes simple. A professional can clean or replace the sensor and make sure everything is operating safely and correctly.

Why does my heat pump blow cold air in heat mode?

When a heat pump blows cold air in heating mode, it’s usually due to a reversing valve issue or auxiliary heat not working properly. 

Heat pumps rely on these components to switch between heating and cooling. If they fail, the system can’t produce warm air. 

This isn’t a DIY fix and needs professional diagnosis.

Is it safe to keep running my system if there’s no heat?

It’s best not to. 

Running the system without heat can stress components, especially if safety switches are being triggered. 

If you notice repeated shutdowns, strange smells, or breakers tripping, turn the system off and call a professional. 

Continuing to run it might lead to more expensive repairs or even unsafe conditions.

How Much Does It Cost To Replace An HVAC System In New Jersey?

If your HVAC system is struggling to keep up or constantly breaking down, you might already be looking to replace it. 

But before you zero in on a new HVAC model, the big question you’re probably looking answers to is: How much does a new HVAC system cost? 

Now, if you’ve already started Googling, you might have seen wildly different figures ranging from $5,000 all the way up to $18,000. 

The reality is, HVAC replacement costs in New Jersey are very different from national averages. 

So, if you came across a figure of $6,000-$7,000 on Forbes Business, chances are you’ll pay $2,000-$3,000 more than that in NJ. 

Sounds confusing?

Rest easy, as I will break it all down in this blog, including:

  • The realistic cost to replace an HVAC system in NJ
  • Cost breakdowns by system type
  • What affects your final price 
  • How to avoid overpriced quotes

And much more.

So, let’s get started. 

Key takeaways 

  • HVAC replacement costs in NJ range from $9,000 to $16,000 on average.
  • Costs depend on system type, home size, and installation complexity.
  • For just AC or furnace replacements, expect prices from $3,500 to $9,500.
  • Always get 2-3 quotes and ask for an itemized breakdown.
  • High-efficiency systems save energy but cost more upfront.
  • Consider repair if your system is under 12 years old and the repair is minor.
  • New Jersey offers rebates and incentives for energy-efficient systems.

What’s the average cost to replace an HVAC system in New Jersey?

HVAC technician installing a residential heat pump system during HVAC replacement in a NJ home

On average, you can expect the average cost to replace HVAC system in NJ to fall between $9,000 and $16,000.

However, the price can vary quite a bit depending on system type, the size of your home, and how complicated the installation is. 

For instance, if you’ve got a large home or you want a high-efficiency system, the cost might be on the higher end of this range. 

But if you’re just replacing a part of your system, like just the furnace or just the AC, it won’t cost you so much. 

Let’s take a closer look at how the prices vary. 

Clean-Air-Technologies's Logo
Angies Super Service
Accredited Business
Aeroseal

Schedule Your Free Estimate Today

Contact us to improve your indoor air
quality with our expert cleaning services in NJ.

How much does HVAC replacement cost based on system type?

HVAC technician installing duct support inside a home during HVAC system replacement in New Jersey

When it comes to HVAC replacement in New Jersey, the  cost will depend on the type of system you’re installing and the features you want. 

You see, different systems come with different price tags, so it’s important to know what you’re getting and what’s best for your home.

Here’s a breakdown of the typical costs for various HVAC system types:

1. Central air conditioning: $5,500-$9,500

If your furnace is still working well, you might only need to replace the central air conditioning system. 

This is a common scenario for homeowners who are just looking to fix their cooling without touching the heating side. Here, costs typically range between $5,500 and $9,500. 

There are several factors that affect the final cost of AC replacement, including : 

  • Home size: The larger the home, the more tonnage (or cooling power) you’ll need, which increases the price.
  • SEER rating: The higher the SEER (Seasonal Energy Efficiency Ratio), the more efficient the unit. Higher SEER units cost more upfront, but they’ll save you on energy bills over time.
  • Compatibility: If your AC coils need to be swapped out or if your existing furnace doesn’t match, that could add extra costs.
  • Electrical work: Sometimes, older homes might need electrical upgrades to handle a new unit.

In short, replacing just the AC might be a budget-friendly option if your furnace is still doing its job. But the total cost can still vary based on your home’s needs.

2. Furnace: $3,500-$9,000

If your air conditioning is still working fine, but your furnace is on its way out, you’ll be looking at replacing just the furnace. 

Now, the total furnace cost in NJ looks something like this:   

  • Gas furnace (standard efficiency): $4,500-$6,500
  • High-efficiency gas furnace: $6,500-$9,000
  • Electric furnace: $3,500-$6,000

The final cost of furnace replacement will depend on several factors including: 

  • AFUE rating: The higher the AFUE (Annual Fuel Utilization Efficiency), the more energy-efficient the furnace is, but it also comes with a higher price tag.
  • Venting and chimney modifications: Older homes might need additional work done to vent the furnace correctly, which can add to the cost.
  • Gas line modifications: In some cases, the existing gas line might need to be upgraded to handle a higher-capacity furnace.
  • Condensate drain installation: High-efficiency furnaces often require a special condensate drain for water runoff, which can add extra labor costs.

3. Heat pump: $7,500-$14,000

Heat pumps are growing in popularity in New Jersey because they provide both heating and cooling in one system.  

Now, their upfront cost is in the range of $7,500-$14,000, which is higher. But in the long run, heat pumps often save money by using less energy.

However, heat pumps might not be ideal for every home as they work best in moderate climates only. 

Note: Sometimes, it is not your cooling or heating system but the air duct that needs replacement. Your HVAC system might be working just fine, but the air ducts might not be doing their part. Thankfully, the cost to replace air ducts starts at just about $1,400 in New Jersey. 

4. Full HVAC system (AC and furnace): $9,000-$16,000+

The most common scenario for homeowners in New Jersey is replacing both the furnace and air conditioning unit at the same time. 

This is often the most cost-effective solution in the long run, as both systems will be properly matched for optimal efficiency and comfort.

But you’re looking to pay anywhere between $9,000 and $16,000 (or more) upfront. 

This price includes both a new furnace and a new AC unit, plus everything you’ll need for installation. This includes: 

5. High-efficiency systems: $14,000-$20,000+

High-efficiency systems are designed to give you better energy performance, which can lower utility bills over time. 

They cost more upfront, anywhere between $14,000 and $20,000 (or more). But they can pay off in the long run.

A high-efficiency HVAC system includes things like:

  • Variable-speed furnaces that adjust heating output depending on your home’s needs
  • Higher SEER AC units for more cooling power and energy savings
  • Better insulation and ductwork to improve overall performance

These systems are ideal if you’re looking for long-term savings and don’t mind spending a little more upfront.

TL;DR, here’s the cost to replace an HVAC system based on system type: 

System TypeTypical NJ Cost RangeMain Cost Factors
Central AC$5,500-$9,500Home size, SEER rating, compatibility, electrical upgrades
Furnace$3,500=$9,000Type (gas, electric), efficiency rating, venting & gas lines
Heat Pump$7,500-$14,000Dual function (heating & cooling), efficiency, rebates
Full HVAC System$9,000-$16,000+Includes both furnace & AC, refrigerant lines, testing
High-Efficiency Systems$14,000-$20,000+Variable-speed motors, better insulation, higher SEER ratings

Why is the average cost to replace HVAC systems higher in New Jersey?

HVAC technician inspecting an outdoor central air conditioning unit during AC replacement in a New Jersey home

When it comes to HVAC replacement, you might see national averages like $6,000-$8,000. But that’s usually not what you’ll find in New Jersey. 

You see, costs here tend to be higher for a few important reasons, which include:

1. Labor and licensing costs

In New Jersey, HVAC work isn’t just about installing a new system, it requires licensed professionals. Contractors must have the proper training and certifications to make sure the job is done safely and up to code. 

This can cost a bit more upfront, but it also ensures that the installation is done correctly and follows all local regulations. 

2. Older homes

New Jersey has a lot of homes that are decades old. While that gives them charm and character, it can also make HVAC replacement trickier and add extra costs. 

3. Permit and inspection requirements

You can’t skip the permits and inspections as they’re required by law. 

But the cost of permits and the time needed for town inspections can add a bit to your total price. 

4. Local climate

New Jersey’s weather can be pretty extreme with hot and humid summers followed by cold winters. That means your HVAC system needs to work overtime to keep your home comfortable year-round. 

These higher demands often require higher-capacity systems or dual-function units. Plus, you might need features like AUX heat to meet the extra heating demands during winters. 

These systems cost more because they need to be more robust. 

ReasonWhy It Affects Costs
Labor and Licensing CostsRequires licensed contractors, adding to the cost.
Older HomesMay need duct or electrical upgrades, increasing expenses.
Permit & Inspection CostsPermits and inspections are required, adding extra fees.
Climate DemandsExtreme weather needs higher-capacity systems, which are more expensive.

Bonus: You might not need a new HVAC system at all

Yes, that’s right.

You see, a lot of times, a dirty HVAC system might trick you into believing that you need a complete HVAC replacement.

In many cases, a thorough air duct cleaning services in NJ can restore airflow, improve efficiency, and eliminate the issues that make a system feel like it needs replacement. In some situations, even basic HVAC duct cleaning can noticeably improve performance.

What’s included in an HVAC system replacement quote and what’s not?

HVAC technician inspecting and replacing a residential furnace during HVAC system replacement in New Jersey

When you get an HVAC replacement quote, the number on the estimate might seem like a good deal at first. But sometimes, there are extra costs that pop up later on. 

So, it is always a good idea to ask for a fully itemized quote so you know exactly what you’re getting for your money. 

Let’s take a look at what’s usually included in your quote, and what isn’t included. 

Here’s what’s usually included in the cost: 

  1. Equipment: Your quote will definitely cover the cost of the new system itself, whether it’s a furnace, air conditioner, or full HVAC system. 
  2. Basic installation labor: The labor to install your new system is typically included. 
  3. Removal of old system: Most contractors will include the removal of your old system in the price. This includes taking out the old furnace, AC, or heat pump and hauling it away.
  4. Refrigerant handling: If you’re replacing your AC or heat pump, the cost of refrigerant will likely be included. Your contractor will make sure the refrigerant is safely handled and that your new system is properly charged.
  5. Startup and testing: After installation, the system will be started up, and the technician will test it to make sure everything is running smoothly. 
  6. Manufacturer warranty registration: Once your system is installed, your contractor will typically register your manufacturer warranty for you. 

Here’s what’s not included in the cost: 

  1. Ductwork repair or replacement: If your existing ductwork is old, damaged, or incompatible with the new system, repairs or replacements might not be included in your quote. 
  2. Electrical panel upgrades: If your electrical panel is outdated or doesn’t have the capacity to support the new system, an upgrade might be needed. This costs extra and isn’t a part of your initial quote.
  3. Gas line modifications: If your gas line isn’t sized properly for your new furnace or HVAC system, it might need to be modified or upgraded. Again, this isn’t always part of the original quote.
  4. Zoning systems: HVAC zoning allows you to control temperatures in different areas of your home. But zoning systems are typically considered an upgrade and they might not be included in a standard quote. 
  5. Air quality add-ons: You might choose to add things like air purifiers, humidifiers, or UV lamps to your HVAC setup. These air quality upgrades are not included in the standard quote and will cost extra. For instance, the cost to install UV lamps can be $200-$1000 above your HVAC replacement cost. 
  6. Permit fees: In New Jersey, permits are required, and the cost for them might be listed separately in your quote. 

TL;DR, here’s what’s included and what’s not included in the HVAC replacement cost:

IncludedNot Included
Equipment (new system)Ductwork repair/replacement
Basic installation laborElectrical panel upgrades
Removal of old systemGas line modifications
Refrigerant handlingZoning systems
Startup and testingAir quality add-ons (e.g. purifiers)
Manufacturer warranty registrationPermit fees (sometimes separate)

Pro tip: Always ask for a fully itemized quote. This way, you won’t be caught off guard by any unexpected charges.

Bonus: Here are a few factors that might increase the cost of HVAC system replacement

There are certain factors that can increase the cost to replace an HVAC system very quickly.

Let’s go through some of the biggest price drivers that can increase the final price. 

FactorWhy It Drives Costs Up
Oversized/Undersized EquipmentWrong-sized systems need more adjustments, causing higher costs.
Ductwork in Poor ConditionDamaged ducts make the system inefficient, leading to added repair/replacement costs.
Electrical Panel UpgradesOld panels may not handle new systems, needing an upgrade.
High-Efficiency SystemsMore upfront costs but can save on long-term energy bills.
Tight Install SpacesCramped attics/crawlspaces require more time and labor.
Zoning or Multi-Story HomesRequires more complex systems for even air distribution.
Cheap System Installed IncorrectlyPoor installation leads to higher long-term costs.
Clean-Air-Technologies's Logo
Angies Super Service
Accredited Business
Aeroseal

Schedule Your Free Estimate Today

Contact us to improve your indoor air
quality with our expert cleaning services in NJ.

Final words

By now, I am sure you know exactly how much it will cost to replace an HVAC system in New Jersey. 

You see, even though replacing an HVAC system is a major investment, when done correctly, a new system will: 

  • Improve comfort
  • Lower energy bills
  • Reduce breakdowns
  • Increase home value
  • Improve indoor air quality

Also, there are times when you don’t need to replace your HVAC system at all. Instead, you can get it cleaned and you’re good to go. 

Got more questions or want to schedule professional HVAC system cleaning?

You can get in touch with us!

At Clean Air Technologies, we’ve been helping New Jersey homeowners with NADCA-certified HVAC air duct cleaning services for over 30 years now. And we’ve got all your HVAC cleaning needs covered on a budget. 

FAQs about HVAC system replacement cost 

How much does it really cost to replace an HVAC system in New Jersey?

In most New Jersey homes, a full HVAC system replacement typically costs between $9,000 and $16,000. 

The exact price depends on your home’s size, system type, efficiency level, and whether upgrades like ductwork or electrical work are needed. 

Why are HVAC replacement quotes so different from one contractor to another?

HVAC quotes can vary widely because contractors might use different equipment, efficiency ratings, labor scope, and installation quality. 

Also, some quotes exclude permits, ductwork, or electrical upgrades, which makes them appear cheaper. Others include everything needed for a code-compliant installation. 

That’s why it’s important to compare detailed itemized estimates rather than just looking at the final price number.

How to avoid overpaying for HVAC replacement in NJ?

To avoid overpaying for your HVAC replacement, take these steps:

  • Get 2-3 detailed quotes from different contractors to compare prices and services.
  • Ask for Manual J load calculations to ensure the system is the right size for your home.
  • Avoid ‘today-only’ discounts that pressure you into a quick decision, take your time. 
  • Don’t buy oversized systems as bigger isn’t always better. A properly sized unit is more efficient.
  • Work with licensed, local contractors to ensure quality and compliance with local codes.
  • Ask for an itemized quote to understand exactly what’s included and what’s not.

Should you repair or replace your HVAC system?

Replacing your HVAC system often makes sense when:

  • Your system is 12-15+ years old, and repairs are becoming frequent.
  • Repairs exceed 30-40% of replacement cost, meaning it’s more cost-effective to replace it.
  • Your energy bills keep rising despite regular maintenance.
  • Comfort is inconsistent, like uneven temperatures or poor airflow.
  • Parts are discontinued, making repairs difficult or expensive. 

But if your system is relatively new and the repair is minor, it might be worth fixing rather than replacing.

Is it cheaper to replace just the AC or furnace instead of the full system?

Yes, replacing only the AC or furnace can cost less upfront if the other component is still in good condition and compatible. 

However, mismatched systems can reduce efficiency and cause performance issues. 

In many cases, replacing both together provides better comfort, efficiency, and long-term savings. 

A professional assessment will help you determine whether a partial or full replacement makes more sense for your home.

Are there rebates or incentives in New Jersey?

Yes, New Jersey homeowners do qualify for various rebates and incentives when replacing their HVAC systems. Depending on the type of system you choose, you may be eligible for:

  • Utility rebates for high-efficiency units.
  • Manufacturer incentives for certain brands or models.
  • Energy-efficiency federal programs make you eligible for federal energy efficient home improvement tax credit of up to $3,200 annually if you buy ENERGY STAR certified HVAC systems. 

How long does a new HVAC system typically last in New Jersey?

Most HVAC systems in New Jersey last 12 to 15 years, depending on usage, maintenance, and installation quality. 

Homes that schedule regular HVAC system cleaning and maintenance see longer system life. 

What hidden costs should I watch out for when replacing my HVAC system?

Common hidden costs include ductwork repairs, electrical panel upgrades, gas line modifications, permits, and zoning systems. 

Some quotes don’t include these upfront, which can lead to surprise charges later. 

I suggest you ask your contractor what is included and what could cost extra. A transparent contractor will explain potential add-ons before installation, not after the job starts.

Everything You Need To Know About Aux Heat On Your Thermostat

You might have looked at your thermostat on a cold New Jersey morning and suddenly noticed ‘aux heat’ or ‘heat on auxiliary’ flashing back at you. 

And if you’re like most homeowners, your first reaction would probably be: 

Is something wrong with my heat pump?

Why is this turning on?

Is this going to cost me a lot of money?

But you aren’t the only one with these questions. 

Aux heat confuses almost everyone the first time they see it. 

However, the truth is, aux heat is a totally normal and essential part of how your heat pump works. At least most of the time.

In this blog, I will walk you through what does aux heat mean exactly in homes. You’ll know: 

  • What is auxiliary heat
  • Why it turns on
  • When it’s normal and when it’s a problem
  • How it affects your energy bill
  • How to reduce your aux heat use
  • When you should call in a professional for home HVAC maintenance

So, let’s get started. 

Key takeaways  

  • Aux heat is your heat pump’s backup heater.
  • It turns on automatically when extra heat is needed.
  • Occasional aux heat is normal in cold weather.
  • Constant aux heat or use in mild weather signals a problem.
  • Emergency heat is manual and only for breakdowns.
  • Aux heat uses more energy and costs more in utility than your heat pump.
  • Common causes of excess aux heat use are dirty filters, airflow issues, duct leaks, or a weak heat pump.  
  • Call a professional if aux heat runs all the time or your home doesn’t heat properly.  

What does aux heat mean on a thermostat?


Aux heat stands for auxiliary heat and it is your heat pump’s backup heating system.

Think of it like this: Yur heat pump is your main heater. But Aux heat is a support heater that kicks in only when your heat pump needs extra support.

It will turn on automatically when:

  • It’s extremely cold outside
  • Your heat pump needs help catching up
  • Your system is in defrost mode
  • Your thermostat senses the heat pump can’t reach the set temperature fast enough

Aux heat usually comes from electric resistance heat strips, which are like giant versions of toaster coils. Also, it can come from a backup gas furnace if you have a dual-fuel system.

And here’s the important part. 

If you’ve been told aux heat is bad, that’s not true as this mode is just a normal part of your heating system.

It only becomes a problem if it’s turning on when it shouldn’t or running constantly.

We’ll talk about it later in the blog.

Clean-Air-Technologies's Logo
Angies Super Service
Accredited Business
Aeroseal

Schedule Your Free Estimate Today

Contact us to improve your indoor air
quality with our expert cleaning services in NJ.

How does aux heat work?

First starters, here’s your heat pump normally works:

  1. It absorbs heat from the outside air
  2. It compresses that heat
  3. It pumps the warm air into your home

But when it’s really cold outside or your indoor temperature drops too fast, the heat pump can’t keep up.

So your thermostat activates electric heat strips or backup furnace if you’ve got a dual-fuel HVAC system.  

This is aux heat for you. It is more powerful, but also more expensive to run.

Why do homes in New Jersey see aux mode more often? 

New Jersey winters are cold, windy, and humid. Here, heat pumps work best when the temperature outside is above 35-40 degrees fahrenheit. 

But when temps drop lower, the outdoor coils get too cold, the heat pump loses efficiency, and its struggles to pull heat from outside air

This is when your thermostat turns aux mode on. 

So your thermostat is actually doing exactly what it’s supposed to do. And if you see aux heat on for short periods, especially when the temperature is too low, that’s totally normal.

Want to avoid unnecessary aux mode usage?

Read my blog on winter HVAC maintenance tips where I have shared practical ways to keep your heat pump working normally and efficiently. 

Why is auxiliary heat on? Here are all the possible scenarios 

Wall-mounted thermostat exposed to sunlight, which can cause inaccurate temperature readings in a home

Aux heat doesn’t turn on randomly, and it doesn’t mean your system is failing. 

You see, your thermostat is constantly watching how fast your home is heating, how cold it is outside, and whether your heat pump can keep up. 

And when it decides the heat pump needs help, it automatically turns on aux heat. 

Here are some of the most common reasons why this happens in New Jersey homes: 

1. It’s too cold outside

Heat pumps work by pulling heat from the outdoor air. But the colder it gets, the harder your heat pump has to work. 

Once temperatures drop into the mid-30s and below, the system often needs backup to maintain comfort.

In New Jersey, winter temperatures frequently fall into this range, especially overnight and during cold snaps. 

And when this happens, aux heat turns on for short periods to help your heat pump keep your home warm. This is completely normal and expected during colder NJ weather.

Here’s what you can expect: 

  • Temperature below 35-40 degrees fahrenheit: Aux heat might run occasionally
  • Temperature below 30 degrees fahrenheit: Aux heat runs more often
  • Temperature below 25 degrees fahrenheit: Aux heat runs frequently

2. You raised your thermostat too quickly

Your thermostat is designed to keep your home comfortable. So, if you crank the temperature up several degrees at once, the system assumes you want fast heat. 

Now, instead of waiting for the heat pump to slowly catch up, the thermostat brings in aux heat to speed things along.

For instance, if you crank the thermostat from 65 to 74 degrees fahrenheit, it tells the system that you need a lot of heat right now. 

And most thermostats automatically turn on aux when the indoor temperature is more than 2–3 degrees below the set point. This isn’t a malfunction, it’s just how the system is programmed to work.

3. Heat pump is running a defrost cycle

This one confuses a lot of homeowners. 

In cold and damp winter weather, frost can build up on the outdoor unit. And when that happens, the heat pump briefly switches into defrost mode to melt the ice and protect itself.

During this short cycle, the heat pump temporarily stops heating your home and focuses on warming the outdoor coils instead. 

But to prevent cold air from blowing inside, aux heat turns on automatically and keeps your home comfortable. 

You might not even notice it happening. However, this process is normal, automatic, and essential for proper heat pump operation.

4. Heat pump needs help with heating demand

Sometimes aux heat turns on not because it’s freezing outside, but because something is limiting your heat pump’s performance. 

For instance, if the HVAC system can’t produce heat fast enough, the thermostat brings in backup heat to make up the difference.

Common causes of this include restricted airflow, dirty air filters, leaky ductwork, low refrigerant, or simply an older or undersized system. 

And when it happens, aux heat steps in to help maintain your set temperature and keep your home comfortable.

5. Thermostat sensors detected slow heating

Thermostats rely on sensors. And sensors aren’t always perfect as they can give incorrect temperature readings

So, if your thermostat is installed in a poor location, it might think your home is colder than it actually is. On top of that, drafts, sunlight, nearby vents, or exterior walls can all affect its readings.

Now, when the thermostat senses that the temperature is rising too slowly, it might activate aux heat even when it’s not really needed. 

In short, here’s why auxiliary is heat on: 

ScenarioWhy It Happens
Cold WeatherHeat pump can’t pull enough heat from outdoor air
Thermostat Raised QuicklySystem speeds up heating with AUX help
Defrost CycleOutdoor unit melts frost, AUX keeps home warm
Heat Pump Can’t Meet DemandSystem struggles due to airflow or other issues
Thermostat Sensors Detect Slow HeatingSensor thinks home is too cold

Is aux heat bad?

Short answer: No, aux heat is not bad. 

And seeing it on your thermostat doesn’t mean your system is broken, failing, or doing something wrong. 

Aux heat is a built-in feature designed to keep your home comfortable when your heat pump needs a little help. It is normal, automatic, and expected during cold weather, big temperature changes, or defrost cycles.

That said, aux heat is more expensive to run. It consumes much more electricity than your heat pump. 

So, when aux heat runs occasionally, it’s no big deal. But if it’s running constantly or for long periods, that’s when your energy bills start to climb. 

Aux heat vs emergency heat: What’s the difference?

Smart thermostat displaying a set indoor temperature during normal home heating operation

AUX heat and emergency heat are not the same thing, even though they both use backup heat.

AUX heat turns on automatically when your heat pump needs help. The heat pump is still running, and the system is simply adding extra heat to keep your home comfortable. 

This is normal, expected, and something most NJ homeowners will see during winter.

Emergency heat, on the other hand, is something you turn on manually. 

When you use emergency heat, the heat pump shuts off completely and your system runs only on backup heat. 

This uses a lot of energy and should only be used if your heat pump is broken, frozen solid, or not working at all. 

Here are all the differences between aux heat and emergency heat: 

FeatureAUX HeatEmergency Heat
ActivationAutomaticManual
Heat Pump StatusStill runningShuts off completely
Use CaseNormal backup during cold or high demandOnly for breakdowns or system failure
CostExpensive but occasional is okayVery expensive if used long-term

When does aux heat mean something is wrong?

Wall-mounted thermostat installed near the floor showing indoor temperature and sensor-based heating control

Aux heat is helpful, but only when it runs briefly and at the right times. It becomes a warning sign when it seems to be running all the time or in mild weather.

For instance, it might be a problem if:

  • Aux heat runs for hours at a time
  • Aux stays on when it’s above 40-45 degrees farenhight outside
  • Aux turns on every time your system heats
  • Aux runs even when your home already feels warm
  • Aux activates during mild weather
  • Your energy bills suddenly jump
  • Your home takes forever to warm up
  • Your thermostat struggles to reach the set temperature

If you’re noticing any of these, your heat pump is likely underperforming and relying too heavily on backup heat. 

 Here are all the signs of aux heat indicating something is wrong: 

SignWhat It Means
Runs for hours continuouslyHeat pump struggling or inefficient
On during mild weather (>40–45°F)System likely has airflow or efficiency issues
Runs every heating cycleCould indicate broken components or poor maintenance
Home stays coldHeat pump underperforming
Energy bills spikeExcessive AUX use
Thermostat can’t reach set tempSystem needs professional check

Bonus: Here are some common reasons why aux heat is running too much

CauseEffect on SystemFix
Dirty/Clogged FiltersReduced airflow, heat pump strugglesChange filters every 1-3 months
Dirty Outdoor UnitBlocks heat absorptionClear dirt, leaves, snow
Low RefrigerantHeat pump can’t pull heat efficientlyProfessional service required
Thermostat IssuesTriggers aux earlyCheck placement & settings
Undersized Heat PumpCan’t meet demandConsider system upgrade
Duct LeaksWarm air escapesSeal leaks in ducts
Blower/Airflow ProblemsWeak heating distributionService blower or HVAC system
Defrost Cycle IssuesAux runs longerTechnician check recommended

In many New Jersey homes, issues like duct leaks, restricted airflow, or dust buildup inside the system can force aux heat to run more than necessary. In these cases, professional air duct cleaning in NJ can help restore proper airflow and improve heat pump efficiency.

Clean-Air-Technologies's Logo
Angies Super Service
Accredited Business
Aeroseal

Schedule Your Free Estimate Today

Contact us to improve your indoor air
quality with our expert cleaning services in NJ.

Final words 

By now, I am sure what does aux heat mean exactly, how it works, and when it’s normal versus when it could signal a problem.

Simply put, occasional aux heat is completely normal and constant aux heat is a warning sign. Also, emergency heat is only for system breakdowns.

Got more questions or want to get your HVAC system cleaned for efficient winter performance?

You can get in touch with us!

At Clean Air Technologies, we’ve been helping New Jersey homes stay warm, comfortable, and efficient for 30 years now. And we’ve got all your HVAC maintenance needs covered on a budget. 

FAQs about aux heat on thermostat 

Is aux heat supposed to come on?

Yes, absolutely. 

Aux heat is designed to turn on automatically when your heat pump needs extra help. This often happens when outdoor temperatures drop below about 35-40 degrees fahrenheit, during defrost cycles, or when your home needs heat quickly. 

Why does aux heat keep turning on?

If aux heat turns on frequently, it usually means your heat pump is struggling to keep up. 

This could be due to cold outdoor temperatures, a big thermostat adjustment, or performance issues like dirty filters, airflow problems, or duct leaks.

To fix this, you can do simple things like cleaning dirty air ducts, or call in an HVAC professional to fix leaks in the ductwork. 

Does aux heat use more electricity? 

Yes, aux heat costs significantly more to run than your heat pump alone. It uses electric heat strips that consume much more electricity. 

How much electricity does aux heat use? 

Heat pumps are very efficient, but aux heat is not. 

A typical heat pump might use around 1-3 kilowatts per hour, while AUX heat strips can use 5-15 kilowatts per hour. 

Is aux heat the same as emergency heat?

No, they are very different. 

Aux heat turns on automatically and works alongside your heat pump. 

Emergency heat is something you turn on manually and shuts the heat pump off completely. 

Can aux heat damage my system?

No, aux heat will not damage your heat pump or HVAC system. It’s designed to work safely with your equipment. 

However, if aux heat runs too often, it can put extra strain on electrical components and lead to higher energy costs over time.

How Much Does HVAC UV Light Installation Cost In New Jersey? (2026)

If you’re among the many New Jersey homeowners who face indoor air quality and health issues, someone might have recommended installing a UV light in your HVAC system. 

More so if you’ve been dealing with musty smells, recurring mold on the AC coil, or seasonal allergies. 

And naturally, your very first question would be: How much does HVAC UV light installation cost? 

Now, the quick answer is, most UV light installations in New Jersey cost anywhere from $250 to $1,000 (or more). 

However, the exact cost will depend on the type of UV light you choose and how difficult the installation is. 

In this blog, I will break it all down. You’ll Know:

  • What’s the exact cost of HVAC UV light installation
  • Why does the price vary so much
  • Which kind of UV system is worth the money
  • What quote is fair and what’s overpriced?

So, let’s get started. 

Key takeaways 

  • Most HVAC UV light installations in New Jersey cost between $250 and $1,000.
  • Coil UV lights are usually cheaper; in-duct UV lights cost more to install.
  • Your final price depends on the UV system type, brand, wiring requirements, installer labor rates, and warranty.
  • Bulb replacements cost $30-$100 once a year.
  • Scroll down for the full NJ cost breakdown, itemized pricing, and real homeowner examples.

What is an HVAC UV light and how does it work? 

Before we get into HVAC UV light cost, let’s first understand what these lights actually do inside the furnace or air handler. 

For starters, UV lights used in HVAC systems produce UV-C light, a short-wave ultraviolet wavelength that can break down the DNA of mold, bacteria, and other microbes.

Think of these lights as a microscopic disinfectant that works 24/7 inside your HVAC system, but without chemicals, sprays, or filters.

Clean-Air-Technologies's Logo
Angies Super Service
Accredited Business
Aeroseal

Schedule Your Free Estimate Today

Contact us to improve your indoor air
quality with our expert cleaning services in NJ.

Where are UV lights installed? 

Depending on your HVAC setup, an HVAC system professional will place UV lights in one of two locations:

  • Over the evaporator coil (this is common in HVACs across New Jersey)
  • Inside the supply duct or plenum

Both these spots are high-risk areas for microbial growth. That’s because coils stay wet from AC condensation, making them the perfect spot for mold and slime to grow.

What do UV lights do? 

At their basic, UV lights keep the inside of your HVAC system clean. This ensures your indoor air stays clean too and your system runs more efficiently.

And to do so, these lights eliminate the following: 

  • Mold growing on evaporator coils
  • Biofilm and slime in the drain pan
  • Bacteria and microbes on damp surfaces
  • Some airborne pathogens (if you’re using in-duct UV systems)

How much does HVAC UV light installation cost exactly? 

As someone who’s been shopping around for a UV light system in New Jersey, you’ve probably noticed that the prices are  drastically different all over the place. 

One company quotes you $300 while another quotes $900. And suddenly you’re wondering who’s being honest and who’s trying to buy themselves a vacation.

Now, here’s the good part: The pricing actually makes sense once you understand what you’re paying for.

Here’s the average cost of uv lights for HVAC system in New Jersey: 

The UV light installation costs generally fall into two ranges for homes across North, Central, and South Jersey. This includes: 

  • Coil (on-coil) UV lights: $250-$650 
  • In-duct (air-sanitizing) UV lights: $350-$1,000 (or more) 

You see, coil UV lights are usually the cheaper option because they mount in one specific spot, that is right over the AC coil. 

On the other hand, in-duct UV systems disinfect moving air and need more wiring, more positioning, and more labor, which makes them pricier. 

In short: 

Type of UV LightPrice Range
Coil (on-coil) UV Lights$250-$650
In-duct (air-sanitizing) UV Lights$350-$1,000+

But why do the quotes vary so much from contractor to contractor even for the same kind of installation?

Let’s understand why and how NJ’s labor cost plays a role. 

How does New Jersey’s labor cost determine HVAC UV light cost? 

New Jersey has some of the highest HVAC labor rates in the country, ranging between $125-$180 per hour. This is especially true for the dense North Jersey counties like Bergen, Essex, and Hudson.

And here’s how it impacts your UV light installation cost: 

  • HVAC labor costs $125–$180 per hour
  • Typical installation time is 1-3 hours depending on system type and access

Now, a quick coil UV light install in a utility closet might take an hour. But a tight attic or crawlspace job in an older home can easily become a 3-hour project.

So, you can expect to pay anywhere between $125-$540 for installation labor. 

Plus, add in travel time, dense traffic, parking issues in urban areas, and higher overhead for licensed/insured HVAC companies, and you can see why pricing changes so much. 

HVAC UV light installation cost: What are you actually paying for? 

Close-up view of a technician installing a UV light inside an HVAC system to prevent mold growth and improve air quality.

Most homeowners think UV lights are expensive because the equipment itself costs a lot.

But here’s the surprise: the equipment is usually the cheapest part of the whole job.

So what are you really paying for? 

Here’s a breakdown of each line item that goes into your final quote: 

1. UV lamp cost: $30-$200

  • Basic replacement bulbs: $30-$80
  • Branded lamp assemblies or high-output lamps: $100-$200

Better UV lamps have stronger output, last longer, and come with longer UV-unit warranty-coverage, so the price increases.

2. Mounting hardware: $10-$75

Depending on your furnace or air handler, the installer might need:

  • Simple clamps
  • A mounting bracket
  • A small sheet-metal adapter (common in older NJ homes)

3. Wiring, transformer, and electrical parts: $30-$250

The exact cost will depend on whether:

  • The system needs a new low-voltage transformer
  • The installer needs to create a new junction box
  • The wiring has to be run through an attic or crawlspace

4. Electrical work: $60-$300

You need an electrician or highly trained HVAC technician to handle this step.

Here, the price can go up if your UV system needs to be: 

  • Tied into your HVAC control board
  • Hard-wired 
  • Switched
  • Or connected to a new power source

5. Labor: $125-$180 per hour 

As we saw earlier, labor cost makes up for the largest part of your final cost. They charge an hourly fee and can take up-to three hours depending on the job. 

For instance: 

  • Easily accessible coil installations take 1-1.5 hours
  • In-duct systems take 2 hours or more
  • Tight attic or crawlspace can take up-to 3 hours or more 

6. Travel or service call fee: $0-$100 

Some contractors roll this into labor. But others might add a service fee, especially for far or off-hour appointments.

7. Brand / warranty markup: $0-$200

Premium UV lights offer:

  • Stronger UV output
  • UV-resistant housings
  • Better warranties
  • Verified safety ratings

This quality comes at a small premium, but it’s usually worth it.

In short: 

ItemCost Range
UV Lamp$30-$200
Mounting Hardware$10-$75
Wiring & Electrical Parts$30-$250
Electrical Work$60-$300
Labor$125-$180 per hour
Travel/Service Fee$0-$100
Brand/Warranty Premium$0-$200

UV light installation cost examples for New Jersey homes

HVAC technician installing a long UV light inside a commercial air handler system, surrounded by tools during maintenance.

Now that you’ve seen the line-by-line breakdown of HVAC UV light installation cost in New Jersey, let me give you examples of how much it might actually cost you.

These examples are based on the kind of installations my team does almost every day. 

And once you look at how the parts and labor stack up, the prices start to make a lot more sense.

1. Simple coil UV installation

This is the kind of job every HVAC technician hopes for. Here, the air handler is easy to reach, the electrical panel is right there, and the UV light mounts cleanly without any surprises.

In a setup like this, you’re typically paying for:

  • UV lamp: $60
  • Basic mounting hardware: $20
  • Minimal wiring or transformer needs: $40
  • Labor (1.5 hours × $150/hr): $225
  • Travel/dispatch: $30

Everything goes smoothly, so the final price lands around $375. 

2. Standard in-duct UV installation 

This scenario is very common in suburban homes with basements or mechanical rooms. Here, the ductwork is accessible, but placing the UV light in the right spot (where it actually hits the moving air) takes a bit more time and wiring.

In this case, the bill usually includes:

  • Higher-output UV lamp/unit: $120
  • Mounting hardware: $40
  • Wiring/transformer parts: $80
  • Labor (2 hours × $150/hr): $300
  • Travel: $50
  • Brand/warranty upgrade: $75

Put it all together, and you’re looking to pay roughly $665.

3. Older home with difficult access 

And then, there’s the reality of many New Jersey homes, especially older ones in towns like Montclair, Bloomfield, Rahway, or parts of Bergen County

Here, the system is tucked in an attic, or the wiring is outdated, or everything is just harder to reach.

When this happens, the price climbs, not because of the UV lamp, but because the installer’s job suddenly gets a whole lot tougher.

A scenario like this might include:

  • UV lamp: $120
  • Custom brackets or sheet-metal work: $75
  • Extensive wiring, new transformer, or additional safety components: $200
  • Labor (3 hours × $160/hr): $480
  • Travel/time premium: $75
  • Warranty/markup: $100

By the time everything is installed safely and up to code, your total lands around $1,050 or more. 

In short: 

ScenarioUV LampMounting HardwareWiring & ElectricalLaborTravelTotal
Simple Coil Installation$60$20$40$225 (1.5 hrs)$30$375
Standard In-Duct Installation$120$40$80$300 (2 hrs)$50$665
Older Home with Difficult Access$120$75$200$480 (3 hrs)$75$1,050

Bonus: Here are the annual running costs of HVAC UV lights

Cost TypeTypical New Jersey RangeNotes
Bulb Replacement$30-$100/yearReplace every 12 months
Professional Bulb Replacement$60-$150If done during a tune-up
Electricity (coil UV)$12-$30/yearAlways running
Electricity (in-duct UV)$8-$20/yearOnly runs with blower

You might also want to read: How To Clean HVAC Ducts Yourself (DIY Guide)?

Clean-Air-Technologies's Logo
Angies Super Service
Accredited Business
Aeroseal

Schedule Your Free Estimate Today

Contact us to improve your indoor air
quality with our expert cleaning services in NJ.

Conclusion

By now, I am sure you know how much does HVAC UV light installation cost exactly. 

You see, UV light is one of the most cost-effective upgrades you can make for your home.

While the price can vary widely, for an investment of $250-$1,000, the long-term benefits are hard to ignore:

And if you’re in New Jersey, Clean Air Technologies can help you choose the right system, install it safely, and keep it running at peak performance.

Whether you’re a homeowner looking to improve indoor air quality or you’re comparing quotes across different contractors, we’re here to make the process simple, transparent, and stress-free.

FAQs about HVAC UV light installation? 

HVAC technician installing a UV light system inside a commercial air handler unit to improve air purification and prevent mold.

Is installing a UV light in HVAC worth it?

For most New Jersey homeowners, yes; especially if you’re dealing with musty odors, coil mold, or persistent indoor air quality issues.

UV lights are worth it when:

  • Your HVAC coil has a history of mold growth
  • You live in a humid area 
  • You or someone in the home has asthma/allergies
  • You want cleaner coils and better airflow
  • You want to reduce biofilm and bacteria inside the system

However, here’s what UV lights don’t do:

  • Remove dust
  • Capture allergens
  • Filter VOCs
  • Replace a real air purifier

So, if you expect a UV light to do everything, it’ll disappoint you.

But if you want cleaner coils and reduced microbial growth, they’re one of the most cost-effective solutions you can install.

How long do HVAC UV bulbs last?

Most HVAC UV-C bulbs last about 9,000 hours, which equals about:

  • 1 year for coil lights (they run 24/7)
  • 12-18 months for in-duct lights (they run only when blower is on)

Even if the bulb still glows after a year, the UV intensity drops, meaning it stops sanitizing effectively.

Does a UV light reduce mold in New Jersey homes?

Yes, UV lights are one of the most effective ways to stop mold growth inside your HVAC system, especially in NJ’s humid climate.

They help by:

  • Killing mold spores on the evaporator coil
  • Preventing the slimy biofilm that restricts airflow
  • Reducing musty odors coming from vents
  • Keeping the drain pan cleaner

However, UV lights do not remove mold inside ducts, drywall, or basements. They’re strictly for sanitizing the inside of your HVAC equipment.

Which is better, coil or in-duct UV?

Both are useful, but they serve different purposes:

For instance, coil UV: 

  • Prevents mold directly on the coil
  • Keeps HVAC efficiency high
  • Reduces musty odors
  • Lowest operating cost

Similarly, in-duct UV: 

  • Sanitizes moving air
  • Helps reduce airborne bacteria and viruses
  • Is better for households with respiratory issues

Many NJ homeowners eventually install both for full coverage, but if you’re picking just one, coil UV is usually the best place to start.

Do UV lights kill viruses?

Yes, UV-C light can deactivate viruses, including many respiratory viruses, by damaging their DNA/RNA.

But here’s the realistic picture:

  • UV works best when microbes pass directly through the light
  • Airflow speed can limit exposure time
  • It reduces viral load, but does not eliminate all viruses
  • It is not a substitute for filtration or ventilation

Think of it as a helpful layer of protection but not a miracle solution.

Can UV lights damage HVAC components?

UV lights are safe when installed correctly.

However, incorrect placement or cheap lamps can cause problems like:

  • Plastic parts fading or becoming brittle
  • Wire insulation degradation
  • Damage to non-UV-rated materials

Professional installers use:

  • UV-resistant mounting equipment
  • Shielding for wiring
  • Correct placement away from sensitive plastics

When installed properly, the UV light only affects microbes but not your equipment.

How much does it cost to replace a UV bulb in NJ?

In New Jersey, the typical replacement cost is:

  • DIY bulb: $30-$100
  • Bulb and professional replacement: $60-$150

If done during a seasonal AC tune-up, many homeowners only pay for the bulb itself.

Higher-end models (dual-lamp systems or premium brands) might cost up to $120-$160 per bulb.

Do I need a professional to install a UV light?

Technically, you can install certain UV light models yourself.

But for most New Jersey homeowners, professional installation is strongly recommended.

Here’s why:

  • Most installations require tapping into HVAC electrical
  • Proper placement affects performance
  • Incorrect mounting can damage coils or plastics
  • An improper seal can cause UV leakage
  • DIY installs can void manufacturer warranty

Professional installation also ensures the UV light is UL-approved, properly wired, and safely shielded.

Why Is My AC Blowing Smoke And What Can I Do About It? 

One of the most common HVAC SOS calls I get is about one question: Why is my AC blowing smoke? 

People wonder if this is normal or they’ll end up with an expensive repair. 

Now, if you’ve got a similar problem on your hands, don’t freak out, but don’t ignore it either.

You see, it is not uncommon for AC to start blowing something that looks like smoke. This is especially true for New Jersey summers when your AC finally kicks back on after months of downtime.

But here’s the thing, what looks like smoke often isn’t smoke at all. It could be steam, condensation, or even just dust burning off. 

Nevertheless, it can sometimes be an electrical problem. Sometimes it’s simply dust or airflow issues, which professional air duct cleaning services in NJ can fix before they turn into serious HVAC problems.

In this blog, I will explain it all. You’ll know:

  • Why is smoke coming out of AC vent
  • Whether or not it is really smoke
  • What causes your AC to blow smoke 
  • What can you do to stop it
  • When to call a professional to fix it and when to call 911

So, let’s get started. 

Key takeaways

  • Most smoke from AC vents is actually harmless mist or condensation.
  • Dark smoke or burning smells are serious and need the AC turned off.
  • Electrical issues are the highest-risk cause of AC smoke.
  • Dirty filters and poor airflow can create fog, overheating, or frozen coils.
  • If you see flames or thick dark smoke, evacuate and call 911.
  • Regular AC maintenance prevents most smoke-like symptoms.

Is it really smoke coming out of AC vent? Here’s how to tell

Man standing in a living room inspecting thick white smoke coming from a ceiling AC vent.

Your AC might look like it’s blowing smoke. But a lot of times it isn’t actually smoke.

So, how do you know the difference? 

Here’s a quick guide to help you figure it out:

1. Steam or fog 

If your AC blows super-cold air into a warm, humid room, it can create a foggy, cloud-like effect. This is common on a humid day or when your room is damp or moist.

  • What does it look like: Light white mist. 
  • What does it smell like: Usually nothing. 
  • What does it mean: This can be caused by high humidity, dirty filters, and even poor airflow. It is usually not a big deal, but you should check and clean your air vents, especially around the filters. 

2. Mist from a frozen coil that’s thawing

Your AC’s evaporator coil can freeze during peak winters. And when it starts to melt, the ice turns into mist that looks like smoke coming from the vents.

  • What does it look like: Thin white fog. 
  • What does it smell like: Usually nothing. 
  • What does it mean: It is robably a clogged filter, low refrigerant, or blocked airflow. But this is also a sign that something needs to be fixed.

3. Dust burn-off   

If your AC’s been sitting unused for a while, dust can settle inside the system. And when the AC starts up again, that dust can burn off and create a smoky puff.

  • What does it look like: Light gray haze
  • What does it smell like: A slightly dusty or hot metal smell
  • What does it mean: This is usually normal when your AC starts up after a long time, and it should clear up in a few minutes. But if it sticks around longer, I suggest you get your AC checked.

4. Electrical smoke

This is the one you want to watch out for. Electrical smoke is dark, heavy, and usually comes with a strong burning or plastic smell.

  • What does it look like: Dark gray, blue, or black smoke that doesn’t go away quickly
  • What does it smell like: Burning wires, melting plastic, or an overheating motor
  • What does it mean: Something is seriously wrong, probably an electrical short, a failing blower motor, or overheating parts. You should turn the AC off immediately and call a technician. 

TL;DR, here’s how to tell if it’s really smoke coming out of AC vent: 

TypeWhat It Looks LikeSmellWhat It MeansRisk Level
Steam/FogLight white mistNo smellCold air hitting warm humid air; airflow or humidity issuesLow
Thawing Frozen Coil MistThin white fogNo smellFrozen evaporator coil melting; often from low refrigerant or poor airflowMedium
Dust Burn-OffLight gray hazeDusty/hot metal smellDust burning after long downtimeLow
Electrical SmokeDark gray/blue/black smokeBurning plastic/wiresElectrical short, motor failure, melting componentsHigh
Clean-Air-Technologies's Logo
Angies Super Service
Accredited Business
Aeroseal

Schedule Your Free Estimate Today

Contact us to improve your indoor air
quality with our expert cleaning services in NJ.

Why is your air conditioner blowing out smoke? 

Worried woman holding her chest while a window AC unit blows white smoke inside the room.

For starters, there are various reasons why your AC might be blowing out smoke, including electrical short, motor failure, or overheating. 

And while some smokes are no big deal, others can cause serious damage to your AC and even pose a safety risk. 

Here are some of the most common causes of smoke coming out of AC vent ranked from high to low risk: 

1. There are electrical problems (high risk)

If your AC is blowing dark smoke or you smell something burning like plastic, this is the most dangerous scenario. 

Here’s what’s most likely happening inside your AC unit: 

  • Wires inside the unit are burning or melting
  • A capacitor has shorted out
  • The blower motor is overheating
  • A control board or other internal component has fried

Why is it dangerous? 

Electrical issues can cause fires, cause permanent damage to the system, and are very expensive to repair.

Here are some signs of electrical problems: 

  • Dark gray, blue, or black smoke that doesn’t go away quickly
  • A strong burning or plastic-like smell
  • The AC suddenly shuts off or makes buzzing/humming noises

What should you do? 

  • Turn off the AC immediately at both the thermostat and the breaker. 
  • Hire a professional HVAC technician right away as this is not something you can fix on your own.

In short:

What’s HappeningSignsWhy It’s DangerousWhat To Do
Burning wires, failing motor, shorted capacitor, fried boardDark smoke, burning plastic smell, buzzing, sudden shutoffFire risk, system damageTurn off AC and breaker, call technician

2. Components are overheating (medium-high risk)

When your AC has to work extra hard to cool your home, parts do usually overheat. This is often caused by poor airflow or dirty parts.

Here are some common causes of overheating: 

  • Dirty condenser or evaporator coils
  • Clogged or dirty air filter
  • Blocked return vents
  • Restricted airflow
  • A failing motor or compressor working too hard

Here are the signs of overheating that you should watch out for: 

  • A hot burning smell (but not the sharp plastic-like smell of electrical short)
  • The AC sounds louder than usual
  • Weak airflow or poor cooling
  • Light haze around the indoor or outdoor unit

What are the risks of overheating? 

If you ignore overheating, it can lead to a total system failure. So, do get your AC checked before things get worse.

In Short:

CauseSignsRisksAction
Dirty coils, clogged filters, blocked vents, struggling motorBurning smell (not plastic), weak airflow, loud unitTotal system failureClean filters, schedule HVAC check

3. Pest or rodent issues (medium–high Risk)

You might not think about it, but pests like rodents can actually cause your AC to blow smoke. 

How? 

They chew through wires, create nests that block airflow, or even burn off debris when the system heats up.

How does this create smoke? 

  • Rodents chew through wires, causing sparks or short circuits
  • Their nests block airflow, leading to overheating
  • Pest droppings and debris burn off when the system kicks on

Here are the signs of pest and rodent problems: 

  • There is a strange smell coming out of the AC, it is musty, burning, or animal-like
  • There is weak airflow or poor cooling
  • You hear rattling or scratching noises
  • You notice smoke or haze near the air handler

Why is this risky? 

Damaged wiring from pests can create electrical hazards that could lead to fires or more serious system damage.

What can you do about it?

If you suspect a pest issue, call a professional to inspect the system. It’s important to fix this before it leads to a bigger problem.

In Short:

What HappensSignsRisksAction
Rodents chew wires, build nests, block airflowMusty/burning smell, rattling, weak airflow, hazeElectrical hazards, overheatingCall pest control and HVAC technician

4. There is a refrigerant leak (medium risk)  

A refrigerant leak can sometimes cause a mist or fog that looks like smoke. While this isn’t super common, it’s serious when it does happen.

Here are the signs of refrigerant leak that you should watch out for: 

  • White fog near the AC unit
  • There is a hissing or bubbling sound
  • The AC is no longer cooling properly
  • There is a chemical-like smell

Why is it risky? 

Refrigerant leaks can cause headaches, dizziness, and nausea if you’re exposed to it. Plus, the leak can damage the system and stop the AC from cooling altogether.

What should you do? 

Turn off the unit immediately and call a professional HVAC technician. Don’t try to handle refrigerant yourself as it’s dangerous and requires special training.

In Short:

SignsWhy It HappensRisksWhat To Do
White fog, hissing/bubbling, poor cooling, chemical smellLeak in refrigerant linesHealth symptoms + system damageTurn off AC, call licensed tech

5. Frozen evaporator coil is thawing (low-medium risk)

This is a bit tricky because it can look like smoke, but it’s really just cold vapor. And it happens when the evaporator coil freezes up and then starts to melt.

Here’s why it happens:

  • Refrigerant levels are low
  • Air filter is dirty
  • Airflow inside the AC ducts are are blocked
  • You are running the AC in very low temperatures
  • One (or more) blower motors are faulty

Here are the signs you should watch out for: 

  • Thin white fog or mist coming from the vents
  • The AC isn’t cooling properly
  • Ice is visible on the evaporator coil or refrigerant lines

Why is this risky? 

While a thawing evaporator coil is not immediately dangerous, if you keep running the AC while the coil is frozen, it can lead to:

  • Water leaks
  • Strain on the compressor
  • Bigger and more expensive repairs later on

What should you do? 

Turn off the AC and thaw the evaporator coil. And if it keeps happening, you’ll have to get it checked by a professional.

In Short:

Why It HappensSignsRisksAction
Low refrigerant, dirty filter, airflow issues, cold tempsThin white mist, poor cooling, ice on coilWater leaks, compressor stressTurn off AC, thaw coil, get inspected

6. Dust, dirt, or oil are burning off (low risk)

Has your AC been sitting unused for a while, like after the winter months?

If yes, chances are dust has settled inside the system. 

And when you turn the AC back on, this dust will heat up, burn off, and create a light smoky effect.

What should you do? 

Don’t panic. This is totally normal when the system starts up after a long break and usually clears up in a few minutes.

But, if the smoke lasts more than 10-15 minutes, you should have a technician check it for buildup.  

In Short:

Why It HappensSignsRiskAction
Long downtime causes dust buildupLight haze, dusty smellVery lowLet it run a few minutes; if persistent, get cleaned

Smoke coming out of AC vent: What should you do? 

Concerned woman sitting in a living room watching white smoke come out of a window AC unit.

Now that you know what are the likely causes of smoke coming from air conditioner vents, let’s see what you can do to keep yourself and the AC unit safe. 

The most important thing in a situation like this is to not panic.

Keep yourself calm and do the following: 

1. Turn off the AC at the thermostat

This is the first thing you need to do to take control of the situation. It stops the system from running and prevents any further damage.

2. If you smell burning or see dark smoke, shut off the breaker

If you notice burning smells or dark, thick smoke, cut the power completely by flipping the breaker. 

This is essential for protecting yourself from electrical fires or shorts that could be happening inside the system.

3. Don’t turn on the fan

It might seem like a good idea to try to clear the air by turning on the fan. But I strongly suggest you don’t do it. 

The fan could spread smoke, dust, or electrical fumes all over your home. So, leave it off for now.

4. Check the air filter and vents (only if it’s safe)

Take a quick look at the air filter and vents, but only if there is no strong burning smell or smoke.

Sometimes even a clogged filter or blocked vent can cause your AC to overheat or freeze up.

Note: If there’s smoke or an electrical smell, don’t try to inspect it yourself.

5. Call a professional HVAC technician

This is where you want a professional to take a look. An HVAC technician can help figure out what’s going on. You’ll know whether it’s just steam or something more serious like an electrical failure.

You might want to check and clean AC ducts yourself. But DIY has its limitations, especially in this case, so do know the pros and cons of DIY duct cleaning before moving ahead. 

Note: If you see actual flames or thick, dark smoke, evacuate the area immediately and call 911. 

TL;DR, here’s what to do if you see smoke coming out of AC:

StepWhy It Matters
Turn off AC at thermostatPrevents further damage
Shut off breaker if burning smellProtects from electrical fires
Don’t turn on fanAvoids spreading fumes/smoke
Check filter/vents (only if safe)Identifies airflow issues
Call HVAC professionalEnsures correct diagnosis
Call 911 for dark smoke or flamesSafety first

How can you prevent your AC from blowing smoke? 

Concerned woman holding her chest while white smoke comes out of a window air conditioner inside the room.

You don’t want an AC that’s blowing smoke. After all, more than just a technical problem, it is a safety hazard. 

But the good news is, this is mostly preventable; all you need is a little maintenance. 

Here’s what helps:

1. Keep the air filters clean 

A clogged filter is one of the biggest reasons coils freeze, motors overheat, and fog shows up at vents. So, change it regularly, especially during summer months.

2. Schedule an annual AC tune-up 

A professional tune-up catches problems like loose wires, dirty coils, low refrigerant, and airflow issues early on. In fact, one technician visit every year can alone prevent 80 percent of smoke-like symptoms.

3. Keep outdoor unit debris-free

Leaves, grass, vines, and dirt can choke your system.

So, do give the unit at least 2-3 feet of breathing room and rinse off dust with a gentle garden hose spray (never pressure-wash).

4. Fix airflow problems early

If you notice weak airflow, hot spots in rooms, or vents constantly dusty, tackle them early. That’s because small airflow issues can turn into frozen coils or overheating, both of which look like smoke.

5. Pest-proof your home 

Homes in New Jersey often deal with mice, squirrels, and insects nesting in or near ductwork. They can chew wires, block vents, or cause overheating.

Here are some simple prevention tips you can follow:

  • Seal small gaps around the foundation
  • Keep shrubs trimmed away from AC units
  • Avoid storing food/pet food near mechanical areas
  • Use wire mesh on attic/vent openings if needed

TL;DR, here’s what to prevent your AC from blowing smoke:

Prevention TipWhy It Helps
Clean/replace air filtersStops freezing, overheating, airflow issues
Annual AC tune-upCatches wiring, refrigerant, airflow problems early
Keep outdoor unit clearPrevents overheating + improves efficiency
Fix airflow issues earlyAvoids frozen coils and overheating
Pest-proof your homePrevents wire damage and blocked vents
Clean-Air-Technologies's Logo
Angies Super Service
Accredited Business
Aeroseal

Schedule Your Free Estimate Today

Contact us to improve your indoor air
quality with our expert cleaning services in NJ.

To sum up

By now, you know what is likely causing that smoke coming out of AC vent and what you can do to prevent it.

You see, most of the time, an AC that looks like it’s blowing smoke is something harmless.

However, sometimes it’s a sign of something serious, especially if there’s a burning smell or dark smoke.

So what’s the safest thing you can do? 

Well, just turn the system off and get it checked quickly. An inspection can prevent bigger problems, protect your home, and save you money in the long run.

Want to schedule an HVAC inspection in New Jersey?

You can get in touch with us!

At Clean Air Technologies, we are NADCA-certified HVAC professionals with 30+ years of hands-on experience under our belt. And we’ve got all your HVAC maintenance and upkeep needs covered on a budget. 

You might also want to read: How Can New Jersey Residents DIY Their Dryer Vent Cleaning?

FAQs about smoke coming out of AC unit

Why is my air conditioner blowing white smoke?

White smoke coming from vents is most often condensation or cold vapor, not actual smoke.

When very cold air from your AC meets warm humid indoor air, it creates a foggy mist that looks like smoke. 

It can also happen when a frozen evaporator coil thaws as the melting ice can make a thin white mist as it evaporates. 

These are usually not dangerous, but they do signal issues like poor airflow, a dirty filter, or low refrigerant that should be checked.

Why does my AC smell like it’s burning?

A burning smell usually means something is overheating or burning inside the unit. 

Common causes are electrical components (wiring, capacitors, motors) or dust/oil baking off hot parts after long downtime. 

If the smell is sharp, plastic-like, or acrid, treat it as a serious electrical warning, you should shut the unit off and get a pro. 

But if it’s faint and dusty when the system first starts after winter, it might clear within minutes, just keep an eye on it.

Is it safe to run my AC if it looks smoky?

The short answer is no, not until you know what kind of smoke it is.

If it’s white fog from humidity or thawing ice and there’s no burning smell, it can be safe to let the system run while you monitor it. 

But if you see dark smoke or smell burning/plastic, turn the AC off immediately at the thermostat and at the breaker if it’s safe to do so.

Then, call an HVAC technician. Running the unit when there’s an electrical problem can create fire risk or spread harmful particles through your home.

Can low refrigerant cause smoke?

Low refrigerant itself doesn’t create smoke, but it can lead to a frozen evaporator coil, and when that ice melts it can release a fog-like mist that looks like smoke. 

In other cases, refrigerant leaks might produce unusual vapors or odors that homeowners misinterpret as smoke.

Also, refrigerant issues will reduce cooling and can damage the compressor if not fixed.

Refrigerant handling requires a licensed technician, so turn the system off and call a professional if you suspect a leak.

Will a dirty filter make my AC overheat?

Yes. A dirty or clogged filter restricts airflow, which forces the blower and other components to work harder. 

This can cause the evaporator coil to freeze (leading to thaw-mist) or make motors and compressors overheat, which might produce burning smells or smoke-like symptoms. 

Regularly changing filters (every 1-3 months in summer) is one of the simplest and most effective prevention steps.

Should I shut off my AC at the breaker?

If you see dark smoke, notice a strong burning/plastic smell, or see sparks, shut the AC off at the thermostat and at the breaker if it’s safe to access.

Then, evacuate and call emergency services if there are flames. 

For mild fog or light dust burn-off, shutting off at the thermostat and monitoring is usually enough. But if you’re unsure, cut power at the breaker and it will prevent further electrical damage. 

9 HVAC Tips for Summer Every New Jersey Homeowner Should Know

If you’ve been in New Jersey for a while, you’ve probably experienced the state’s summer. .

From that heavy, sticky air that hits you the second you step outside to the intense heatwaves that make the pavement look like it’s melting, this season is no joke.

And as the temperatures skyrocket, your air conditioner goes from a nice-to-have to a must-have. 

But here’s the catch: No matter how good your air con is, it can struggle in a heatwave or worse break down. This is the last thing you want when the mercury’s hitting its peak.

So, how do you keep your home cool, comfortable, and energy-efficient all summer long? 

It’s easier than you might think. Follow my simple HVAC tips for summer and you can save on expensive repairs, lower your energy bills, and make sure your home stays cozy throughout the season. 

I’ve detailed each of these home HVAC maintenance tips below, so let’s get started. 

Key Takeaways

  • Schedule a pre-summer AC tune-up to catch problems early.
  • Change your air filter every month during the hot months.
  • Set your thermostat to 78°F for comfort and savings.
  • Keep your outdoor AC unit clear of debris and plants.
  • Use ceiling fans to stay cool without turning down the thermostat.
  • Seal any drafts and make sure your insulation is in good shape.
  • Reduce indoor humidity to feel cooler and reduce strain on your AC.
  • Upgrade to a smart or programmable thermostat for better control.
  • Take advantage of NJ rebates for energy-efficient upgrades.

The best HVAC tips for summer in NJ

1. Get a pre-summer HVAC maintenance

HVAC technician servicing an outdoor air conditioning unit to ensure optimal performance during the summer months.

Before the first heatwave hits, getting a professional HVAC tune-up should be at the top of your to-do list. 

Why? 

Your AC has been sitting unused for months, and a quick check-up makes sure it’s in good shape for the New Jersey summer heat. 

A seasonal maintenance ensures your system runs safely and efficiently,  keeping you cool throughout the hot months.

Talking about service itself, a professional HVAC duct cleaner should do the following:

  • Check refrigerant levels and look for leaks.
  • Clean the evaporator and condenser coils to help your air con run better.
  • Make sure your thermostat is working correctly.
  • Check the electrical components to detect any hidden issues.
  • Clear the drain line to prevent water damage or breakdowns.
  • Test the entire system to make sure everything’s working properly.

Pro tip: Book your tune-up in the spring before the summer rush. This way, not only will you get an appointment at your convenience, but you might also grab some discounts. 

Clean-Air-Technologies's Logo
Angies Super Service
Accredited Business
Aeroseal

Schedule Your Free Estimate Today

Contact us to improve your indoor air
quality with our expert cleaning services in NJ.

2. Change the air filter regularly

HVAC technician replacing the air filter of an indoor air conditioning unit to ensure efficient airflow and proper cooling.

Changing your air filter is one of the simplest and most effective ways to keep your HVAC system running efficiently. 

You see, a dirty or clogged air filter makes it harder for air to flow, forcing your AC to work much harder than it should. This, in turn, reduces airflow, causes poor cooling, and even increases your energy bills.

What’s worse?

In some cases, dirty filters can even cause your system to freeze up, leading to even more troubles down the line.

Pro tip: Check your filter once every month and swap it out if it looks dirty or clogged. For most 1-inch HVAC filters, a replacement every 1-3 months is fine, but keep an eye on it during summers and change it more often if needed. 

3. Be smart with your thermostat and save money

HVAC technician performing a pre-summer inspection on a thermostat to ensure optimal air conditioning performance for hot weather.

Cranking your AC down to 72°F feels awesome. But your energy bill will remind you that it’s not the best idea.

Instead, try setting your thermostat to 78°F when you’re home and awake. This is the sweet spot for staying cool without wasting energy. 

Also, it is the Department of Energy’s recommended setting for the best balance of comfort and efficiency.

Bonus: When you’re sleeping or out, raise the temperature by 7-10 degrees. This simple change can save you up to 10% on your cooling costs each year. 

Awesome, isn’t it?

4. Maintain your outdoor HVAC unit

HVAC technician cleaning the outdoor air conditioning unit to ensure optimal performance during the hot summer months.

That metal box outside your home is your AC’s condenser unit, and it’s super important for optimal HVAC function. 

Now, this unit needs plenty of space to push out hot air without running any danger of damage. 

So, here’s what I suggest you do: 

  • Clear the area: Make sure there’s at least 2-3 feet of space around it. Trim back any plants, weeds, or bushes that are crowding it.
  • Clean the unit: Turn off the power and gently spray the fins with a garden hose to get rid of dirt and pollen. Avoid a pressure washer as it can damage the delicate parts.

Pro tip: Keep grass clippings and falling leaves away. They can clog the coils and mess with your AC’s efficiency.

5. Use ceiling fans to stay cool

Ceiling fan circulating air in a room, helping to stay cool and reduce the need for excessive air conditioning during the summer.

Ceiling fans don’t actually cool the air. But they do create a breeze that makes you feel cooler. 

This lets you set your thermostat about 4°F higher and still feel just as comfortable.

Sounds awesome, doesn’t it?

Pro tip: Make sure your fan is spinning counterclockwise in the summer. This pushes cool air down, giving you that nice, refreshing breeze. (In the winter, flip it clockwise to push warm air back down.)

6. Seal the drafts and insulate your home

Man performing HVAC maintenance by cleaning and replacing the air filter in an air conditioning unit for summer readiness.

Your AC can be working perfectly, but if all that cool air is escaping, you’re basically cooling the outside world. 

And to get the most out of your system, you need to keep the cool air inside where it belongs.

Here’s what I suggest you do: 

  • Seal windows and doors: Use weatherstripping and caulk to seal any drafts. On a sunny day, go around your windows and doors, and feel for any cold air leaking through. You might be surprised where it’s escaping. 
  • Check your insulation: Proper attic insulation (R-30 to R-60 is ideal for NJ) helps prevent heat from pouring in. This helps prevent your home from becoming a hot box. A good insulation makes a big difference in keeping things cool without overworking your AC.

7. Prevent humidity build-up 

HVAC technician using a diagnostic tool to inspect and troubleshoot an outdoor air conditioning unit for optimal performance.

New Jersey summers are famously humid. And that sticky, muggy air can make even the most comfortable temperature feel uncomfortable. 

Plus, humidity makes your AC work even harder to remove moisture from the air.

So, what can you do?

  • If you’re feeling sticky, add a dehumidifier to areas like the basement or laundry room. A well-functioning AC does dehumidify, but sometimes it’s just not enough for those extra humid spots.
  • Also, keep your indoor humidity levels between 30 and 50 percent for the best comfort and efficiency.

8. Upgrade to a smart thermostat

HVAC technician calibrating or diagnosing a thermostat to ensure proper temperature regulation for energy efficiency.

Still rocking that old manual thermostat? 

You could be missing out on some serious energy savings. 

A smart thermostat learns your schedule and automatically adjusts the temperature when you’re away or asleep.

How?

You can control it right from your phone, and it gives you detailed energy usage reports, so you know exactly where your money’s going.

On top of that, many NJ utility companies offer rebates for upgrading to a smart thermostat, which can lower the upfront cost.

9. Take advantage of NJ’s energy efficiency rebates

A family celebrating summer in New Jersey with an HVAC system in top condition, following expert tips to keep their home cool and energy-efficient.

If you’re thinking about upgrading your AC to a more energy-efficient model, New Jersey has some great programs to help you save money.

For instance, the NJ Clean Energy Program offers rebates for installing energy-efficient HVAC equipment and smart thermostats. 

These upgrades not only make your home more comfortable but can also significantly lower your cooling bills in the long run.

Clean-Air-Technologies's Logo
Angies Super Service
Accredited Business
Aeroseal

Schedule Your Free Estimate Today

Contact us to improve your indoor air
quality with our expert cleaning services in NJ.

In short, here are all the HVAC tips for summer in New Jersey:

TipWhat to DoWhy it HelpsQuick Tip
1Get a Pre-Summer Tune-UpMakes sure your AC is ready for the heat.Book early to avoid the summer rush!
2Change Air Filter RegularlyKeeps your AC running smoothly and saves energy.Change it monthly, especially in summer.
3Set Thermostat to 78°FSaves energy and keeps you cool.Raise it 7-10°F when you’re not home to save more.
4Clean and Clear Outdoor UnitHelps your AC run better and cooler.Keep 2-3 feet of space around it, no pressure washers!
5Use Ceiling FansHelps you feel cooler without cranking the AC.Make sure fans spin counterclockwise in summer.
6Seal Drafts & InsulateKeeps cool air inside and saves energy.Seal windows/doors and check attic insulation.
7Use a DehumidifierReduces sticky, uncomfortable humidity.Keep humidity between 30-50% for the best comfort.
8Upgrade to a Smart ThermostatSaves energy by adjusting automatically.Check for NJ rebates to save on the upgrade.
9Use NJ Energy RebatesGet money back for upgrading your AC and thermostat.Save money on energy-efficient upgrades.

You might also want to read: 7 Expert-backed HVAC Tips For Winter In New Jersey.

Final thoughts

By now, you know all the essential HVAC tips for summer in New Jersey.

You see,  NJ summers demand a lot from your home’s cooling system. But with the above summer HVAC tips, you can enjoy a season of reliable, efficient, and comfortable cooling.

Be it a simple filter change or a professional tune-up, each of these tips will help you stay cool, save money, and avoid the distress of a mid-summer breakdown.

Need a hand getting your system summer-ready?

We’re here to help!

At Clean Air Technologies, we’ve been helping NJ homeowners stay comfortable for nearly 30 years. 

Reach out to us today for a pre-summer tune-up, and we’ll make sure your HVAC system is all set to beat the heat.

FAQs about hvac maintenance tips for summer

How often should I run my AC to keep my home cool?

I suggest you run it consistently rather than turning it completely off and on. 

Also, set your thermostat at a consistent but slightly higher temperature when you’re out. For instance, 85°F is more efficient than turning it off and forcing the system to work extra hard to cool down a hot house when you return.

My AC is running but not cooling well. What’s wrong?

This could be a few things: a dirty air filter, low refrigerant, a dirty condenser coil, or a failing component. 

Start by checking and replacing the filter. If that doesn’t solve it, it’s time to call a professional for a diagnosis.

Is it worth closing vents in unused rooms?

Generally, no. 

Modern central AC systems are designed to balance airflow throughout the entire duct system. Closing vents can increase pressure in the ducts, forcing your system to work harder and potentially leading to leaks or other damage.

What should I do if my AC completely stops working during a heatwave?

First, check your circuit breaker to see if it has tripped. If it has, reset it. If it trips again, call a professional. 

Also, ensure your thermostat has batteries and is set to cool. If these simple steps don’t work, shut the system off and call for emergency service to prevent further damage.

How To Clean HVAC Ducts Yourself? (DIY Tips For Safe Cleaning)

Have you been noticing extra dust around your home, a musty smell when the air con kicks on, or your allergies flaring up for no reason?  

Well, dirty HVAC ducts might be causing all of it. 

Now, before you hit panic mode and make frantic calls to every duct cleaner, let me tell you that you can clean your HVAC ducts yourself.

Although it’s not a full replacement for professional duct cleaning, a DIY cleaning can still improve airflow, reduce dust buildup, and help your HVAC system run smoother.

This isn’t a magic fix for mold, pests, or years of neglected ductwork. But if you’re in a typical New Jersey home, regular DIY duct cleaning can make a difference.

In this blog, I’ll walk you through exactly how to clean your HVAC ducts yourself safely using tools you might already have. You’ll learn:

  • What tools and materials you need
  • All the required steps for complete air duct cleaning
  • When to stop and call in a professional
  • Extra tips to keep your ducts cleaner, longer

So roll up your sleeves and let’s get started.

 Key takeaways

  • DIY duct cleaning helps reduce dust and improve airflow.
  • You’ll need basic tools like a shop vac, brush, and screwdriver.
  • This method is for light maintenance and not deep cleaning or mold.
  • Always replace your HVAC filter after cleaning.
  • Older NJ homes often need duct checks due to age and humidity.
  • If you smell mold, see pests, or have allergies, call a professional.

How to clean HVAC ducts yourself safely?

For starters, a DIY HVAC duct cleaning is one where you tackle all sorts of dust, dirt, and debris.

Here, you’ll remove vent covers, vacuum out dust using a strong hose, and scrub ducts to loosen grime. 

While this DIY approach can improve your indoor air quality and system efficiency, it’s mainly for routine maintenance. 

I have detailed exactly how to clean ductwork yourself using the right tools and steps below. 

First of all, gather essential tools

Before you start with actual cleaning, you’ve got to have the right gear on hand. Most of these are common household tools, or you can find them easily at a local hardware store.

Here’s what you’ll need:

  • Screwdriver or drill: To remove vent covers (Phillips or flat-head depending on your vents).
  • Shop vac (wet/dry vacuum): A vacuum with a long hose and strong suction is key. Bonus points if it has a brush attachment.
  • Dryer vent brush or stiff cleaning brush: Helps loosen dust and debris inside the ducts.
  • Microfiber cloths or rags: For wiping down vent covers and duct openings.
  • Paper towels: To cover supply vents while you clean others, so dust doesn’t blow everywhere.
  • Protective gear: A dust mask, safety goggles, and gloves are a good idea (especially if you have allergies or asthma).
  • New HVAC filter: To replace your filter after cleaning to keep your air clean and your system running efficiently.

Optional but helpful tools:

  • Flashlight: To help you see deeper into the ducts.
  • Vacuum brush attachment: Makes cleaning around vent edges easier.

In short, here are all the tools you need: 

ToolPurpose
Screwdriver or DrillTo remove vent covers
Shop Vac (Wet/Dry Vacuum)To vacuum dust and debris inside ducts
Dryer Vent Brush/Stiff BrushTo loosen dust and debris inside ducts
Microfiber Cloths/RagsFor wiping down vent covers and duct openings
Paper TowelsTo cover supply vents during cleaning
Protective GearDust mask, safety goggles, gloves for safety
New HVAC FilterTo replace after cleaning
FlashlightFor seeing deep into ducts
Clean-Air-Technologies's Logo
Angies Super Service
Accredited Business
Aeroseal

Schedule Your Free Estimate Today

Contact us to improve your indoor air
quality with our expert cleaning services in NJ.

Then, follow this step-by-step guide to clean ductwork yourself

Now that you’ve got your tools ready, it’s time to get your hands dirty. This isn’t a complicated job, but it does take some patience and attention to detail.

I will walk you through the process step by step so you can do it safely and effectively. 

But remember, this DIY method is for basic cleaning and maintenance. And if you’re dealing with mold, strong odors, or signs of pests, stop here and call a professional.

Let’s get started.

Step 1. Turn off your HVAC system

Before you start removing vent covers or sticking anything into your ducts, turn off your heating or cooling system at the thermostat. If your HVAC unit has a dedicated breaker switch, flip that off too.

This is important for two reasons:

  • It prevents dust and debris from being blown around while you clean.
  • It keeps your fingers safe if you’re reaching near fan components or motorized vents.

Double-check that both heating/cooling and fan settings are off before moving on.

Step 2. Remove and clean vent covers

Having turned the system off, you go around your home and unscrew or unclip the vent covers from both floor and wall registers. You’ll usually need a screwdriver or a drill for this part.

Once removed:

  • Soak the covers in warm, soapy water, especially if they’re dusty or greasy (common near kitchens).
  • Scrub with a brush or cloth to remove any built-up grime.
  • Let them dry completely before putting them back on later.

I’ve explained how to clean air vents yourself in a separate blog, go through it for more details. 

Step 3. Cover supply vents

It’s a good idea to cover the supply vents in rooms you’re not actively cleaning yet. This helps prevent dust and debris from blowing into your living space while you work.

Here’s how to do it:

  • Cut a few paper towels to size and lightly tape them over each vent cover opening.
  • You can also use microfiber cloths or old rags if you prefer something reusable.
  • Don’t seal them airtight, just enough to catch loose particles.

This keeps things cleaner and stops dust from settling back into your home while you vacuum other sections.

Step 4. Loosen dust and debris

Now it’s time to break up the buildup inside your ducts. Most of what you’ll be dealing with is dry dust, cobwebs, pet hair, and loose debris that’s clinging to the walls of the ductwork.

Here’s how to loosen it up:

  • Use a dryer vent brush, long-handled stiff brush, or even a toilet brush to gently scrub the inside of the ducts.
  • Reach in as far as you comfortably can and twist the brush around to dislodge gunk stuck to the sides.
  • Start with return vents as these tend to collect the most dust. And if you’re not sure which one is a return vent, go through my blog on different types of air vents before you follow this step. 
  • Be careful not to damage flexible ductwork (common in newer homes or attics). If it feels soft or crinkly, don’t push too hard.

5. Vacuum inside the ducts

Everything is loosened up now, and it’s time to vacuum all that dust and debris out of your ducts.

Here’s how you can do it:

  • Use a shop vac with a long, flexible hose, ideally one with a brush attachment for better reach and agitation.
  • Insert the hose into the duct and slowly move it around in circular motions, making sure to get into the corners and bends as far as you can reach.
  • Pay extra attention to the return vents as it usually collects the most buildup.
  • If your vacuum doesn’t reach deep into the ductwork, that’s okay, you’re still removing a good chunk of surface-level dust and particles.

Pro tip: If your shop vac blows air out the back, make sure the exhaust is vented outside or use a HEPA filter bag so you’re not just redistributing the dust.

6. Wipe down openings and grilles

While most of the cleaning happens inside the ducts, don’t forget the vent covers and grilles as they collect dust, dirt, and grime too.

Here’s what you should do:

  • Remove vent covers gently using a screwdriver if needed.
  • Use a damp cloth or microfiber towel with mild soap or all-purpose cleaner to wipe down the covers and the surrounding wall or floor area.
  • For metal grilles, a quick scrub with a soft brush can help loosen stubborn dirt.
  • Let them dry completely before reinstalling to avoid trapping moisture inside the ducts.

Cleaning these components improves airflow and keeps your home looking tidy.

7. Replace or clean HVAC filters

Your HVAC filters play a huge role in keeping dust and debris out of your ducts, so this step is crucial.

Here’s what to do:

  • Locate your HVAC filter (it is usually near the air handler or furnace).
  • If it’s a disposable filter, get an air filter replacement and replace it with a new one that matches the size and rating recommended by your HVAC system’s manufacturer.
  • If it’s a reusable filter, remove it and clean it according to the manufacturer’s instructions. You’ll usually rinse with water and let it dry completely before reinstalling.

8. Do a final check and restart your system

You’re almost done. Now it’s time to make sure everything is back in place and your system is running smoothly.

Here’s what you need to do:

  • Double-check that all vent covers and grilles are securely reattached.
  • Make sure your tools and cleaning materials are cleared away from the area.
  • Turn your HVAC system back on and listen for any unusual noises.
  • Feel the airflow at the vents to ensure it’s strong and consistent.
  • Keep an eye on your system over the next few days for any signs of trouble, like strange smells or reduced airflow.

Your HVAC system should now run more efficiently and keep your home’s air fresher.

In short, here are all the steps to clean your HVAC ducts:

StepAction
1. Turn Off Your HVAC SystemTurn off at the thermostat or dedicated breaker switch.
2. Remove and Clean Vent CoversUnscrew vent covers, soak in soapy water, and scrub.
3. Cover Supply VentsUse paper towels or microfiber cloths to cover vents while cleaning others.
4. Loosen Dust and DebrisScrub ducts with a dryer vent brush or stiff cleaning brush.
5. Vacuum Inside the DuctsUse a shop vac with a long hose to suck out debris.
6. Wipe Down Openings & GrillesWipe vent covers and surrounding areas with a damp cloth.
7. Replace or Clean HVAC FiltersReplace disposable filters or clean reusable filters.
8. Final Check & Restart SystemEnsure all covers are back on, tools are cleared, and the system runs smoothly.

When should you call in an HVAC duct cleaning professional?

Man inspecting inside a wall-mounted HVAC duct using a flashlight, checking for dust, debris, or possible issues before cleaning as part of a DIY air duct maintenance process.

DIY duct cleaning can tackle a lot of the everyday dust and debris in your HVAC system.

But sometimes, the problems run deeper, and that’s when it’s smart to call in the professionals.

Here are some clear signs that your DIY efforts might not be enough, and it’s time to get expert help:

1. There’s musty smell or signs of mold

If you notice a persistent musty or moldy smell coming from your vents or around your home, that’s a big red flag. 

Mold inside your ducts isn’t just unpleasant, it can seriously affect your family’s health, especially if anyone has allergies or asthma. 

You see, mold in air ducts looks black, green, white, or gray. And it hides in hard-to-see places.

Removing it safely requires special equipment and know-how. DIY cleaning usually can’t handle this safely or thoroughly, so a professional is your best bet.

2. Pests or droppings in ducts

Are you finding signs of rodents, insects, or other pests in your ducts? 

Pests signs can include anything from droppings, chewed insulation, or even strange noises at night. And they can cause damage and spread bacteria or allergens through your air system.

Professional cleaners know how to safely remove pests and seal up entry points, keeping your home healthier in the long run.

3. Strange or persistent odors

Sometimes the odors coming from your ducts aren’t just from dust or normal use, they could be from hidden issues like dead rodents, mold, or chemical off-gassing. 

And if you’ve tried cleaning and freshening your ducts but the smell lingers, a professional inspection can identify and eliminate the root cause.

4. Severe allergies or asthma symptoms

If family members experience worsening allergies, asthma attacks, or respiratory problems that don’t improve despite regular cleaning, it could mean deeper air quality problems that DIY methods can’t fix. 

A professional duct cleaning combined with an indoor air quality assessment can make a real difference here.

5. Recent water damage

Had a recent leak, flood, or water damage in your home? 

Well, moisture can cause mold growth or rust inside your ducts, which is tough to clean without professional equipment. Plus, water damage can weaken ducts or HVAC components. 

So, calling a professional after water damage ensures your ducts are safe and your system isn’t at risk.

In short, here’s when you should call in a professional: 

SignReason to Call a Professional
Musty Smell or MoldMold can affect health and needs special equipment to remove.
Pests or DroppingsPests in ducts can cause damage and spread bacteria.
Strange or Persistent OdorsHidden issues like dead rodents or mold need expert help.
Severe Allergies or Asthma SymptomsUnresolved air quality problems require a professional cleaning.
Recent Water DamageMoisture can cause mold or duct damage that needs professional repair.

Pro tips to keep your ducts clean

Two HVAC technicians installing or repairing ductwork inside a home.

Cleaning your HVAC ducts yourself is a great way to improve your home’s air quality, but keeping them clean over time takes a little extra care. 

Here are some easy tips to help you keep your ducts clean and your system running smoothly for a long time: 

  • Change Filters Every 1-3 Months: Swap out your HVAC filters regularly to catch dust and debris before they enter your ducts.
  • Clean Vent Covers Every 6 Months: Wipe down vent covers every six months to remove dust, pet hair, and grime.
  • Keep Furniture & Rugs Away from Vents: Avoid blocking vents with furniture or rugs to allow proper airflow and reduce dust buildup.
  • Control Humidity (Especially in NJ Basements): Use a dehumidifier or improve ventilation to prevent mold growth in damp areas like basements.
  • Seal Leaky Ducts or Gaps: Inspect and seal any leaks in your ducts to keep dust and pests out while improving energy efficiency.
Clean-Air-Technologies's Logo
Angies Super Service
Accredited Business
Aeroseal

Schedule Your Free Estimate Today

Contact us to improve your indoor air
quality with our expert cleaning services in NJ.

Final thoughts

By now, I am sure you know everything about how to clean HVAC ducts yourself while keeping yourself and your system safe.

You see, as long as you’re prepared, careful, and take the right steps, DIY HVAC cleaning is absolutely doable. Plus, it’s a great way to maintain your system between professional visits.

Just remember that DIY cleaning isn’t a full substitute for a professional deep clean or a remedy for serious issues like mold or pests.

Need a deeper duct cleaning?

Get in touch with us!

At Clean Air Technologies, we have been helping homes across New Jersey breathe easier for over 28 years. Our experienced team offers thorough inspections and professional duct cleaning to tackle even the toughest issues.

FAQs about how to clean ac ducts yourself

How often should I clean my HVAC ducts?

Generally, it’s good to have your ducts cleaned professionally every 3 to 5 years. 

However, for routine maintenance, you can clean vent covers and accessible ducts yourself every 1 to 2 years. If you have pets, allergies, or live in a dusty area, more frequent cleaning might help.

Can I really clean my HVAC ducts myself, or should I always hire a professional?

DIY cleaning is great for regular maintenance like removing dust and debris from vent covers and accessible duct openings. 

But if you notice mold, pests, severe dust buildup, or if your ducts are hard to reach, it’s safer and more effective to call a professional.

What tools do I need for cleaning my ducts at home?

Basic tools include a vacuum with a long hose (preferably with a HEPA filter), microfiber cloths, brushes (like a paintbrush or dryer vent brush), screwdrivers, and possibly a flashlight. 

Having a face mask and gloves is also a good idea to protect yourself from dust and allergens.

Is vacuuming enough to clean HVAC ducts?

Vacuuming helps remove surface dust and debris, but it might not reach deep into the ducts or remove stubborn mold or pest contamination. 

That’s why a full professional cleaning often includes brushing, sanitizing, and sealing as needed.

What are the risks of trying to clean flexible or hard-to-reach ducts myself?

Flexible ducts are more fragile and can tear easily, which reduces HVAC efficiency and can worsen air quality. 

Hard-to-reach ducts may harbor hidden mold or pests that require special tools and expertise to remove safely. 

Damaging ducts can be costly to repair, so it’s best to leave these to pros.

How do I know if there’s mold in my HVAC ducts?

Signs of molds in air ducts include a musty or moldy smell near vents, increased allergy or asthma symptoms indoors, visible mold around vents, or recent water damage in your home. 

If you suspect mold, avoid disturbing it yourself and schedule a professional inspection.

How long does DIY duct cleaning usually take?

For an average home, basic DIY cleaning can take a few hours depending on the number of vents and how dirty they are. 

Professional cleaning might take a full day or more, depending on the home size and condition of the ducts.

How much does a professional HVAC duct cleaning cost?

A full air duct cleaning in New Jersey can cost anywhere in the range of $500 and $1000. The exact cost will depend on your location, extent of required cleaning, and the cleaning professional or company you hire. 

7 Essential HVAC Tips For Winter In New Jersey

From Nor’easters that dump snow overnight to mornings so cold your breath fogs up the windows inside the house, winter in the Garden State doesn’t mess around. 

And when it hits, your HVAC system becomes more than just a convenience, it’s your lifeline.

But here’s the thing: Even the best heating systems can struggle, or worse completely fail, if they’re not properly maintained. And you definitely don’t want to deal with furnace issues when the wind chill’s in the single digits. 

So how do you keep your home warm and cozy for the long and harsh winter spell? 

Well, it’s not that complicated. Just follow a few simple HVAC tips for winter now, and you can avoid mid-winter breakdowns, cut down your energy bills, and stay toasty until spring.

I will walk you through each of these tips in detail along with my professional HVAC maintenance advice.

Let’s get started. 

Key takeaways 

  • Schedule a full HVAC tune-up before winter kicks in.
  • Set your thermostat to 68°F for ideal comfort and savings.
  • Clear snow and ice from vents and outdoor HVAC units.
  • Seal drafts and upgrade insulation to prevent heat loss.
  • Heat pumps need extra care, so don’t panic during defrost cycles.
  • Maintain indoor humidity at 30-40% for comfort and health.
  • Use NJ rebate programs to save on energy-efficient upgrades.

Winter HVAC tips for every NJ resident

Woman in winter clothing adjusting a home thermostat to 68°F for better comfort and energy savings during cold weather.

1. Schedule a pre-winter HVAC service

Before you even think about snow boots or space heaters, a full HVAC service should be the first thing on your list.

Why? 

You see, your HVAC system takes on the full force of New Jersey winters. And it needs pre-winter maintenance for uninterrupted heating. 

A professional tune-up will ensure your heating system runs safely, efficiently, and reliably when you need it most.

Now, during a pre-winter service, your technician should typically:

  • Inspect your furnace or boiler for any gas or carbon monoxide leaks
  • Clean the blower motor, burners, and internal components
  • Test airflow to make sure it’s reaching every room
  • Check the heat exchanger for cracks or corrosion
  • Verify your thermostat is accurate and responsive

So, if you’re scheduling a service, make sure your technician does all of the above to fool-proof your system. 

Pro tip: Don’t forget to replace your air filter. A dirty filter can choke your airflow and force your system to work harder, leading to higher bills and more dust in your home. 

Clean-Air-Technologies's Logo
Angies Super Service
Accredited Business
Aeroseal

Schedule Your Free Estimate Today

Contact us to improve your indoor air
quality with our expert cleaning services in NJ.

2. Set your thermostat a bit lower to save energy

Running your heat all day at 75°F might feel cozy, but it will certainly increase your energy bills.

So how about you lower the temperature just a little at around 68°F?

No, it won’t freeze you. 

In fact, in most NJ homes, setting your thermostat around this range during the day can strike the perfect balance between comfort and efficiency. 

Moreover, if you’re asleep or away, lower it by another 5-7 degrees and you help you save more energy without sacrificing warmth.

Note: If you’ve got a heat pump, be careful with large temperature changes. That’s because sudden temperature changes can trigger the system’s backup electric heating mode and increase your energy bills. 

Pro tip: I suggest you install a smart thermostat that learns your schedule and adjusts automatically. Or take it a step further by using SimpleSwitch energy management system to monitor and optimize your home’s energy use more effectively. Many NJ utility providers even offer rebates to help cover its cost.

3. Clear snow and ice from outdoor units and vents

You might want to shovel the entire driveway after a snowstorm. 

But what about your HVAC system? 

It needs some attention too.

Here’s what you can do:  

  • If you have a heat pump, make sure there’s at least 18-24 inches of clear space around the outdoor unit. That’s because snow and ice buildup can block airflow and cause the system to shut down.
  • If you have a high-efficiency furnace, check the PVC intake and exhaust pipes on the side of your home. If they’re covered in snow or ice, your furnace could stop working, or worse, vent harmful gases back into your home.

Pro tip: Always use a soft brush to clear the area and avoid banging, chipping, or using a shovel as these can damage the unit.

4. Seal drafts and improve your insulation  

No matter how powerful your furnace is, it won’t keep your home warm if all the heat is escaping through cracks and gaps.

This is exactly why as part of my HVAC tips for winter I suggest homeowners a weekend to seal up their homes. Do this and you’ll feel the difference immediately, both in comfort and in your utility bills.

Here’s where you can start:

  • Weatherstrip doors and seal around windows with caulk
  • Use spray foam or sealant around plumbing, dryer vents, and wiring holes
  • Check your attic insulation. NJ homes typically need R-38 to R-60 insulation for optimal winter protection

5. Homes with heat pump need special care 

Heat pumps are becoming more popular across New Jersey, and they’re great for year-round comfort. 

But they work differently than gas furnaces. So keep these winter-specific tips in mind:

  • Don’t be alarmed if the air feels cool during a defrost cycle, that’s totally normal
  • Prevent dripping water from gutters or downspouts from freezing on the outdoor unit
  • Switch to emergency heat only if your system completely stops working

Considering an HVAC upgrade? 

Ask your contractor about cold-climate heat pumps. They’re designed to perform even in sub-freezing NJ temperatures.

6. Maintain consistent indoor humidity levels

Dry winter air isn’t just uncomfortable, it can actually make your home feel colder than it is, even when the thermostat says it’s warm.   

So, take my advice and try to keep your indoor humidity between 30% and 40% throughout the winter months. 

You see, if indoor humidity is too low, you can end up with skin, scratchy throats, and static shocks.

7. Make the most of NJ rebates

If you own a home anywhere in the state, you’ve got access to some excellent rebate programs for energy upgrades. This includes rebates on things like smart thermostats, insulation, and high-efficiency heating systems.

Do check with your utility provider before making any upgrades and you can save hundreds.

Sounds amazing, doesn’t it? 

Here’s a quick pre-winter HVAC checklist for NJ homeowners: 

TaskWhy It Matters
Pre-winter tune-upEnsures safety, efficiency, and peace of mind
Air filter swapImproves airflow, energy efficiency, and air quality
Thermostat set to 68°FBalances comfort with cost savings
Snow/ice clearance around HVACPrevents airflow issues and functional hazards
Seal drafts & boost insulationKeeps heating in, drafts out
Monitor heat pump cyclesMaintains system health and avoids DIY repairs
Track rebates & safety devicesSaves money and keeps you safe

You might also want to read: How Much Does Air Duct Cleaning Cost In New Jersey?

Final thoughts

Winter in New Jersey doesn’t take it easy and your HVAC system shouldn’t either.

With the above HVAC maintenance tips for winter you can stay warm, avoid mid-season breakdowns, and keep your energy bills in check. 

Be it scheduling a quick tune-up, sealing up those chilly drafts, or taking advantage of local rebates, each of the tips give you peace of mind all winter long.

Got more questions or want expert help?

We’ve got you covered!

At Clean Air Technologies, we’ve been keeping NJ homes warm for nearly 30 years. Get in touch with us now and we’ll make sure your HVAC system is ready for whatever winter throws your way.

Clean-Air-Technologies's Logo
Angies Super Service
Accredited Business
Aeroseal

Schedule Your Free Estimate Today

Contact us to improve your indoor air
quality with our expert cleaning services in NJ.

Frequently asked questions about winter HVAC tips

HVAC technician inspecting and servicing a furnace before winter to ensure safe and efficient heating.

How often should I service my HVAC system in winter?

Once a year is perfect, ideally before the cold really kicks in. A quick tune-up in the fall can save you from major problems when it’s freezing out.

Is it really worth installing a smart thermostat?

Absolutely. 

Smart thermostats learn your schedule, help lower your energy bills, and many NJ utility providers offer rebates to help cover the cost. 

It’s one of those upgrades that pays for itself pretty quickly.

My furnace is working, but some rooms still feel cold. Why?

That could be poor airflow or insulation issues. Make sure your vents are open and unobstructed. 

Also, check for drafts around windows or doors. Those little gaps can make a big difference.

How do I know if my attic insulation is enough?

A quick rule of thumb: If the insulation is below the level of your floor joists (the wood beams), you probably need more. 

In New Jersey, R-38 to R-60 is ideal for winter comfort and energy savings.

What should I do if snow covers my outdoor HVAC unit?

Gently clear the snow with a soft broom or brush. And never use a shovel or bang on the unit.

Snow and ice can block airflow or damage components, so check it after every storm.

What’s the right indoor humidity level for winter?

Indoor humidity levels between 30-40% is the sweet spot to keep your air comfortable without causing dry skin, static shocks, or foggy windows.