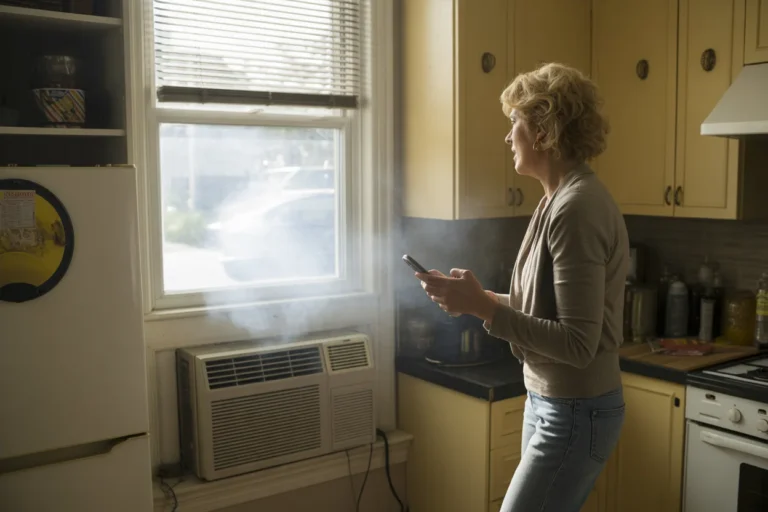
Are you noticing your mini split AC blowing weaker air, giving off a musty smell, or struggling to keep your room cool?
If yes, then it is likely dirty and it’s time to clean it.
The good news is that you don’t need to call an HVAC technician right away. You can mostly clean your mini split yourself and keep it running efficiently with a little routine maintenance.
Yes, DIY mini split cleaning has its limits. But cleaning filters, dust, and light buildup is completely manageable for most homeowners.
In this blog, I will explain exactly how to clean mini split air conditioner safely at home. You’ll know:
- What tools and supplies you’ll need
- How you can clean mini split filters and other accessible parts
- When DIY cleaning is enough
- When it’s time to call a professional
And more.
So, let’s get started.
Table of Contents
Key takeaways
- Mini split filter cleaning is one of the most important maintenance tasks.
- You can safely clean filters, covers, and accessible surfaces.
- Indoor and outdoor units both need routine cleaning.
- Filters should also be cleaned every 2 to 4 weeks during heavy use.
- Mold, water leaks, and persistent odors should be handled only by a professional.
What does DIY mini split cleaning involve?
Before we jump into the cleaning process, let’s first understand what DIY mini split maintenance actually includes.
For starters, DIY cleaning involves AC air duct cleaning, vacuuming indoor air handlers, washing the filters, removing dust buildup, and cleaning the outdoor unit. These are the tasks that most people can handle safely.
Overall, here’s what a typical DIY mini split cleaning includes:
- Cleaning the air ducts and filters
- Wiping down the indoor unit cover
- Removing dust from accessible evaporator coil surfaces
- Cleaning around the condensate drain area
- Removing debris from the outdoor condenser unit
- Checking for visible dirt, mold, or blockages
However, DIY cleaning is mainly preventative maintenance. If your mini split has mold growth, severe coil buildup, electrical issues, refrigerant problems, or a clogged drain line deep inside the system, you’ll likely need professional service.
Contact us to improve your indoor air
quality with our expert cleaning services in NJ.
Before you clean mini split air conditioner, gather the required tools
Before you start cleaning your mini split AC, make sure you have the right tools on hand.
Here’s what you’ll need:
| Tool | Purpose |
| Microfiber Cloth | Wipe down indoor unit surfaces |
| Vacuum With Brush Attachment | Remove dust from filters and coils |
| Soft Cleaning Brush | Loosen dirt and debris |
| Spray Bottle | Light cleaning and rinsing |
| Mild Dish Soap | Cleaning washable parts |
| Flashlight | Inspect inside the unit |
| Gloves & Dust Mask | Personal protection |
| Evaporator Coil Cleaner | Optional deeper coil cleaning |
| Fin Comb | Straighten damaged coil fins |
Also, here are some optional but helpful tools:
- Fin comb for straightening bent coil fins
- Mini split evaporator coil cleaner approved by the manufacturer
- Small handheld vacuum
- Condensate drain cleaning kit
Here’s how to clean mini split AC step-by-step
Now that you’ve got your tools ready, it’s time to clean the unit. The process isn’t difficult, but it does require a little patience and care.
And remember, if you notice mold growth, standing water, damaged wiring, or anything that doesn’t look right, stop and call a professional.
Let’s start with the first step.
Step 1. Turn off the mini split completely
Before doing any cleaning, turn the system off. Use the remote control to power down the unit, and if possible, switch off the breaker supplying power to the system.
This is important because:
- It keeps you safe while cleaning.
- It prevents the fan from turning on during maintenance.
- It protects internal components from accidental damage.
Once the unit is completely powered down, you can safely begin cleaning.
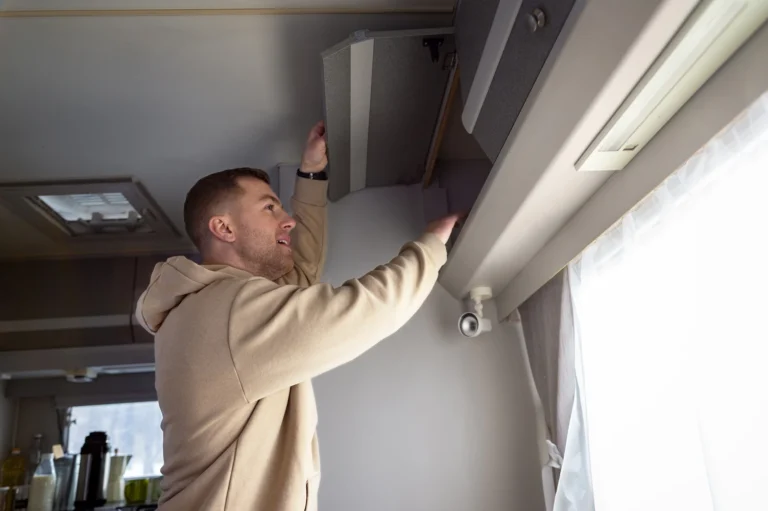
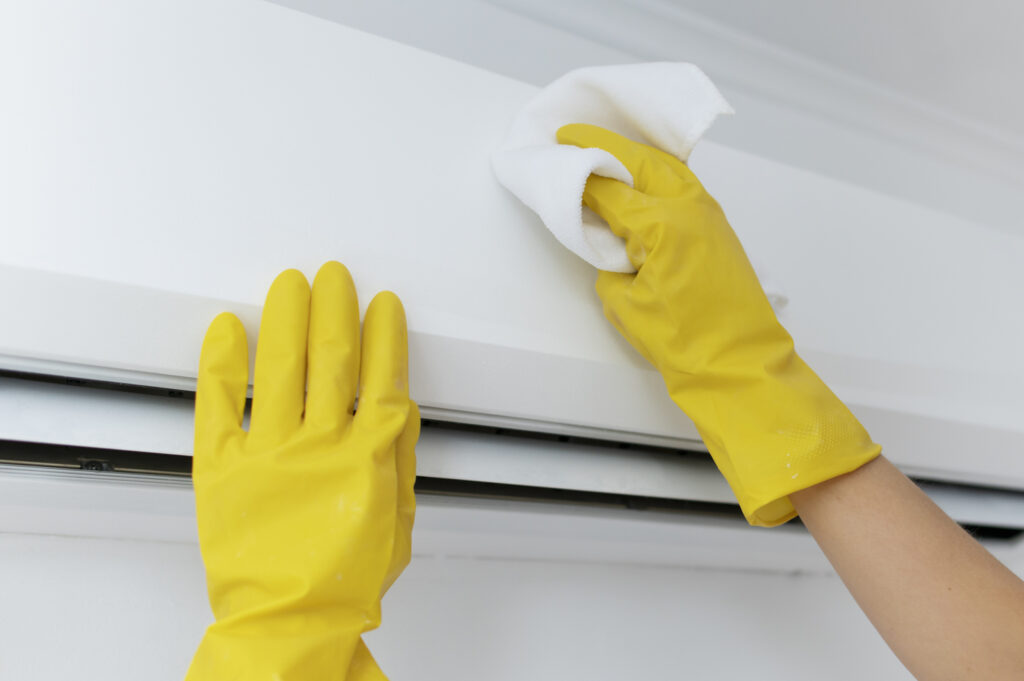
Step 2. Open the front cover and remove the filters
Once the power is off, gently lift the front cover of the indoor unit.
Most mini splits are designed so the front panel swings upward, giving you access to the air filters. You’ll usually find one or two mesh filters sitting directly behind the cover.
Carefully slide the filters out. And as you remove them, take a quick look at their condition.
If they’re covered in dust, pet hair, or dirt, your AC likely has clogged air ducts. This is why your system isn’t performing at its best.
Step 3. Clean the mini split filters
If you’re wondering how to clean mini split filters properly, the process is actually pretty simple.
Here’s what you should do:
- Take the filters outside if possible.
- Use a HEPA vacuum with a brush attachment to remove loose dust and debris.
- Rinse the filters under lukewarm running water.
- If they’re especially dirty, use a small amount of mild dish soap.
- Gently rinse away any soap residue.
Also, avoid using:
- Hot water
- Harsh chemicals
- Pressure washers
- Abrasive brushes
These can damage the filter material.
Once cleaned, place the filters somewhere safe and allow them to air dry completely. Never reinstall damp filters, as moisture can encourage mold growth inside the unit.
Step 4. Clean the indoor unit and accessible coil surfaces
While the filters are drying, take a look inside the air handler. You might notice some dust buildup around the evaporator coil and surrounding surfaces.
The evaporator coil is responsible for absorbing heat from your indoor air, so keeping it clean helps maintain efficiency and airflow.
Here’s how to clean these accessible areas:
- Use a vacuum with a soft brush attachment to remove loose dust.
- Wipe surrounding plastic surfaces with a damp microfiber cloth.
- Use a flashlight to inspect for dirt buildup.
If you see light dirt on the coil surface, you can clean it using a manufacturer-approved mini split evaporator coil cleaner.
Just follow the product instructions carefully and avoid oversaturating the coil.
Also, don’t force brushes or tools deep into the unit as the delicate aluminum fins on the coil can bend easily and reduce airflow.
Step 5. Check the blower wheel and drain area
Now take a flashlight and look deeper inside the unit.
You might be able to see portions of the blower wheel, which is the cylindrical fan that pushes air into your room.
You should look for:
- Dust buildup
- Dirt accumulation
- Signs of mold
- Standing water
Here, a small amount of dust is normal.
However, if the blower wheel is heavily coated with dirt or appears moldy, a DIY cleaning will not be enough and you should get a professional mini split cleaning.
Also, while you’re inspecting the interior, check around the condensate drain area. And if you notice standing water, excessive moisture, or visible algae growth, it could indicate a developing drain issue.
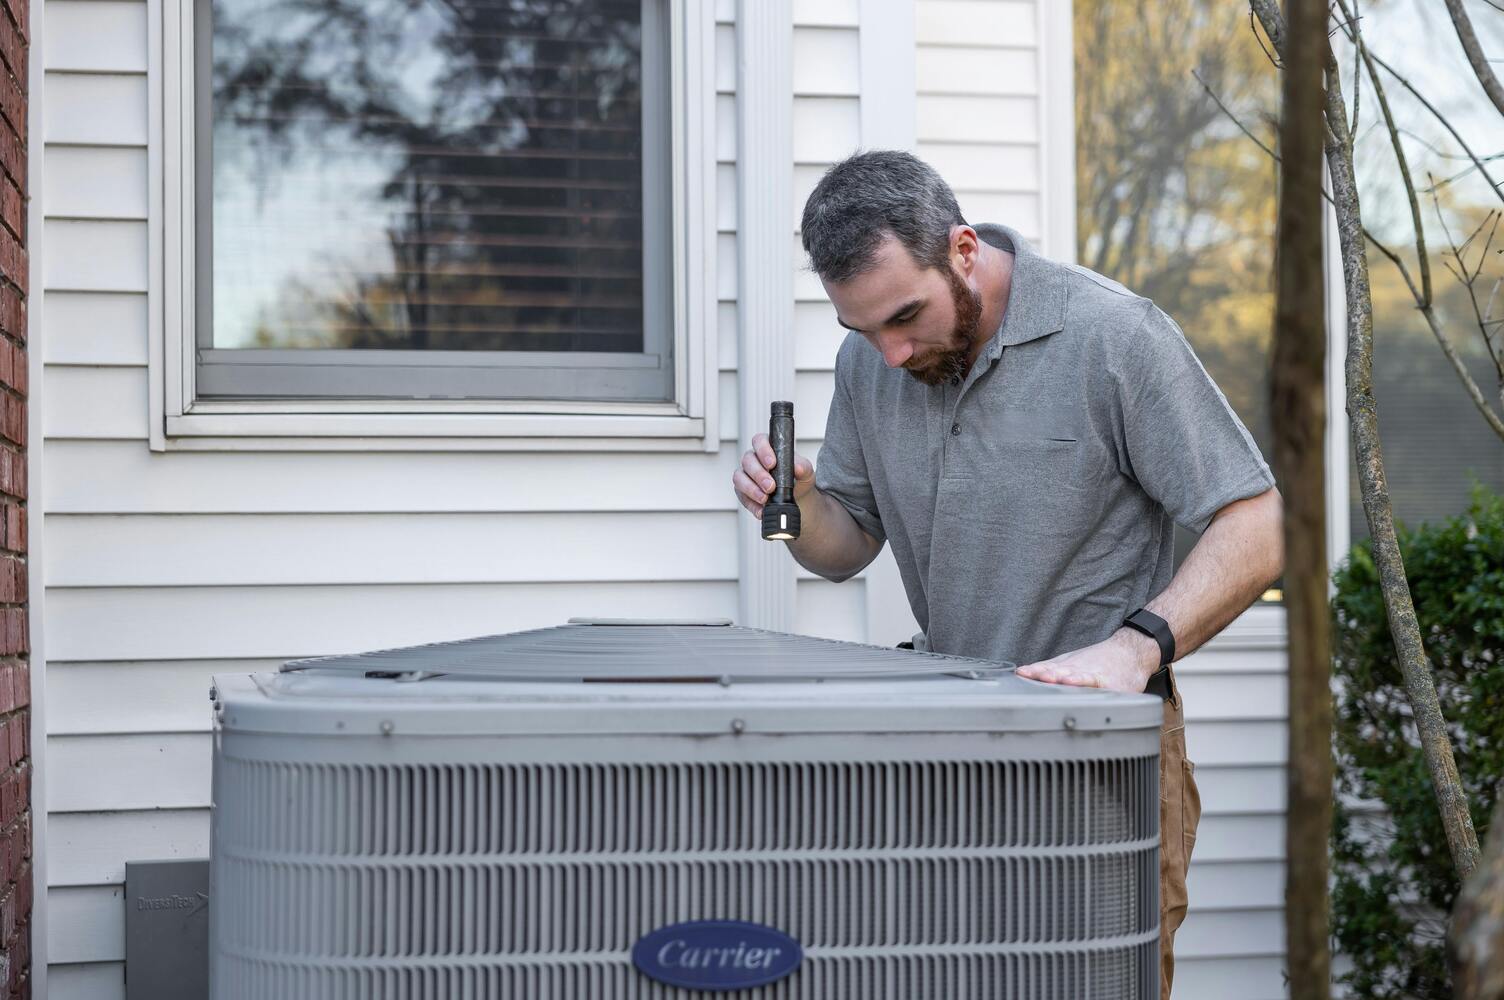
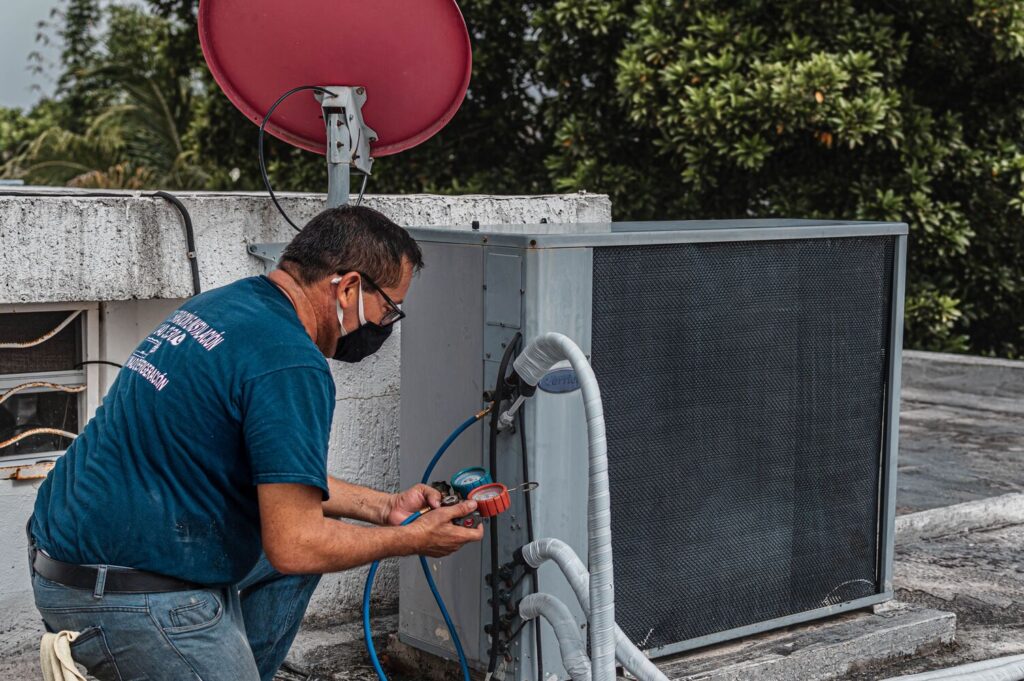
Step 6. Clean the outdoor unit
A lot of homeowners focus only on the indoor unit, but the outdoor condenser needs attention too. After all, your mini split relies on both units working together efficiently.
You can start by removing the following things from your outdoor unit:
- Leaves
- Grass clippings
- Dirt
- Twigs
- Any other debris nearby
Also, try to maintain at least two feet of clearance around the unit whenever possible.
Next up inspect the coil fins and gently remove debris either by hand or using a soft brush.
You can also lightly rinse the exterior coil surfaces using a garden hose. But use gentle water pressure only and avoid pressure washers because they can bend the coil fins and damage the system.
Step 7. Reinstall the filters
By now, your filters should be completely dry. Slide them back into their original positions and make sure they’re seated properly.
Thereafter:
- Close the front panel securely.
- Double-check that nothing is loose.
- Remove any cleaning supplies from the area.
This is also a good time to give the exterior of the indoor unit one final wipe-down.
Step 8. Restart the system and test airflow
You’re almost done.
Turn the power back on and restart the mini split.
Let it run for several minutes and pay attention to how it performs. Do check for:
- Strong airflow
- Consistent cooling or heating
- Normal operating sounds
- No unusual odors
If the unit runs smoothly and the airflow feels stronger than before, your mini split cleaning was successful.
However, if you still notice weak airflow, musty smells, water leaks, or performance issues, it might be time for a professional inspection.
In short, here’s how to clean mini split AC yourself:
| Step | Action |
| 1. Turn Off the System | Shut off power before cleaning |
| 2. Remove Filters | Open front panel and remove filters |
| 3. Clean Filters | Vacuum, wash, and fully dry filters |
| 4. Clean Indoor Unit | Remove dust from accessible surfaces and coils |
| 5. Check Blower Wheel & Drain | Look for dirt, mold, or standing water |
| 6. Clean Outdoor Unit | Remove debris and gently rinse coils |
| 7. Reinstall Filters | Put dry filters back in place |
| 8. Restart & Test | Check airflow and system performance |
When should you call in a mini split cleaning professional?
DIY mini split cleaning is great for routine maintenance, but there are situations where professional help is the smarter and safer option.
For instance, if you notice any of the signs below, it’s best to stop troubleshooting and schedule a professional inspection.
1. There’s mold inside the unit
If you see black, green, gray, or white mold inside air ducts or elsewhere in the indoor unit, this is not something you should try to DIY.
Mold spores can spread throughout your home whenever the system runs. And unfortunately, surface cleaning isn’t enough to fully remove it.
Only professional HVAC technicians have the equipment needed to clean and sanitize contaminated components safely.
2. Your mini split smells musty even after cleaning
A dirty air filter can sometimes cause odors. But if you’ve already cleaned the system, done air filter replacement, and the smell keeps coming back, there might be contamination in the evaporator coil, blower wheel, or drain pan.
These areas are difficult to access without taking the unit apart. That’s why professional cleaning becomes necessary.
3. Water is leaking from the indoor unit
A leaking mini split often points to a clogged condensate drain. And while minor drainage issues can sometimes be resolved during routine maintenance, persistent leaks require professional attention.
Ignoring water leaks can lead to:
- Mold growth
- Water damage
- Reduced system performance
And the longer you wait, the worse the problem can become.
4. The airflow is still weak after cleaning
One of the biggest reasons homeowners perform mini split cleaning is to improve airflow.
But if you’ve cleaned the filters, checked the outdoor unit, and the airflow is still weak, there could be a deeper issue at play. For instance, there can be:
- A heavily clogged evaporator coil
- A dirty blower wheel
- Damaged components
- Refrigerant issues
These problems require professional-grade tools and training to diagnose.
5. You notice ice forming on the unit
Ice buildup on a mini split is never normal. While dirty filters can sometimes contribute to freezing, ice can also indicate:
- Refrigerant leaks
- Airflow restrictions
- Sensor problems
- Mechanical failures
Now, it’s best to schedule service if you notice ice forming on the indoor or outdoor unit because refrigerant systems should only be handled by licensed professionals.
6. It’s been years since the unit had a deep cleaning
Even if your mini split seems to be running fine, years of operation can allow dirt to build up in places you simply can’t reach during routine maintenance.
Over time, dust and moisture can accumulate on:
- The blower wheel
- The evaporator coil
- The drain pan
- Internal components
A professional deep cleaning helps remove this hidden buildup and can improve efficiency, airflow, and indoor air quality.
In short, here’s when to call a professional for mini split cleaning:
| Sign | Reason to Call a Professional |
| Visible Mold | Mold requires specialized cleaning and sanitizing |
| Musty Odors | Could indicate hidden contamination inside the unit |
| Water Leaks | Often caused by drain line problems |
| Weak Airflow | May signal deeper mechanical or airflow issues |
| Ice Buildup | Could indicate refrigerant or system problems |
| Years Without Maintenance | Internal components may need deep cleaning |
Bonus: Here are some pro tips to keep your mini split clean
| Tip | Why It Helps |
| Clean Filters Every 2-4 Weeks | Improves airflow, efficiency, and indoor air quality. |
| Keep Outdoor Unit Clear | Prevents airflow restrictions caused by leaves, dirt, and debris. |
| Dust Your Home Regularly | Reduces the amount of dust entering the mini split system. |
| Control Indoor Humidity | Helps prevent mold and mildew growth inside the unit. |
| Schedule Annual Maintenance | Allows professionals to catch and fix small issues early. |
Contact us to improve your indoor air
quality with our expert cleaning services in NJ.
Final words
By now, you know exactly how to clean mini split AC yourself and keep it running efficiently throughout the year.
The best part is that most routine mini split air conditioner maintenance is fairly simple. All you need to do is clean filters, wipe down the indoor unit, and keep the outdoor condenser free of debris.
Just remember that DIY maintenance has its limits. So, if you’re dealing with mold, water leaks, persistent odors, ice buildup, or years of neglected maintenance, professional cleaning is often the safest and most effective solution.
Got more questions or need complete HVAC system cleaning in New Jersey?
You can get in touch with us!
At Clean Air Technologies, we’ve been helping homeowners across New Jersey improve their indoor air quality and HVAC performance for over 28 years.
Whether your HVAC system needs a routine inspection or a thorough deep cleaning, our team is here to help.
FAQs about how to clean mini split AC yourself
How often should I clean my mini split filters?
Most manufacturers recommend mini split filter cleaning every 2 to 4 weeks during periods of heavy use.
But if you have pets, allergies, or a particularly dusty home, you might need to clean them more often.
How often should I clean a mini split unit?
Basic DIY mini split cleaning should be performed regularly throughout the year.
Filters should be cleaned every few weeks, while the indoor and outdoor units should be inspected and cleaned as needed.
Can I clean a mini split air conditioner myself?
Yes, most homeowners can safely clean a mini split air conditioner themselves.
Tasks such as washing filters, wiping the indoor unit, and clearing debris around the outdoor condenser are all suitable DIY maintenance jobs.
However, mold removal, drain line cleaning, and deep internal cleaning are usually best left to professionals.
What is the best way to clean mini split filters?
The best way to clean mini split filters is to first vacuum away loose dust and then rinse the filters under lukewarm water.
If needed, use a small amount of mild dish soap. Also, allow the filters to dry completely before reinstalling them.
Can I use a mini split evaporator coil cleaner?
Yes, but only if it’s approved for your system and used according to the manufacturer’s instructions.
A mini split evaporator coil cleaner can help remove light dirt buildup from accessible coil surfaces. For heavily contaminated coils, professional cleaning is usually recommended.
Why does my mini split smell bad even after cleaning?
If unpleasant odors remain after cleaning the filters and accessible surfaces, there can be mold, bacteria, or dirt buildup deeper inside the unit.
The blower wheel, drain pan, and evaporator coil are common sources of persistent odors and often require professional cleaning.
Can a dirty mini split increase energy bills?
Yes it can.
A dirty mini split has to work harder to move air and maintain the desired temperature. This can increase energy consumption and put extra strain on system components.
How much does professional mini split cleaning cost?
The cost of professional mini split cleaning varies depending on the condition of the system, the number of indoor units, and the level of cleaning required.
In New Jersey, homeowners can generally expect to pay $100 to $260 for a single indoor unit and $260 and $650 for multi-zone systems.